

Watchlist_Triage
Review screening and monitoring alerts with one AI agent that provides recommendations and supporting evidence.
Overview
Watchlist_Triage is a RiskOS™ agent available in Agent Suite. It reviews potential matches across Sanctions, Enforcement, Politically Exposed Persons (PEP), and Adverse Media before human investigation.
Watchlist_Triage has two configurations:
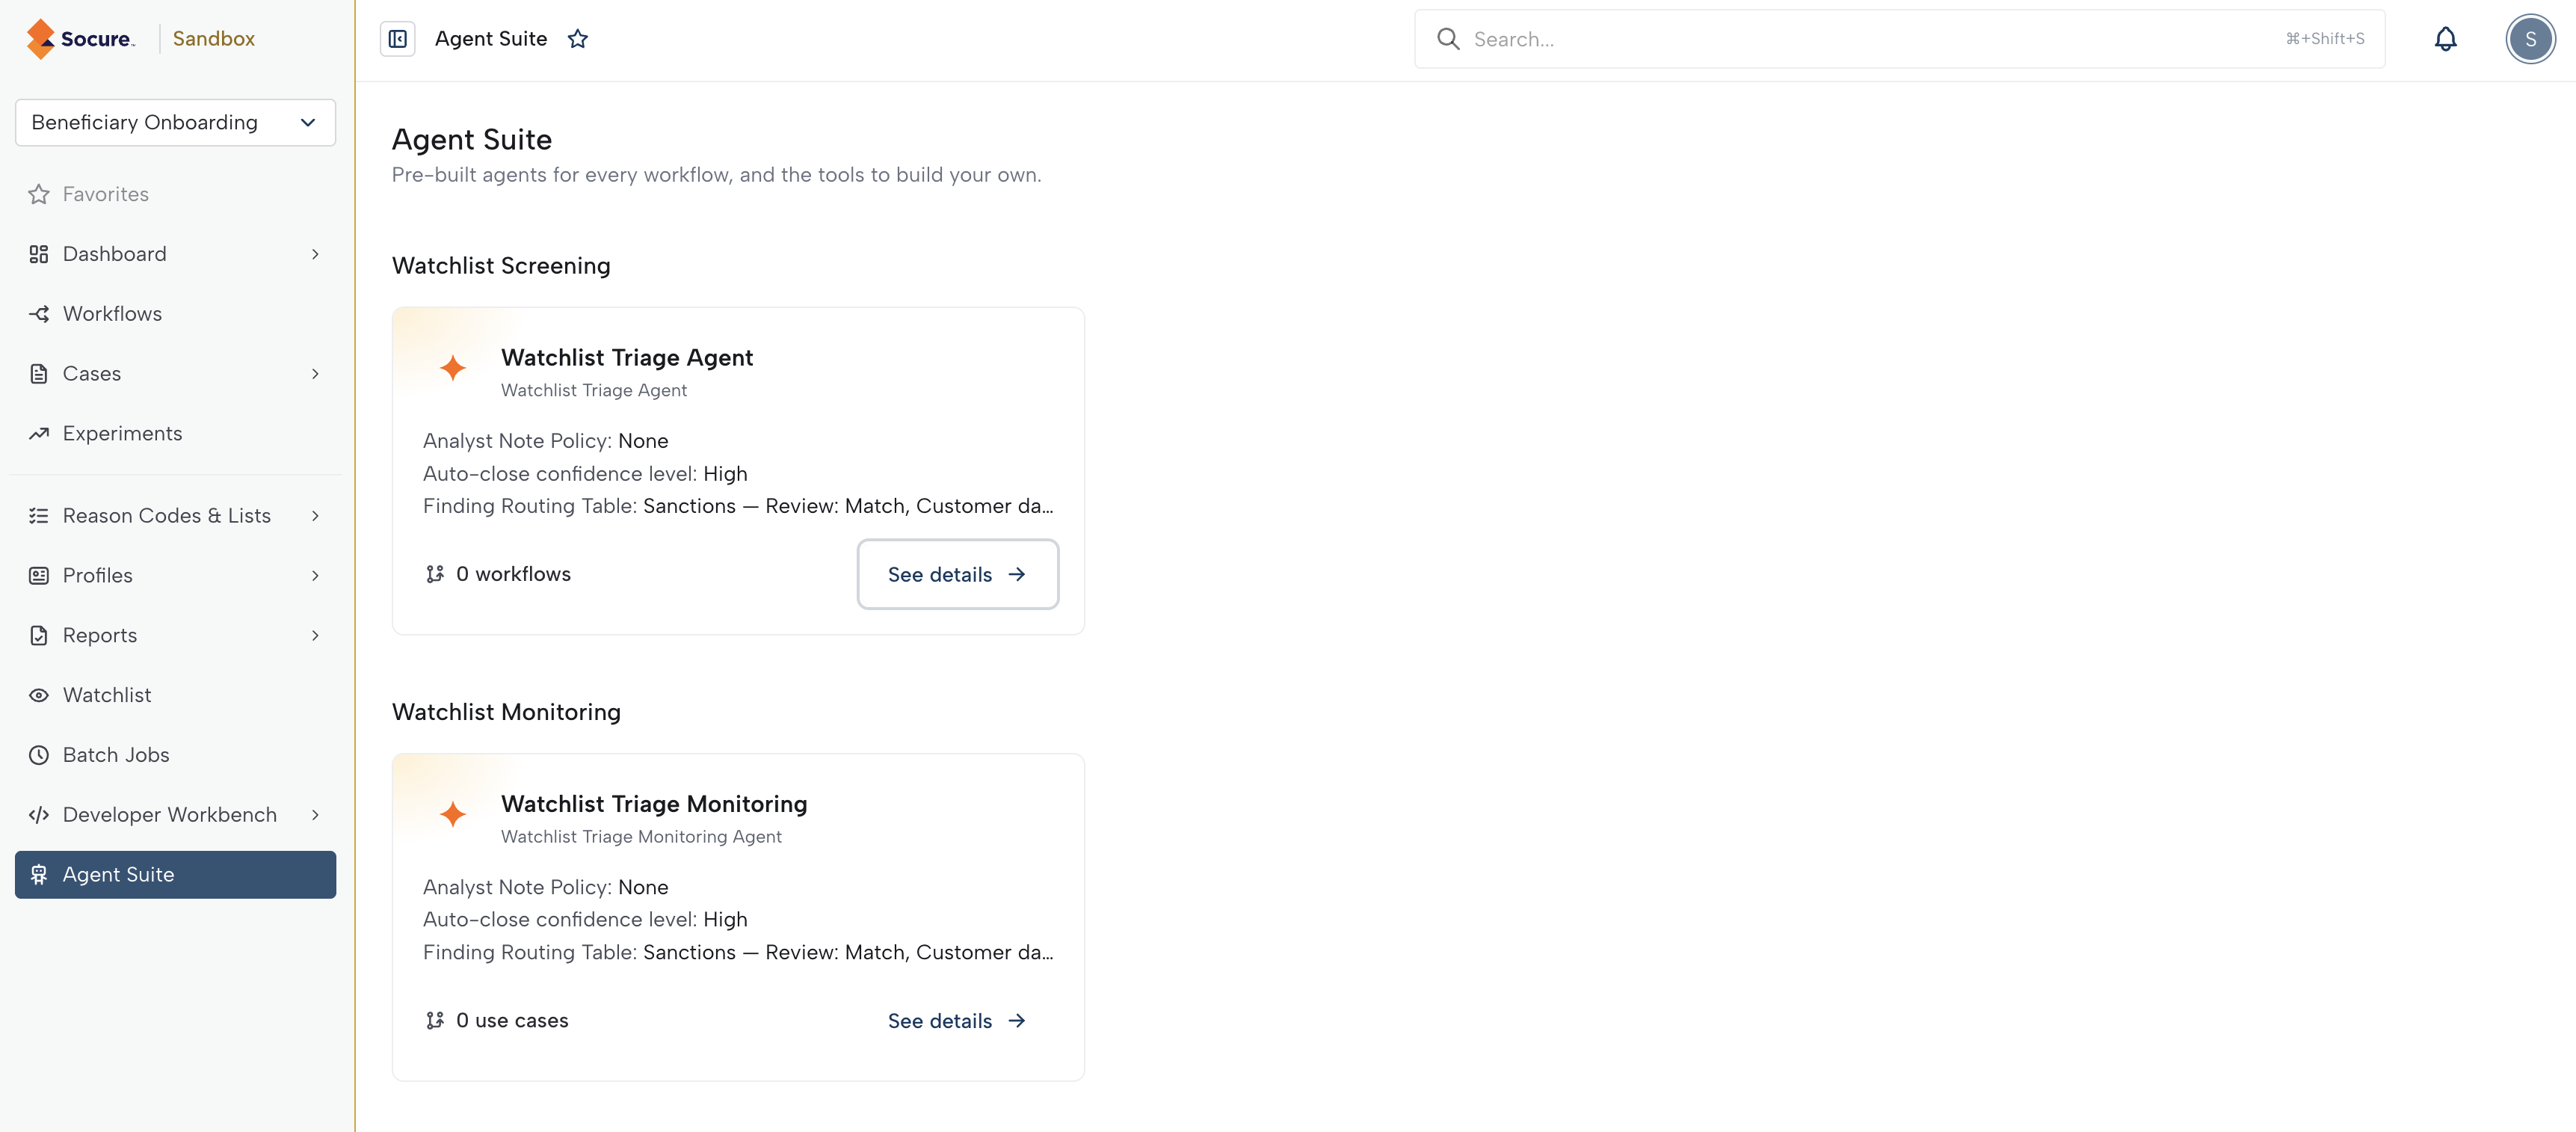
- Screening: Listed under Watchlist Screening in Agent Suite, where the default configuration is named Watchlist Triage Agent. Add it to a workflow’s Manual Review step to review screening results.
- Monitoring: Listed under Watchlist Monitoring in Agent Suite, where the default configuration is named Watchlist Triage Monitoring. Assign it to monitoring use cases.
Both configurations use the same settings and provide recommendations, confidence, reasoning, and evidence. Eligible alerts can close through Auto-close; all other alerts go to human review.
A RiskOS™ case can contain several Watchlist alerts, each with several potential matches. Every alert retains a human assignee, including alerts closed automatically.
Before you start
Agent Suite appears in the navigation only when RiskOS™ Agents is enabled for your account and your role has view permission.
| Permission | What it allows |
|---|---|
| View | Open Agent Suite and see agent configurations. |
| Create | Create agent configurations, including duplicates. |
| Modify | Change and rename agent configurations. |
| Delete | Archive and unarchive agent configurations. |
Without modify permission, agent configurations are view only. Ask your account administrator or Socure account team if access is unavailable.
Configure Watchlist_Triage
-
Open Agent Suite.
-
Under Watchlist Screening or Watchlist Monitoring, open the configuration you want to change.
-
Review Watchlist coverage, then configure the settings below.
-
Click Save changes.
- Analyst Note Policy: Add your team’s custom review instructions, up to 1,000 characters. The agent explains how it applied them in its summary. Instructions cannot change identity evidence or clear a confirmed or unresolved sanctions match.
- Auto-close confidence level: Select High to auto-close eligible No Match alerts with high confidence only, Medium for medium or high confidence, or Low for low, medium, or high confidence. This setting is shared wherever the configuration is used. Auto-close is enabled separately for each workflow step or monitoring use case.
- Finding Routing Table: Select Review or Clear for each Watchlist category and result. Complete every entry before saving; locked options cannot be changed. Selecting Clear does not close an alert unless Auto-close requirements are met.
Changes to a configuration apply wherever it is used. Select Duplicate agent when a workflow or use case needs an independent configuration.
Add the screening configuration to a workflow
-
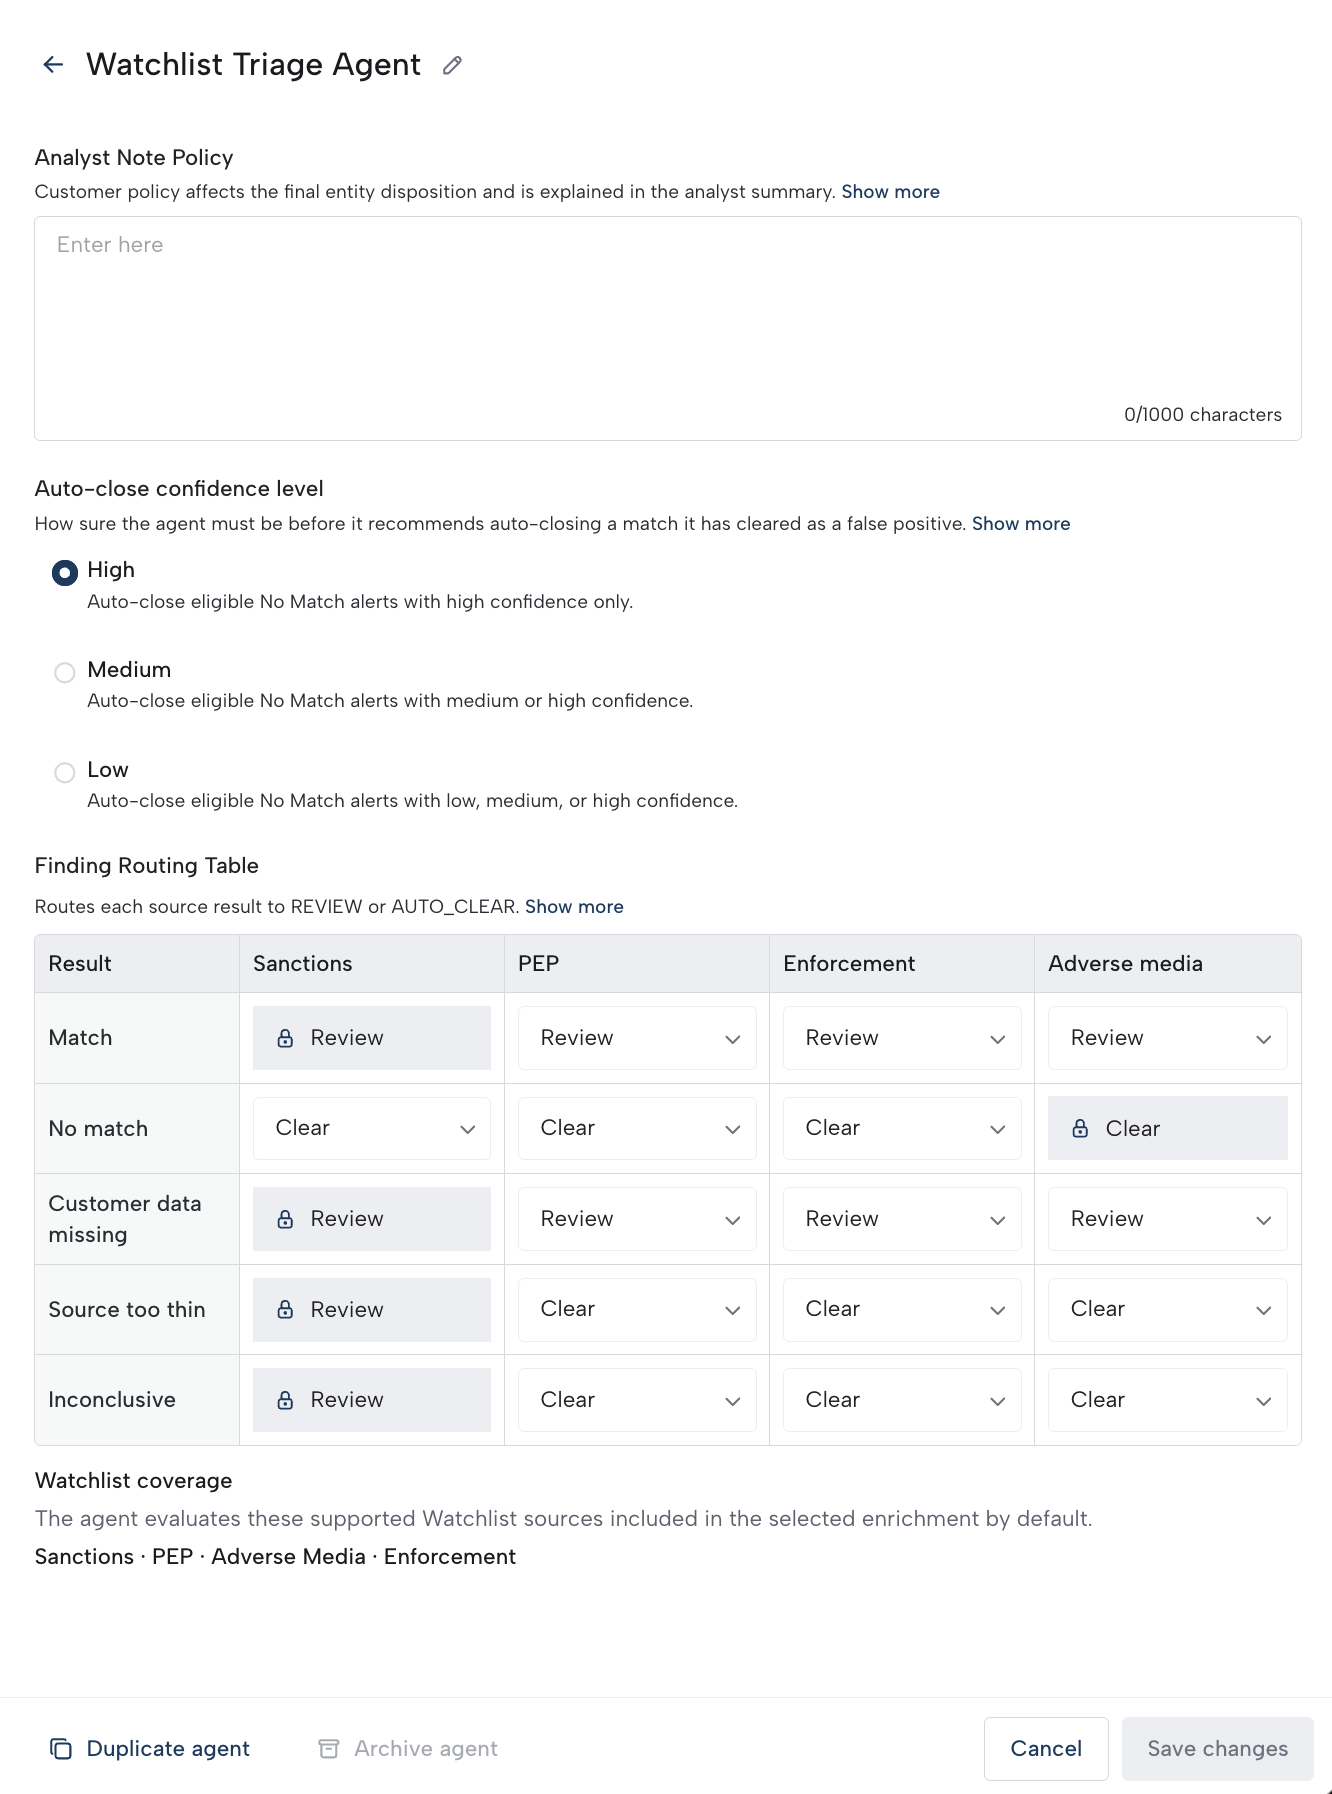
Open the workflow in Workflow Builder and select the Manual Review step.
-
Click Automate with an agent to open Agents, then select a Watchlist_Triage screening configuration, such as Watchlist Triage Agent.
-
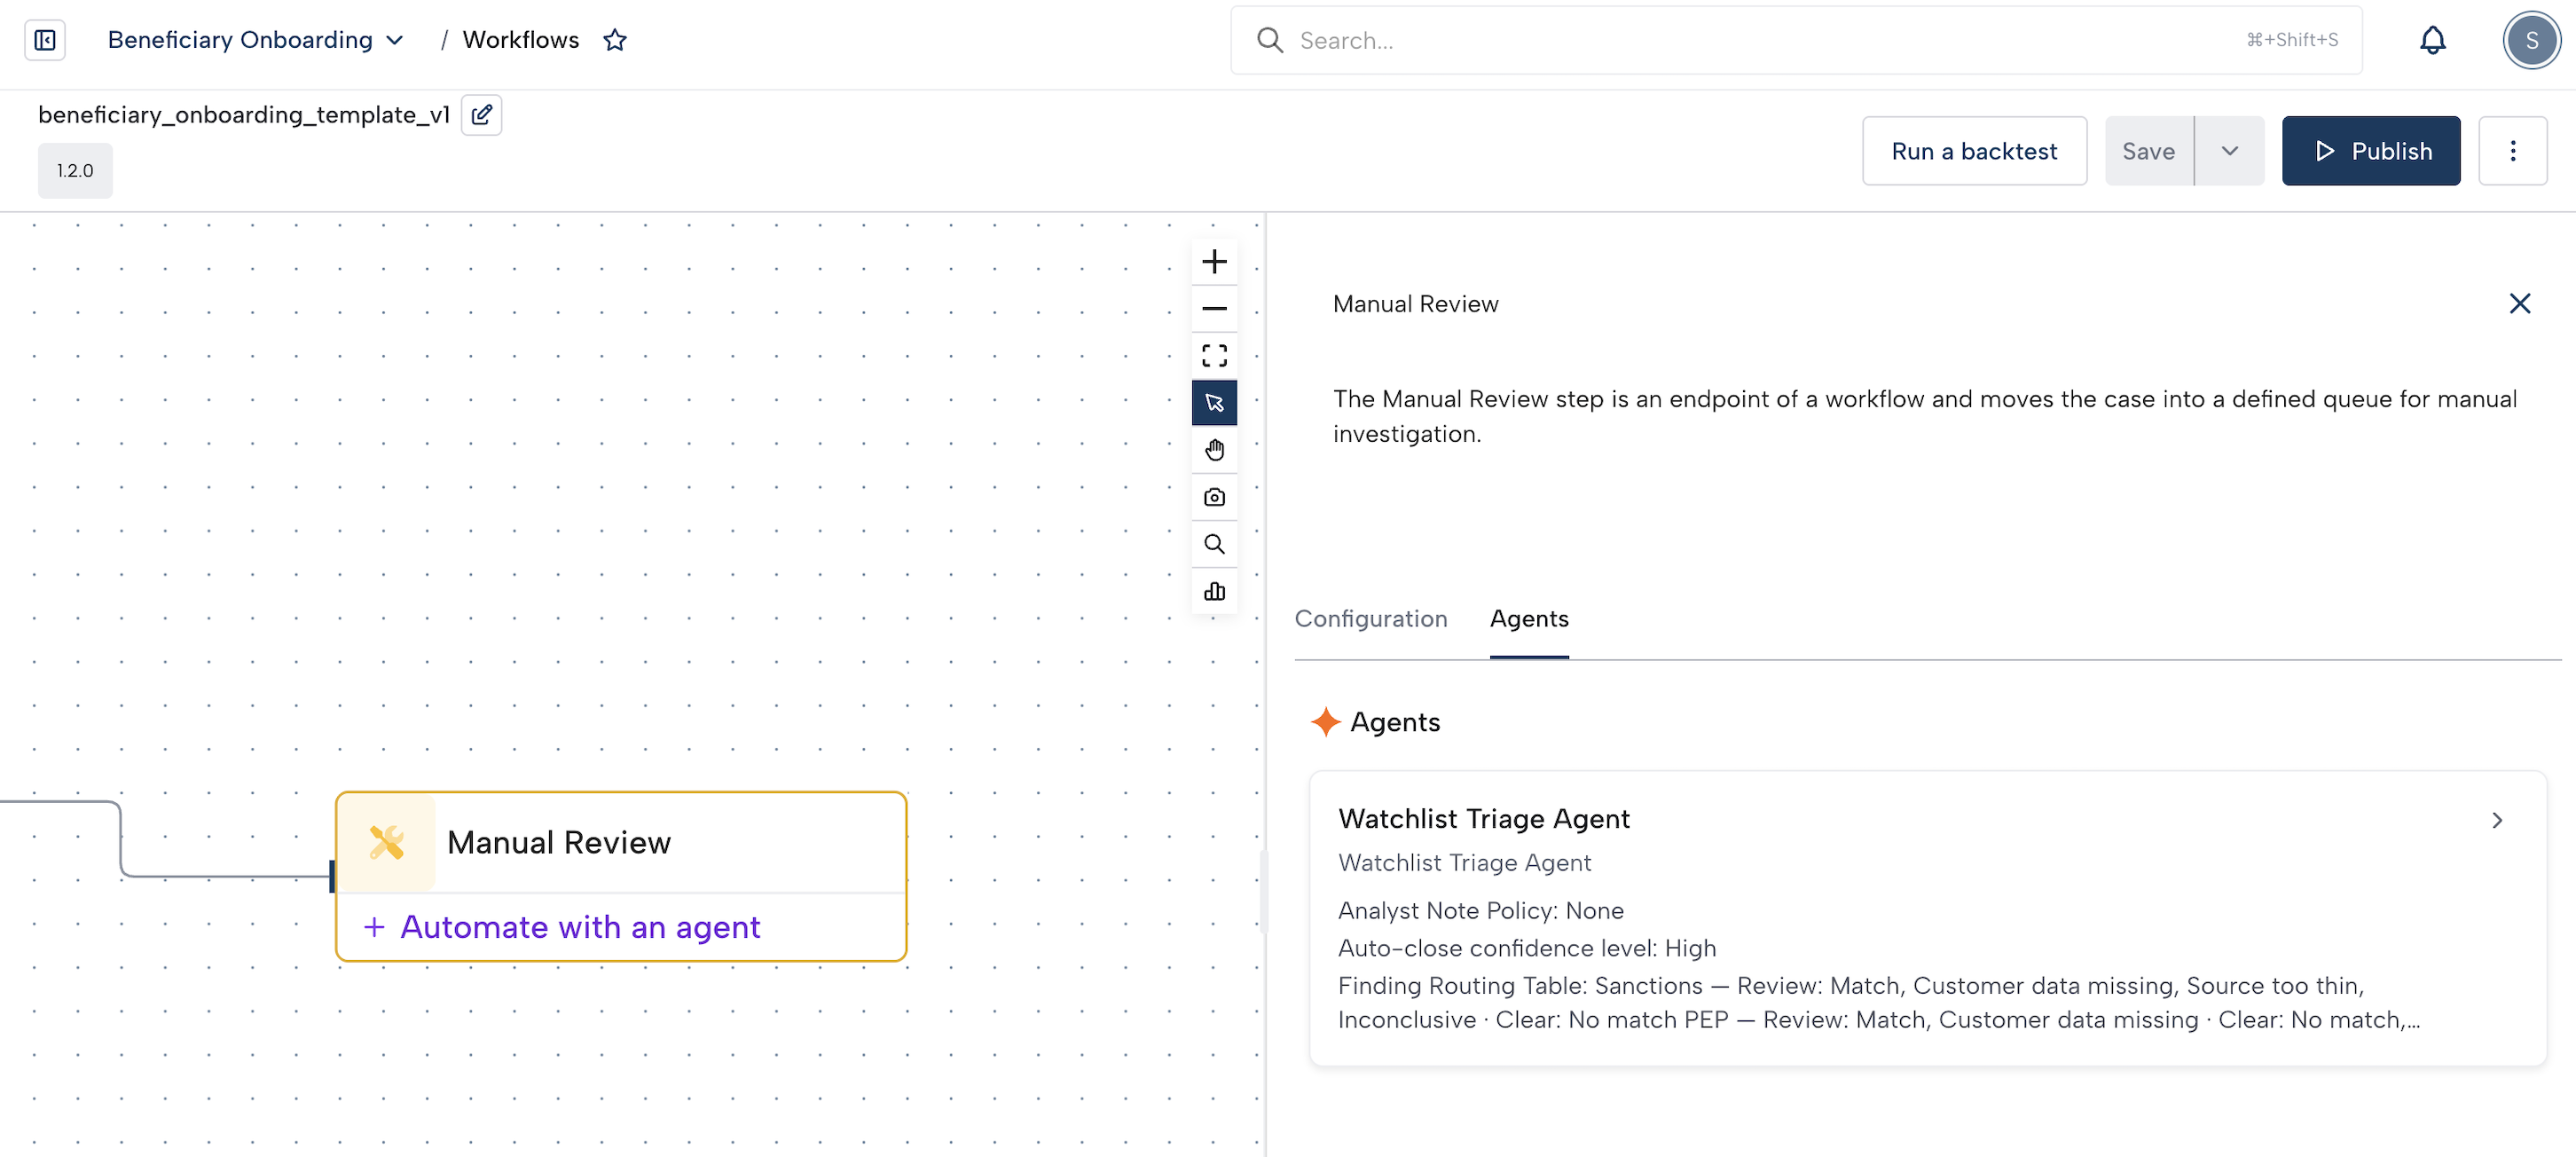
Under Watchlist input, select one or more compatible Watchlist enrichments.
-
Turn Auto-close on or off for this step. If the step shows Auto decisioning, turn it on to allow the agent to make an automated decision when its requirements are met.
-
Click Save and add agent, then save and publish the workflow.
Compatible screening enrichments include Socure Global Watchlist Plus, Socure Watchlist Plus, Socure Watchlist Premier, and Socure Watchlist Standard. Add a compatible enrichment first if none is available.
Watchlist_Triage runs within Manual Review. With Auto-close off, it still provides recommendations and all alerts go to human review.
Only one agent of each type can run on a step. If the step already has an active agent, replacing it applies the new agent’s confidence level and Analyst Note Policy.
Agent settings are managed at the account level and apply everywhere the agent is used. To change the confidence level or Analyst Note Policy from the step, select the Agent Suite link, which opens Agent Suite in a new tab.
Removing the agent from the step stops future agent reviews and Auto-close for that step, and alerts go to human review. The configuration remains in Agent Suite.
Set up the monitoring configuration
-
In Agent Suite, under Watchlist Monitoring, open a Watchlist_Triage monitoring configuration, such as Watchlist Triage Monitoring.
-
Review its configuration.
-
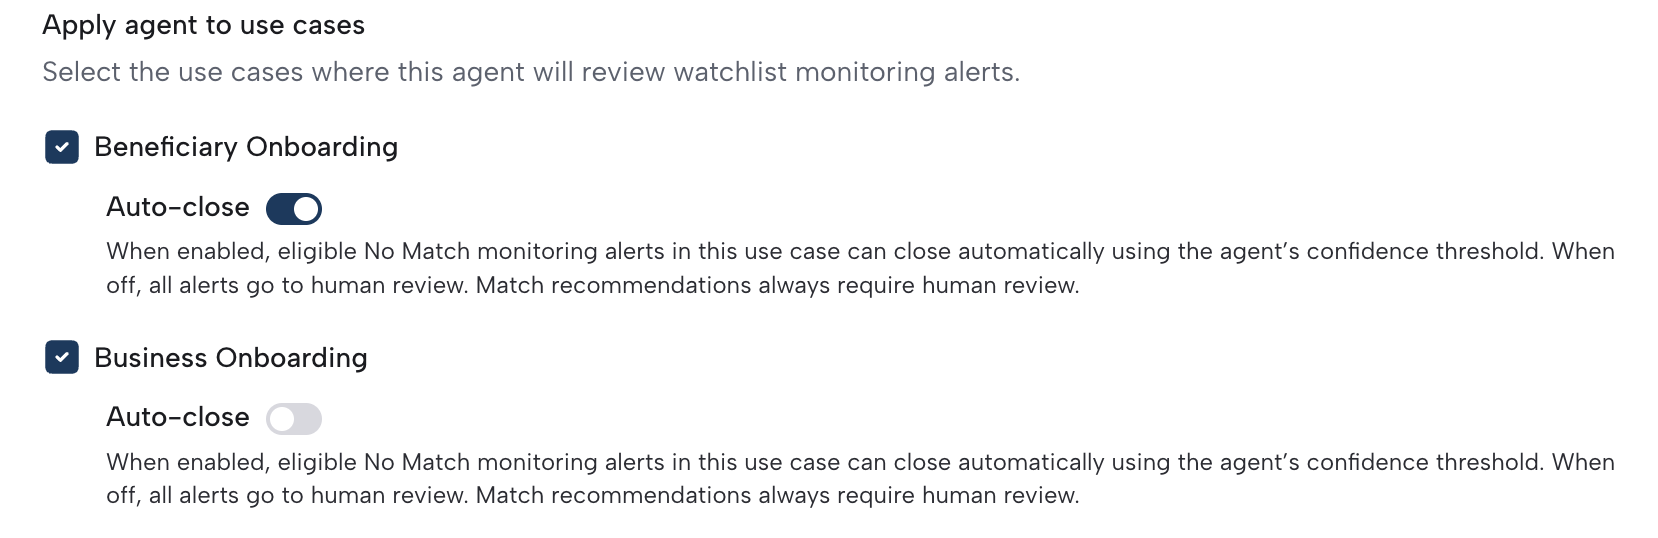
Under Apply agent to use cases, select the use cases it should review.
-
Turn Auto-close on or off separately for each selected use case.
-
Click Save changes.
One monitoring configuration can serve multiple use cases. Its Auto-close confidence level is shared across those use cases, while each has its own Auto-close toggle.
Each use case has one monitoring agent. Replacing a use case’s agent applies the new agent’s confidence level and Analyst Note Policy to that use case’s monitoring alerts. Use-case assignments take effect immediately, and canceling the configuration panel afterward does not undo them.
Selecting a configuration does not enroll entities in monitoring. Monitoring enrollment is configured separately. Use cases without an assigned configuration follow normal human review.
Understand Auto-close
RiskOS™ automatically closes a Watchlist alert only when Auto-close is enabled and every potential match receives a No Match recommendation from Watchlist_Triage and meets the selected Auto-close confidence level.
Match recommendations, unreviewed matches, results below the selected level, and failed or aborted reviews require human review.
Note:
A Match recommendation indicates a possible match; it does not confirm wrongdoing.
For example, with High selected, three High-confidence No Match recommendations can qualify an alert for Auto-close. If one recommendation has Medium confidence, the alert stays open.
Eligible alerts close without manual submission or approval. Closing a Watchlist alert does not automatically close the overall RiskOS™ case.
Review an alert
- Open a RiskOS™ case from a case queue and locate the Watchlist screening or monitoring alert.
- Select a potential match and read the agent’s recommendation, confidence, and summary.
- Check the supporting evidence in the Sanctions, Enforcement, PEP, and Adverse Media tabs.
- Compare the evidence with the submitted customer information and record your own Match or No Match decision.
- Repeat for the remaining matches, then submit, approve, or close the alert as your role and workflow allow.
Important:
AI summaries may contain errors. The agent’s recommendation is separate from your decision; check the evidence before deciding. Agent confidence is also separate from Name Match Score and Entity Correlation Score.
Use Add note to record information for the case, alert, or match. Upload documents at alert or match level.
AI tags help find cases with agent activity. Tags record past activity, so check the alert for its current status. Case History records agent reviews and outcomes; Settings → Audit Logs records configuration changes. A new monitoring hit reopens the RiskOS™ case and, when the use case has a monitoring agent, starts a new agent review. A hit that only reports entities removed from a list does not reopen the case.
Manage agent configurations
- Create: Select Create agent, enter a unique name, and configure the settings.
- Duplicate: Select Duplicate agent and enter a unique name. The duplicate keeps the original’s Auto-close confidence level, Watchlist settings, and Analyst Note Policy. Add the new configuration where needed.
- Rename: Open the configuration and select the pencil icon beside its name. Save the new name. Settings, workflow associations, and monitoring assignments are preserved.
- Archive: You cannot archive a configuration that is used in published workflow versions or assigned to monitoring use cases. RiskOS™ lists what blocks the archive. Archive those workflow versions, and remove or replace the configuration under Apply agent to use cases. Workflow versions that are live, or share a major version with the live version, cannot be archived. The last remaining configuration cannot be archived. Archived configurations are hidden from lists and selectors, and their settings are preserved.
- Unarchive: Select Show archived, open the configuration under Archived agents, and unarchive it. Add the restored configuration to the workflows or monitoring use cases where it should run.
To stop screening reviews, remove the configuration from the Manual Review step, then save and publish the workflow. To stop monitoring reviews, clear the use-case selection under Apply agent to use cases and click Save changes. The configuration remains available, and removing a monitoring assignment does not stop Watchlist Monitoring.
Turning Auto-close off keeps agent reviews active.
Receive findings by webhook
For accounts with RiskOS™ Agents enabled:
- Go to Developer Workbench → Webhooks and create or edit a webhook.
- Under Review Case, subscribe to the events below.
- Save the webhook configuration.
| Event | Description |
|---|---|
watchlist_triage_agent_completed | The run completed successfully with run_status set to FINISHED and includes the agent’s findings. |
watchlist_triage_agent_failed | The run ended with run_status set to ABORTED, FAILED, or SKIPPED. |
RiskOS™ sends one event per agent run, and each run reviews one Watchlist case. Each event includes the agent’s type and name, including for archived agents. Delivery is best effort, so don’t rely on webhooks as the only record of agent reviews. Successful completion does not by itself confirm alert closure. For endpoint setup, see Webhooks.
Troubleshooting
I cannot see or edit Watchlist_Triage
Confirm account access and your RiskOS™ agent permissions. Attaching a configuration to a workflow also requires Workflow editor permission.
No Watchlist enrichment is available
Add a compatible enrichment to the workflow’s relevant branch, then return to the Manual Review step.
The agent recommended No Match, but the alert is open
Check Auto-close on the workflow step or monitoring use case. Every potential match must have a qualifying No Match recommendation. If the review failed, continue with human review and contact Socure Support if needed.
Related
Updated 1 day ago