
Custom Watchlist
Maintain your own lists and screen and monitor against them in RiskOS™ workflows
Overview
Custom Watchlist lets you maintain your own list of individuals or organizations — for example, people or businesses you've previously identified as high-risk, fraudulent, or otherwise worth flagging — and automatically screen new applicants or transactions against that list as part of your RiskOS™ workflows. Matches use the same matching engine that powers Socure's Sanctions, Enforcement, PEP, and Adverse Media screening.
You can manage a custom watchlist three ways: directly in the RiskOS™ Dashboard, programmatically through the Custom Watchlist API, or by bulk CSV upload. All three work against the same underlying list, so you can use whichever is convenient for a given task.
Example use cases:
- FinCEN 314(a) list screening — Load the subjects from FinCEN's 314(a) list into a custom watchlist so they're automatically checked during onboarding and transaction screening, alongside your other compliance checks.
- Gaming self-exclusion lists — Maintain a list of individuals who have self-excluded from gaming platforms, so they're automatically flagged if they attempt to sign up or transact again.
Create a list and find its ID
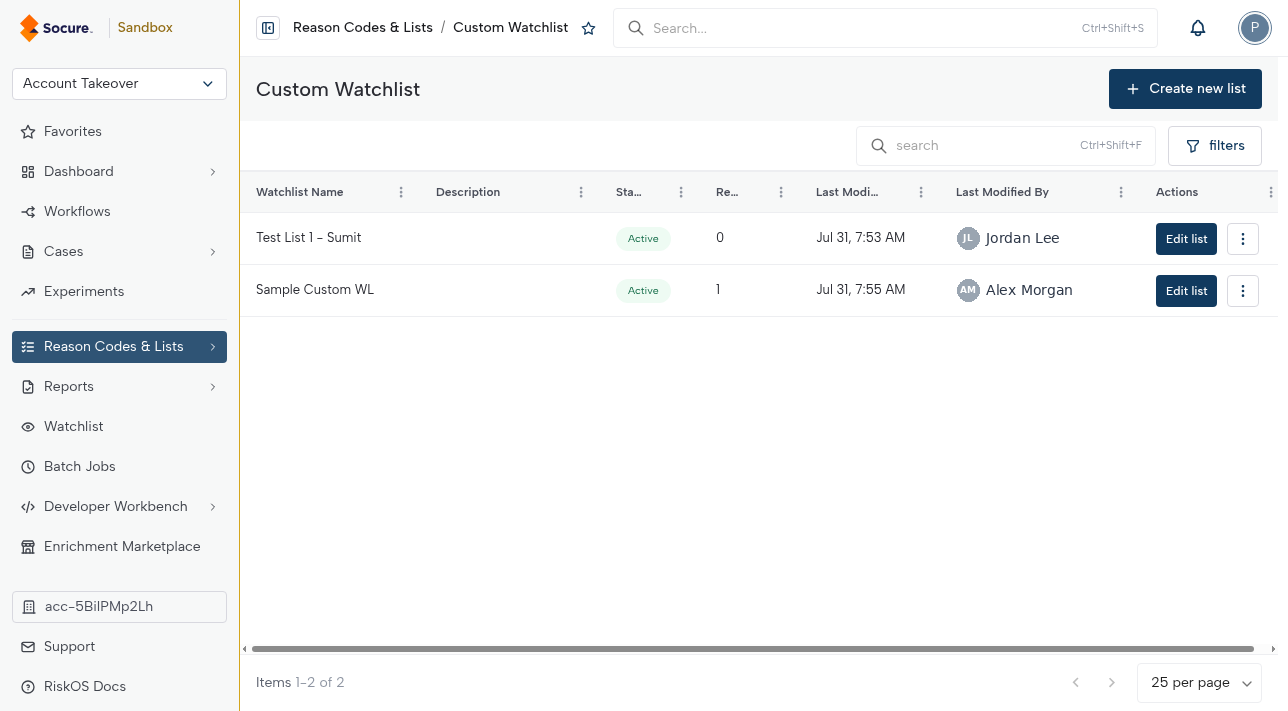
- In the RiskOS™ Dashboard, go to Reason Codes & Lists > Custom Watchlist.
- Click Create New List to start a new list, or click into an existing list from the table.
- Once you're inside a list, its list ID is the identifier shown in the browser's URL. You need this ID any time you interact with the list through the API or a bulk upload.
Manage your list manually
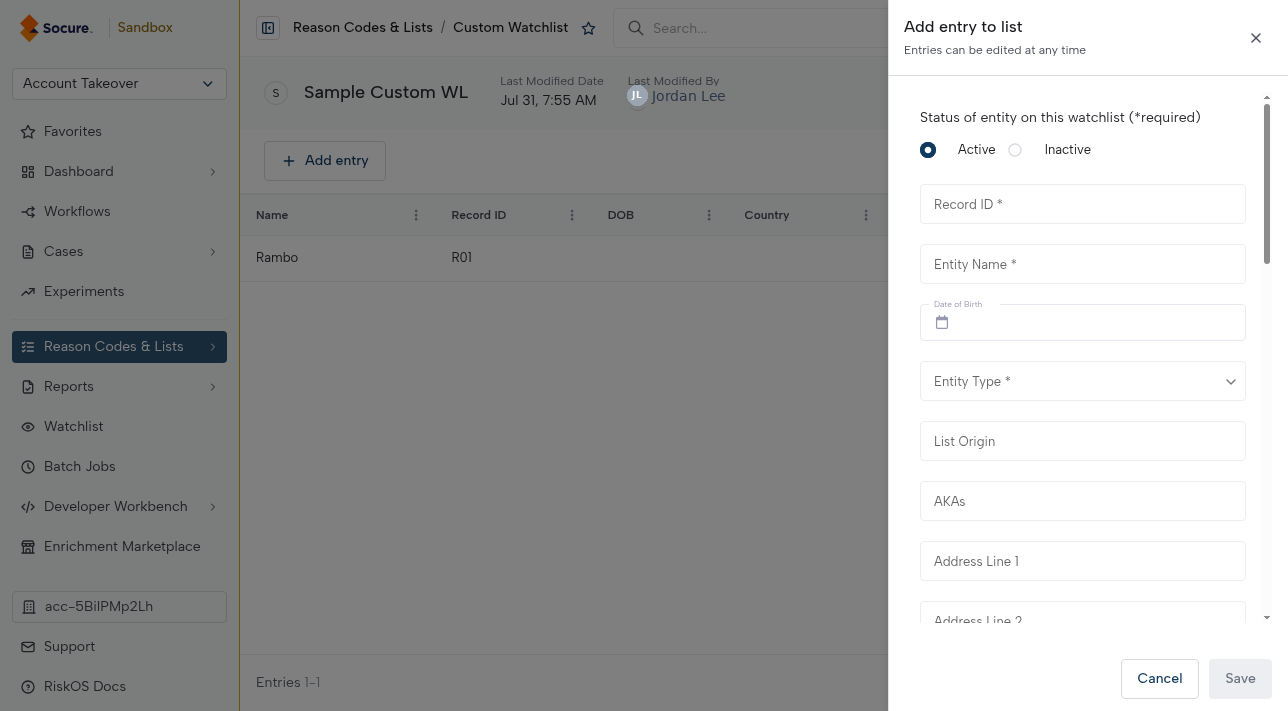
From inside a list in the RiskOS™ Dashboard, click Add Entry to add a record by hand. A record can include:
- Basic identity details — name, entity type (individual or organization), any known aliases, date(s) of birth, and gender.
- Contact and location details — address, phone number(s), and email address(es).
- Identifying numbers — government ID numbers, driver's license number, bank account numbers, and cryptocurrency wallet addresses.
- Background details — nationality, country and place of birth, occupation, and free-text notes explaining why the entry was added.
- List-tracking details — where the entry originated (for example, an internal team or an external data source), a title or role, an external reference ID if it came from another list, and the date it was first listed.
You only need to provide the entry's name. Everything else is optional and you can fill it in as it becomes available, or add it later as an update.
Removing an entry is a soft delete:
The record isn't erased. Instead, its status changes from Active to Inactive, and it stops being screened against. A removed entry can be reviewed or reinstated later, rather than being gone for good. This behavior applies no matter which method you use to remove the entry — manually, through the API, or by bulk upload.
Manage your list through the API
The Custom Watchlist API lets you add, update, or delete entries programmatically through a single endpoint, scoped to your list's ID. Each request specifies an action_type of add, update, or delete, along with the entry's details (the same fields available in the Dashboard's Add Entry form).
Use the API when entries need to be kept in sync automatically — for example, pulling in updates from an external list on a schedule, or reacting to events in your own systems.
Note:
Create the list in the RiskOS™ Dashboard first (see Create a list and find its ID). Creating the list is what generates the list ID the API calls are scoped to — the API can't create a new list on its own.
As with manual removal, a delete request is a soft delete: the entry's status changes to Inactive rather than being removed outright.
Manage your list by bulk upload
For larger one-off batches, you can upload entries as a CSV file instead of adding them one at a time or making individual API calls. A CSV upload can include up to approximately 20,000 records (fewer if many columns are populated per record), and the file itself can be up to 10 MB.
As with the API, each row in the CSV includes an action column specifying whether that entry should be added, updated, or deleted, so a single file can cover all three operations at once. A delete row follows the same soft-delete behavior as manual and API removal.
List status: Active vs. Inactive
Each list itself — not only its individual entries — has a status of Active or Inactive:
- You can screen against an Active list, which appears as an individually selectable option (alongside your other custom watchlists) when you configure a screening policy.
- An Inactive list is no longer screened against, and no longer appears in the list of available custom watchlists in your policy configuration.
Setting a list to Inactive is a quick way to pause its use across all your policies at once, without deleting the list or its entries.
Add your list to a screening policy
A custom watchlist isn't screened against until you include it in a screening (or monitoring) policy. To add one:
- In the RiskOS™ Dashboard, go to Product Settings > Global Watchlist.
- Choose the environment you're configuring — Sandbox for testing, Production for live traffic.
- Click Edit to open the configuration panel, then under Search Policies, click Add Policy (or select an existing policy to edit it).
- Name the policy so it's clear where it applies (for example,
Sanctions_OnboardingorPEP_Monitoring). - On the Properties step, find Custom Watchlist among the screening categories (alongside Sanctions, Enforcement, PEP, and Adverse Media) and select its checkbox to expand it, then select the checkbox next to each individual list you want this policy to screen against. Only Active lists are selectable here.
- Continue through the remaining steps — Threshold and False Positive — as you would for any other policy, then save.
You can select multiple custom watchlists within the same policy, and you can add a list to more than one policy at once.
For how thresholds, match scores, and false-positive filters work, see Watchlist Policy Configuration.
Related
Updated about 1 hour ago