
Roles & Permissions
View, create, and delete roles that control user permissions in Channel Partner client accounts in RiskOS™.
Roles control what users can do within a Channel Partner client account. RiskOS™ provides system-defined roles as starting points and lets you create custom roles with granular permissions tailored to your organization's needs.
Access the Roles tab from Settings > Users in the Channel Partner sidebar.
Why it matters
Roles are the building blocks of your access control model. A poorly designed role can either block users from doing their work or grant more access than intended. Understanding the permission categories and designing roles around job functions keeps your client accounts secure and functional.
Before you begin
| Requirement | Details |
|---|---|
| Permission | You must have the UAM Users View tier permission. |
| Account context | If managing roles for a client, switch into the client's account first. |
| Planning | Understand your client's team structure and what each team member needs access to before creating custom roles. Review the permission categories below. |
| Estimated time | 5–15 minutes per custom role. |
| Production impact | New roles are available for assignment immediately. Modifying a role affects all users currently assigned to it. |
Roles table
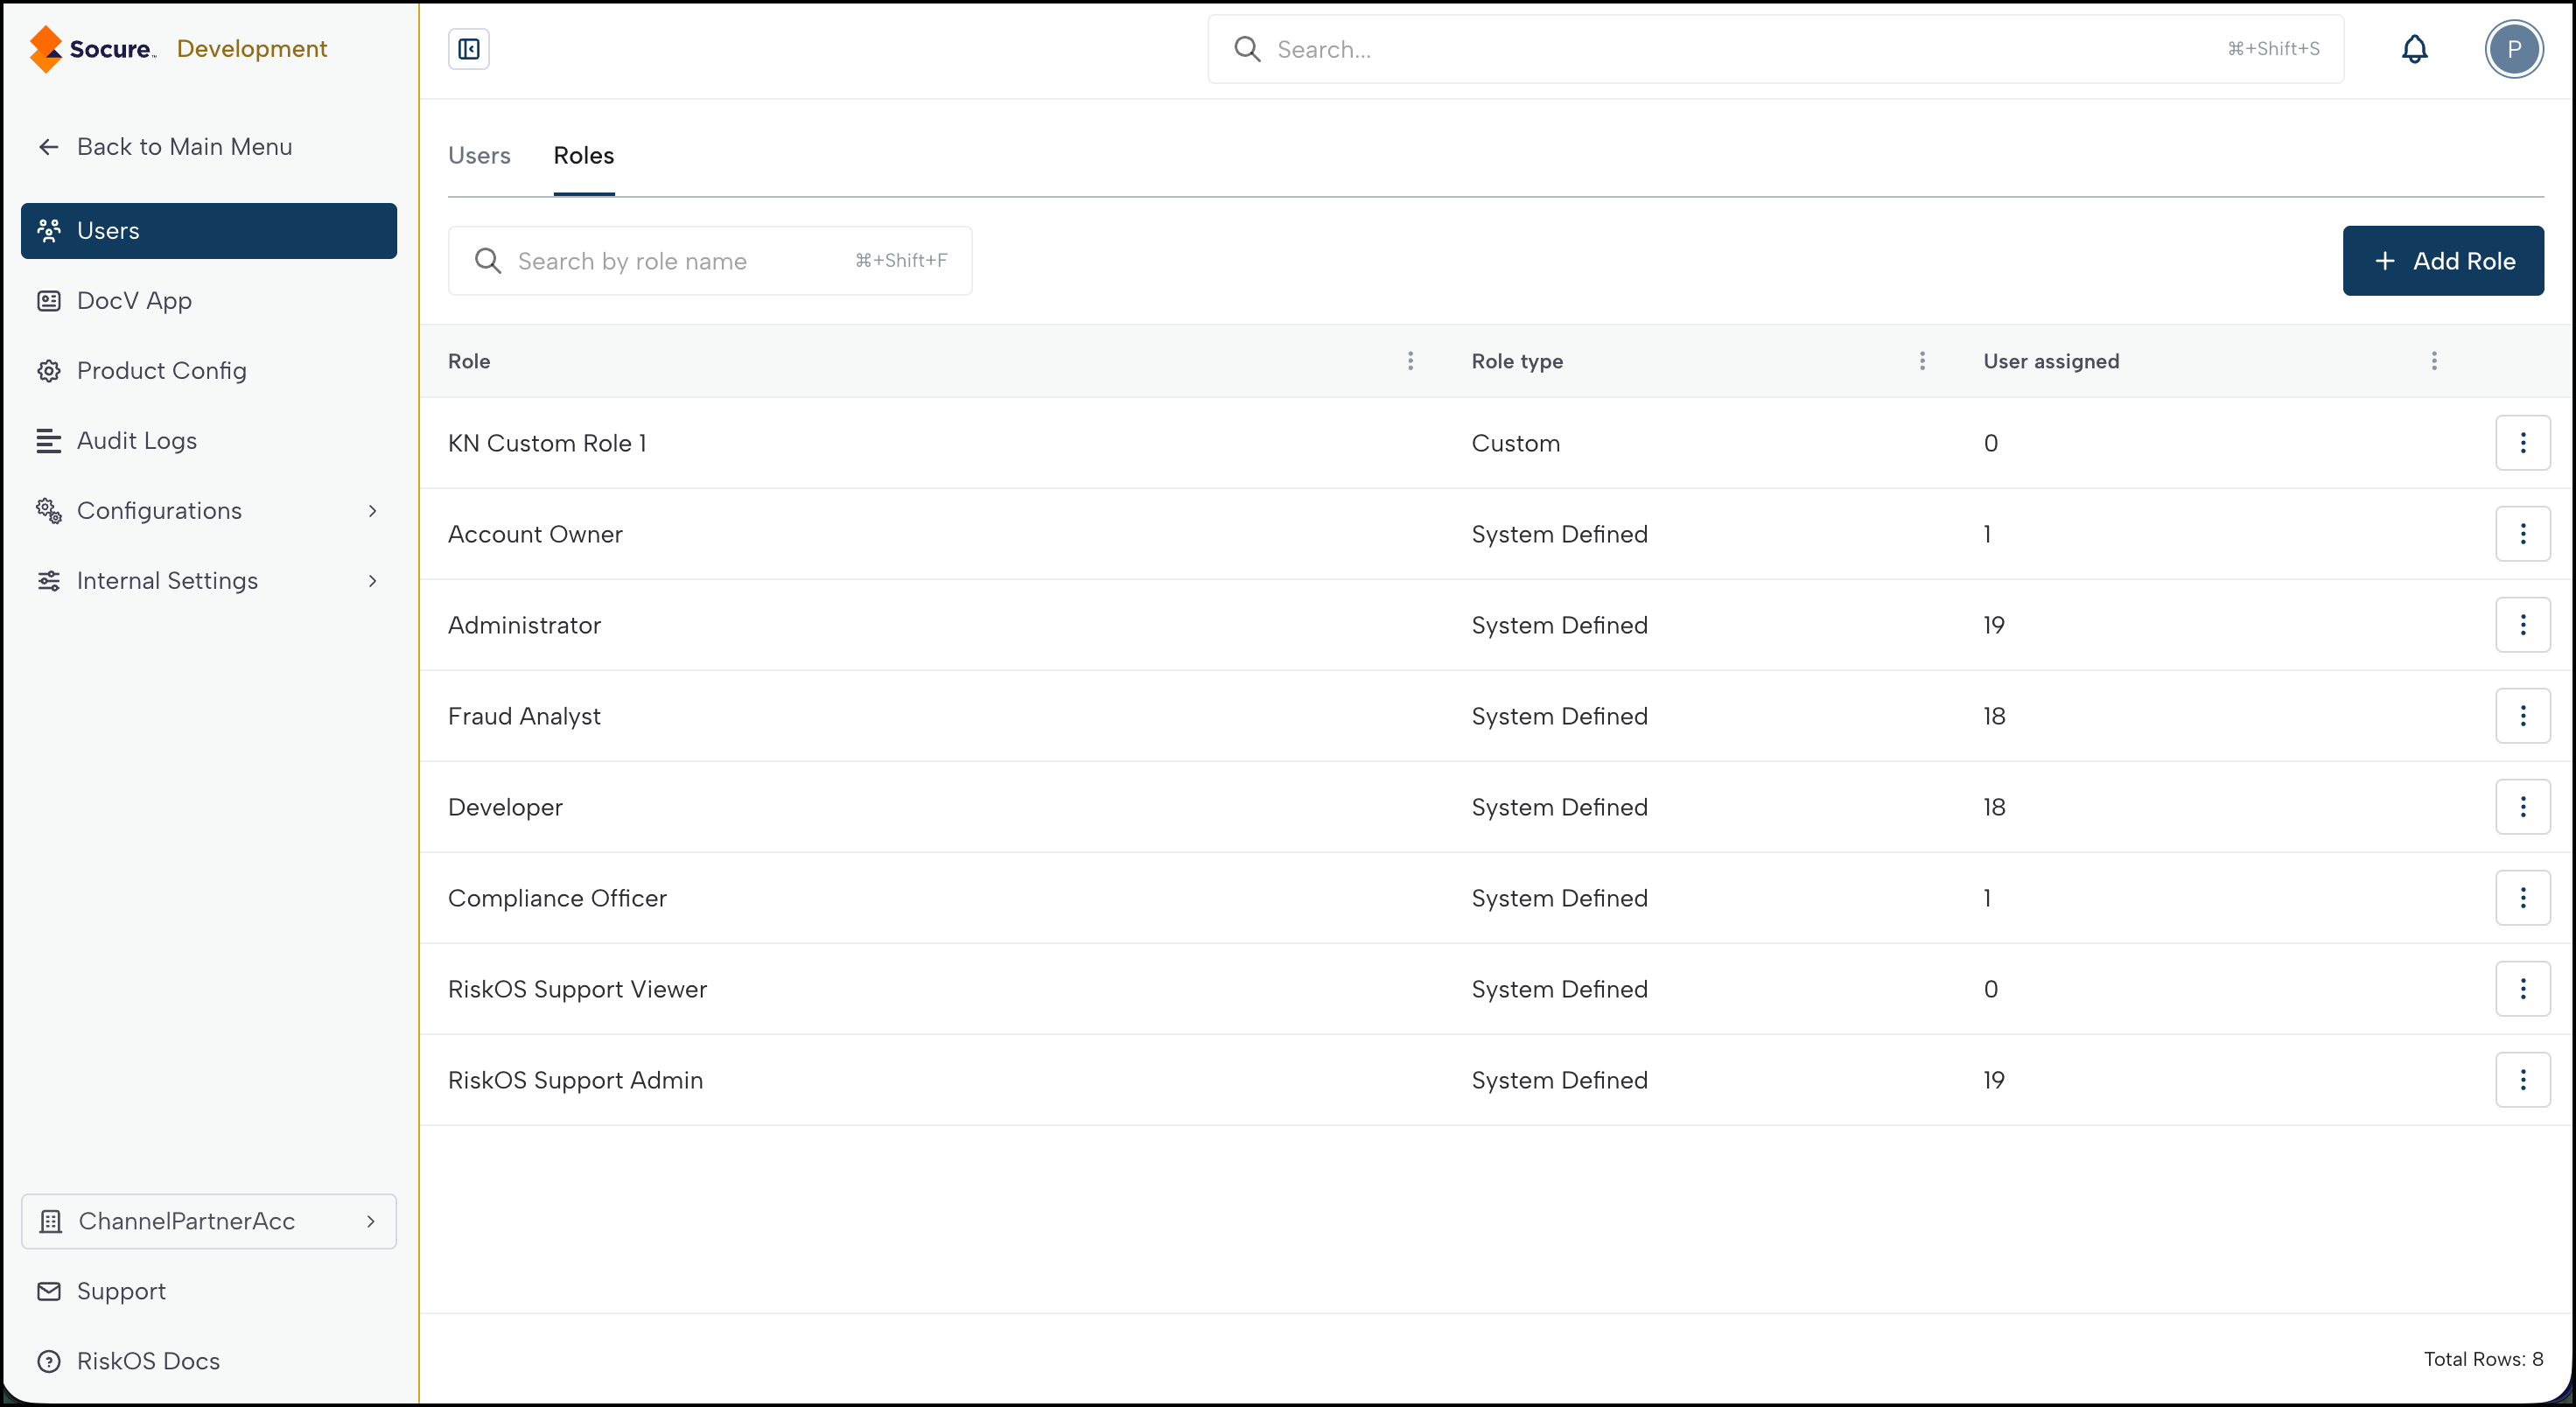
The Roles tab displays all roles available in the current account.
| Column | Description |
|---|---|
| Role | The name of the role. |
| Role Type | System Defined or Custom. |
| User assigned | The number of users currently assigned this role. |
| Actions | Delete button (custom roles only). |
Search roles
Use the search field above the table to filter roles by name.
System-defined vs. custom roles
| Type | Description | Editable | Deletable |
|---|---|---|---|
| System-Defined | Pre-built roles provided by RiskOS™. Serve as starting points for common permission sets. | No | No |
| Custom | Roles created by your organization. You configure each permission category independently. | Yes | Yes |
Note:
System-defined roles cannot be edited or deleted. To see exactly what each one grants, review the system-defined roles section.
System-defined roles
Channel Partner client accounts include the same system-defined roles as every other RiskOS™ account. These roles are identical across all accounts, and you cannot edit or delete them. The following tables list the permissions each system-defined role grants in Production and Sandbox.
The Account Owner is the most powerful administrative role in RiskOS™ and you should assign it to a limited number of users. The role has full access to the primary account and sub accounts in your organization, including access to transaction data, including PII, and user information.
When a Socure account is created, we provision the Account Owner role to a designated user in your organization. After the registration and provisioning are complete, the Account Owner can begin assigning additional user roles.
| Functionality | Production | Sandbox |
|---|---|---|
| Accounts | Can Edit | Can Edit |
| Roles | Can Edit | Can Edit |
| Users | Can Edit | Can Edit |
| Batch Jobs | Can Edit | Can Edit |
| Documentation | Can View | Can View |
| PII Access | Can View | Can View |
| Reports | Can Edit | Can Edit |
| Custom File Uploads | Can Create | Can Create |
| Workflows | Can Edit Can Move to Live Can Test Can View | Can Edit Can Move to Live Can Test Can View |
| Fraud Case Management | Can Assign Can Review Can Comment Can View Can Evaluate | Can Assign Can Review Can Comment Can View Can Evaluate |
| Allow/Deny List | Can Edit | Can Edit |
| Compliance Case Management | Can View | Can View |
| Dashboards | Can View | Can View |
| Developers | Can Edit | Can Edit |
| Audit Logs | Can View | Can View |
| Configurations | Can Edit | Can Edit |
| Profiles | Can View | Can View |
The Administrator role can create sub accounts and has full access to each sub account's transaction data, including PII access, and user information. Every account and sub account must have at least one Administrator for user management and account configuration.
| Functionality | Production | Sandbox |
|---|---|---|
| Accounts | Can Edit | Can Edit |
| Roles | Can Edit | Can Edit |
| Users | Can Edit | Can Edit |
| Batch Jobs | Can Edit | Can Edit |
| Documentation | Can View | Can View |
| PII Access | Can View | Can View |
| Reports | Can Edit | Can Edit |
| Custom File Uploads | Can Create | Can Create |
| Workflows | Can Edit Can Move to Live Can Test Can View | Can Edit Can Move to Live Can Test Can View |
| Fraud Case Management | Can Assign Can Review Can Comment Can View Can Evaluate | Can Assign Can Review Can Comment Can View Can Evaluate |
| Allow/Deny List | Can Edit | Can Edit |
| Compliance Case Management | Can View | Can View |
| Dashboards | Can View | Can View |
| Developers | Can Edit | Can Edit |
| Audit Logs | Can View | Can View |
| Configurations | Can Edit | Can Edit |
| Profiles | Can View | Can View |
The Fraud Analyst role has full access to PII but limited or no access to other features in RiskOS™. You can assign this role to multiple users in your account.
| Functionality | Production | Sandbox |
|---|---|---|
| Accounts | Can View | Can View |
| Roles | ✖︎ | ✖︎ |
| Users | ✖︎ | ✖︎ |
| Batch Jobs | Can View | Can View |
| Documentation | Can View | Can View |
| PII Access | Can View | Can View |
| Reports | Can Edit | Can Edit |
| Custom File Uploads | ✖︎ | ✖︎ |
| Workflows | Can Edit Can Test Can View | Can Edit Can Test Can View |
| Fraud Case Management | Can Assign Can Review Can Comment Can View Can Evaluate | Can Assign Can Review Can Comment Can View Can Evaluate |
| Allow/Deny List | Can Edit | Can Edit |
| Compliance Case Management | ✖︎ | ✖︎ |
| Dashboards | Can View | Can View |
| Developers | ✖︎ | ✖︎ |
| Audit Logs | ✖︎ | ✖︎ |
| Configurations | Can View | Can View |
| Profiles | Can View | Can View |
The Developer has full access to the Developers page and limited or no access to the other features in RiskOS™, including no access to PII. You can assign this role to multiple users in your account.
| Functionality | Production | Sandbox |
|---|---|---|
| Accounts | Can View | Can View |
| Roles | ✖︎ | ✖︎ |
| Users | ✖︎ | ✖︎ |
| Batch Jobs | ✖︎ | ✖︎ |
| Documentation | Can View | Can View |
| PII Access | ✖︎ | ✖︎ |
| Reports | ✖︎ | ✖︎ |
| Custom File Uploads | ✖︎ | ✖︎ |
| Workflows | Can View | Can View |
| Fraud Case Management | ✖︎ | ✖︎ |
| Allow/Deny List | ✖︎ | ✖︎ |
| Compliance Case Management | ✖︎ | ✖︎ |
| Dashboards | ✖︎ | ✖︎ |
| Developers | Can Edit | Can Edit |
| Audit Logs | Can View | Can View |
| Configurations | Can View | Can View |
| Profiles | ✖︎ | ✖︎ |
Compliance Case Management
The following section lists the system-defined roles available for Compliance Case Management.
Compliance roles receive cases based on the Case Management workflow your organization configures:
- One-step workflow (Step 1): Cases are auto-assigned to the Compliance Officer. See Watchlist One-Step Workflow.
- Two-step workflow (Step 2): Cases are auto-assigned round-robin to the Compliance Analyst, then escalated to the Compliance Supervisor for approval. See Watchlist Two-Step Workflow.
Note:
In a one-step workflow, only the Compliance Officer can act on a case. If Compliance Analyst or Compliance Supervisor roles remain assigned during a transition, they are included in round-robin assignment but cannot act on cases.
You don't have to remove a role before switching workflows. To reassign a case that the system auto-assigned to you during a transition, remove your own permission and the system reassigns the case automatically. A Workforce Manager can also remove an individual from the auto-assignment mechanism on a short-term basis.
The Compliance Supervisor role allows users to review cases, add comments, evaluate them, and assign them to other Compliance Analysts.
| Functionality | Production | Sandbox |
|---|---|---|
| Accounts | Can View | Can View |
| Roles | Can View | Can View |
| Users | Can Edit | Can Edit |
| Batch Jobs | Can View | Can View |
| Documentation | Can View | Can View |
| PII Access | Can View | Can View |
| Reports | ✖︎ | ✖︎ |
| Custom File Uploads | ✖︎ | ✖︎ |
| Workflows | Can View | Can View |
| Fraud Case Management | ✖︎ | ✖︎ |
| Allow/Deny List | Can Edit | Can Edit |
| Compliance Case Management | Can Assign Can Approve Can Comment Can Evaluate (Step 2) | Can Assign Can Approve Can Comment Can Evaluate (Step 2) |
| Dashboards | ✖︎ | ✖︎ |
| Developers | Can Edit | Can Edit |
| Audit Logs | Can View | Can View |
| Configurations | Can View | Can View |
| Profiles | Can View | Can View |
The Compliance Officer role enables users to review cases, add comments, evaluate and approve them, and assign them to other Compliance Analysts.
| Functionality | Production | Sandbox |
|---|---|---|
| Accounts | Can View | Can View |
| Roles | Can View | Can View |
| Users | Can Edit | Can Edit |
| Batch Jobs | Can View | Can View |
| Documentation | Can View | Can View |
| PII Access | Can View | Can View |
| Reports | ✖︎ | ✖︎ |
| Custom File Uploads | ✖︎ | ✖︎ |
| Workflows | Can Edit Can Test Can View | Can Edit Can Test Can View |
| Fraud Case Management | ✖︎ | ✖︎ |
| Allow/Deny List | Can Edit | Can Edit |
| Compliance Case Management | Can Assign Can Review Can Comment Can Evaluate (Step 1) | Can Assign Can Review Can Comment Can Evaluate (Step 1) |
| Dashboards | Can View | Can View |
| Developers | ✖︎ | ✖︎ |
| Audit Logs | ✖︎ | ✖︎ |
| Configurations | Can View | Can View |
| Profiles | Can View | Can View |
The Compliance Analyst role gives the user the ability to review and add comments to compliance cases.
| Functionality | Production | Sandbox |
|---|---|---|
| Accounts | Can View | Can View |
| Roles | ✖︎ | ✖︎ |
| Users | Can View | Can View |
| Batch Jobs | Can View | Can View |
| Documentation | Can View | Can View |
| PII Access | Can View | Can View |
| Reports | ✖︎ | ✖︎ |
| Custom File Uploads | ✖︎ | ✖︎ |
| Workflows | Can View | Can View |
| Fraud Case Management | ✖︎ | ✖︎ |
| Allow/Deny List | Can View | Can View |
| Compliance Case Management | Can Review Can Comment (Step 2) | Can Review Can Comment (Step 2) |
| Dashboards | ✖︎ | ✖︎ |
| Developers | Can Edit | Can Edit |
| Audit Logs | Can View | Can View |
| Configurations | ✖︎ | ✖︎ |
| Profiles | Can View | Can View |
Permission categories
Each role is configured with permissions across several categories. Most categories use a single access level — you pick one option, such as No Access, Can View, or Can Edit (the highest level, which grants every permission in that category). Workflows and Fraud Case Management are multi-select: instead of one access level, you choose any combination of granular actions. The following diagram shows how permissions flow from role to user:
graph LR
    R["Role"] --> PC["Permission categories"]
    PC --> SS["Single access level
    (most categories)"]
    PC --> MS["Multi-select actions
    (Workflows, Fraud Case Management)"]
    SS --> NA["No Access"]
    SS --> CV["Can View"]
    SS --> CE["Can Edit"]
    MS --> A["Any combination of
    granular actions"]
| Permission category | Selection | Options |
|---|---|---|
| Accounts | Single access level | No Access, Can View, Can Edit |
| Roles | Single access level | No Access, Can View, Can Edit |
| Users | Single access level | No Access, Can View, Can Edit |
| Batch Jobs | Single access level | No Access, Can View, Can Edit |
| Documentation | Single access level | No Access, Can View |
| PII Access | Single access level | No Access, Can View |
| Reports | Single access level | No Access, Can View, Can Edit |
| Custom File Uploads | Single access level | No Access, Can Create |
| Workflows | Multi-select | Any combination of granular actions (for example, Can View, Can Modify, Can Move to Live) |
| Fraud Case Management | Multi-select | Any combination of granular actions (for example, Can View, Can Comment, Can Evaluate) |
| Allow/Deny List | Single access level | No Access, Can View, Can Edit |
| Compliance Case Management | Single access level | No Access, Can View, Can Edit |
| Custom Watchlist | Single access level | No Access, Can View |
Note:
The categories and actions available when you create or edit a role depend on your account configuration and enabled products, so the role dialog may show a different set. The granular actions offered for Workflows and Fraud Case Management are also configuration-driven — the examples earlier in this topic are illustrative, not an exhaustive list.
Fraud Case Management actions
The Fraud Case Management actions control what a user can do in the case queue:
| Permission | What it grants |
|---|---|
| Can View | View the case queue and open case details, including attached documents. Read-only, and the baseline for the other actions. |
| Can Assign | Assign a case to a reviewer, and reassign or unassign cases. |
| Can Comment | Add comments and notes to a case. |
| Can Review | Update an existing case and render or approve a decision on it (Update Case, Decision Case). |
| Can Evaluate | Create a new manual case or trigger a fresh evaluation against the risk engine (Create Manual Case, Rerun Eval). |
Can Review and Can Evaluate gate different functions in Case Management, not different levels of the same action:
| UI action | Required permission |
|---|---|
| Update Case | Can Review |
| Decision Case | Can Review* |
| Create Manual Case | Can Evaluate |
| Rerun Eval | Can Evaluate |
*On Decision Case, Can Review also acts as Can Approve for the second-level approver in a 2-step escalated review workflow.
- Can Review decides on cases already in the queue.
- Can Evaluate creates cases or re-runs the risk evaluation itself.
Create a custom role
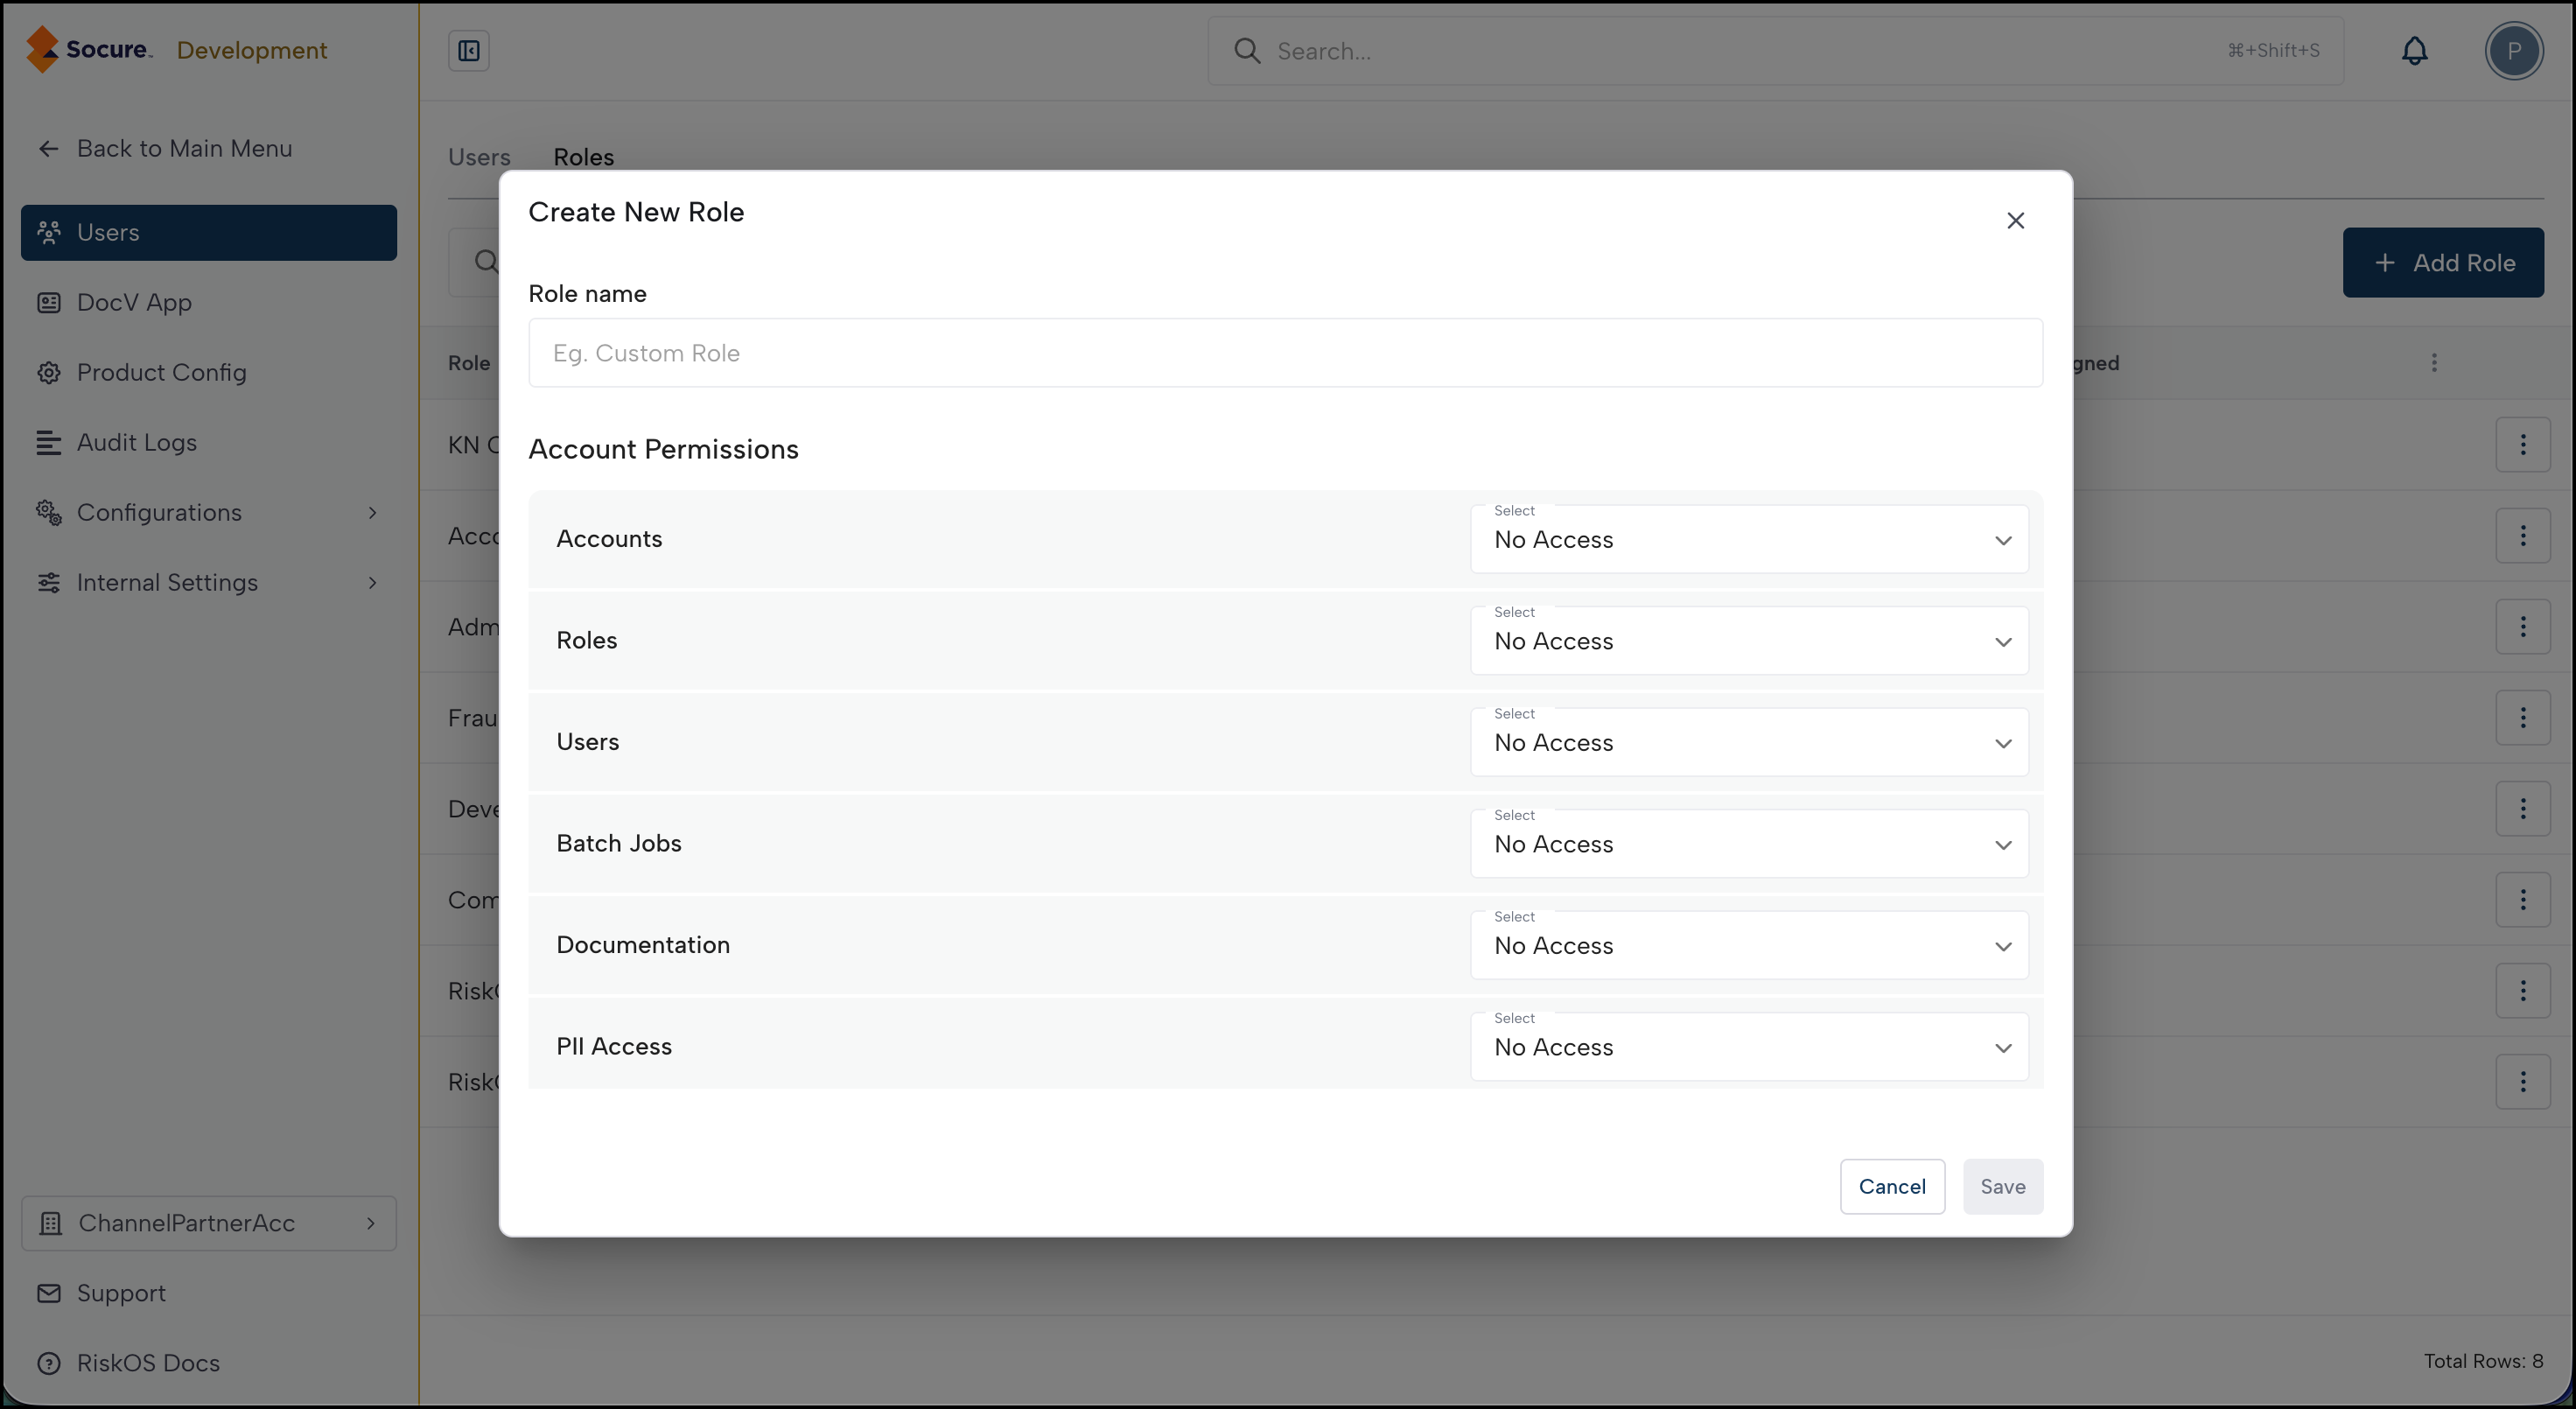
- On the Roles tab, click Add Role.
- Enter a Role Name (required). Use a descriptive name based on the job function (for example, "Case Reviewer", "Workflow Admin").
- Set the permissions for each category. For single access level categories, select one option (No Access, Can View, or Can Edit). For Workflows and Fraud Case Management, select any combination of granular actions from the multi-select dropdown.
- Click Save to create the role.
What happens after saving
| Effect | Timing |
|---|---|
| The new role appears in the Roles table. | Immediate |
| The role becomes available in the role assignment table when adding or editing users. | Immediate |
| No users are assigned to the role automatically. | — |
Global custom roles
A custom role you create in the Management account is a Global role: it becomes available in every client account automatically, so you don't re-create it in each one. This lets you centrally manage roles for all your clients from a single account.
| Behavior | Detail |
|---|---|
| Scope | Global roles appear in all your client accounts, marked with a Global badge. |
| Central management | You manage Global roles from the Management account. Edits propagate to every client account immediately. |
| Client-account access | In a client account, Global roles are view-only. To change a Global role, edit it from the Management account. |
| Local roles | A custom role you create while switched into a specific client account stays local to that account. |
Note:
Create a role in the Management account when every client needs it. Create a role inside a specific client account when only that client needs it.
Delete a custom role
- On the Roles tab, locate the custom role you want to remove.
- Click the Delete button in the Actions column.
- Confirm the deletion in the dialog.
Important:
System-defined roles cannot be deleted — only custom roles can be removed. Before deleting a custom role, reassign any users currently assigned to it. Deleting a role that is still assigned to users removes those permissions immediately.
Role design best practices
| Guideline | Rationale |
|---|---|
| Start with least privilege. Grant only the permissions the role needs. | Prevents accidental access to sensitive data or destructive actions. Expand permissions incrementally as needs arise. |
| Name roles by responsibility, not by person. Use names like "Case Reviewer" or "Workflow Admin" instead of "John's Role". | Roles outlast individual users. Descriptive names make the Roles table self-documenting. |
| Create separate roles for Sandbox and Production tasks. Assign broader-access roles to Sandbox and narrower roles to Production. | Lets users experiment in Sandbox without risking Production. See Assign Roles. |
| Audit assigned user counts. Roles with zero users may be candidates for cleanup. | Keeps the Roles table manageable and reduces confusion. |
| Use system-defined roles as baselines. Review their behavior before creating custom roles. | System-defined roles cover common patterns. You may only need a small adjustment, not a new role from scratch. |
For a comprehensive access review process, see Access Governance Best Practices.
Troubleshooting
| Issue | Cause | Resolution |
|---|---|---|
| Roles tab is not accessible | You do not have the UAM Users View permission. | Contact your administrator to grant the permission. |
| Cannot delete a system-defined role | System-defined roles are protected and cannot be removed. | If the system-defined role does not fit your needs, create a custom role with the permissions you require. |
| Deleted role still appears assigned to a user | The user list may not have refreshed. | Edit the user to assign a different role, then refresh the page. |
| New custom role does not appear in the add user wizard | The role list may not have refreshed. | Refresh the page or close and reopen the add user wizard. |
| A user has access they should not have | The user may be assigned multiple roles, one of which grants the unintended permission. | Review all roles assigned to the user in Assign Roles and remove the role with excessive permissions. |
| Cannot edit a role in a client account | The role is a Global role managed from the Management account. | Switch to the Management account to edit the role. The change then applies to all client accounts. |
Related articles
| Topic | Guide |
|---|---|
| Understand the UAM model | Users & Roles Overview |
| Create and manage user accounts | Manage Users |
| Assign or change roles for users | Assign Roles |
| Access governance and audit guidelines | Access Governance Best Practices |
Updated about 1 month ago