Add and Manage Users
Learn how to create and manage users in RiskOS™.
Create a user and assign a role
You can grant a user access to one or more accounts, or assign them multiple roles. Before creating a user, you should determine the accounts and roles they should be assigned. See Users and Roles for more information.
- Click your profile menu (top right), then click Users.
- On the Users page, click Add User.
- Under User Information, enter the user’s first and last name, email address, and phone number.
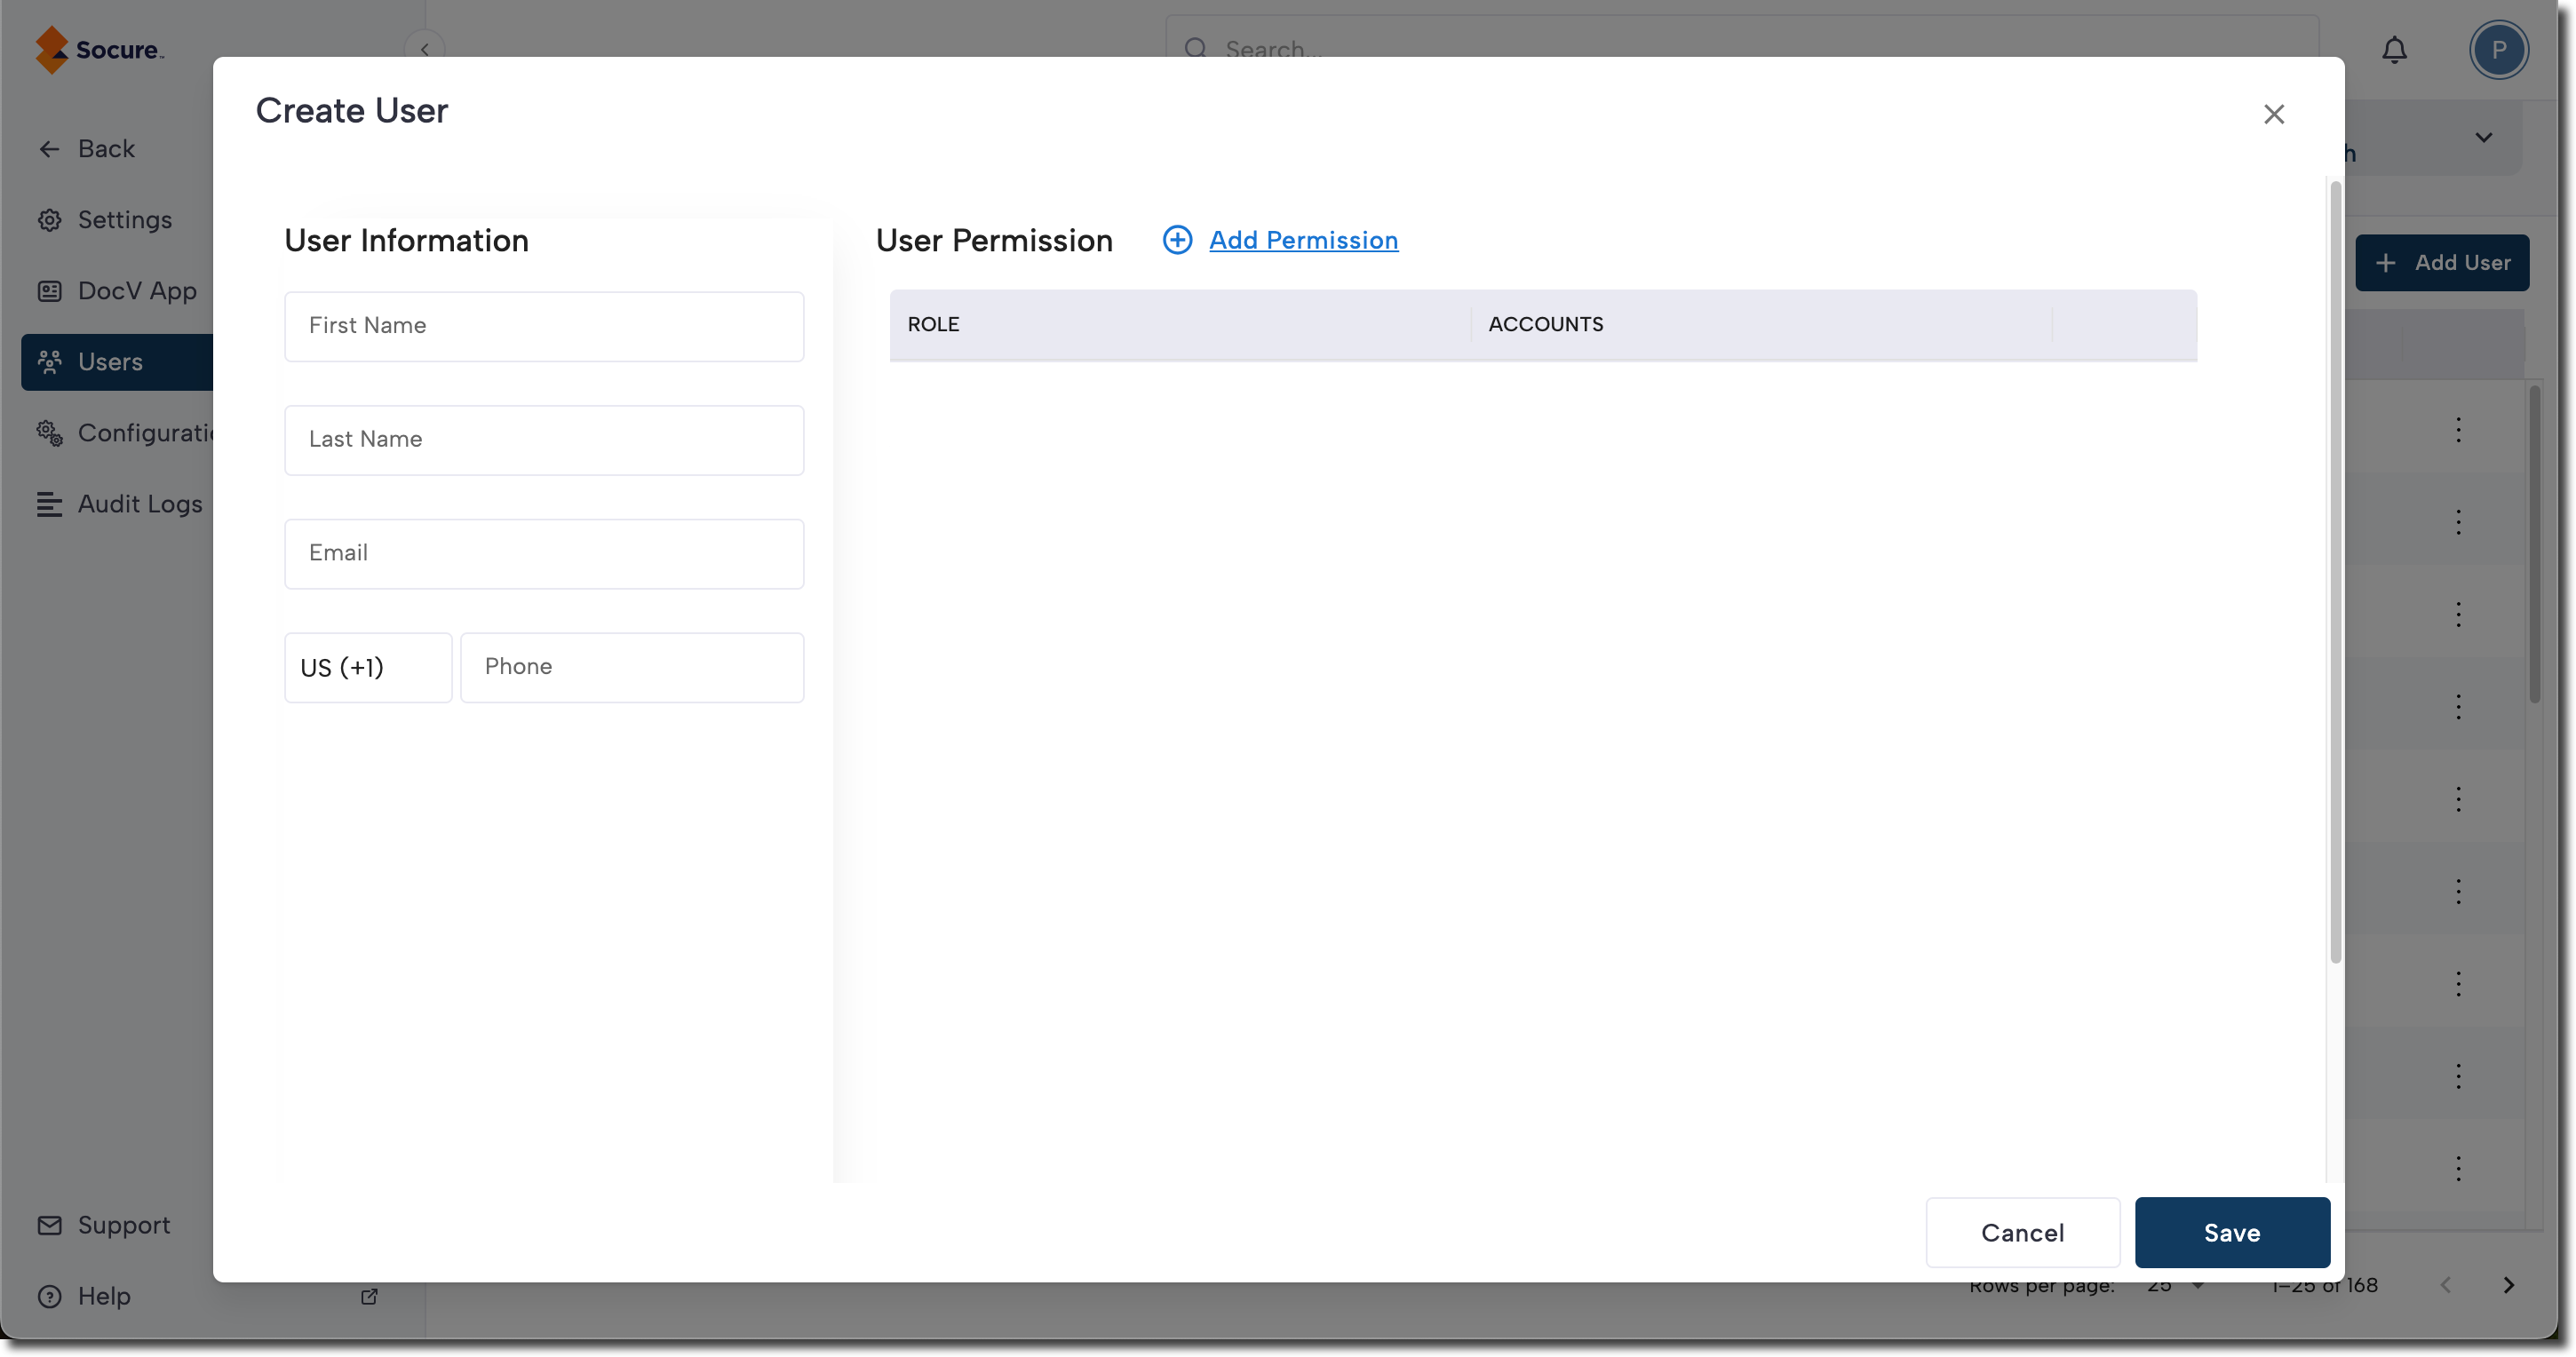
- Click Add Permission.
- On the Roles tab, select the role you want to assign to the user.
- On the Accounts tab, select the accounts and sub-accounts the user can access with this role.
- Click Add to update the role permissions.
- To assign an additional role, repeat steps 5–7.
- Click Save.
Note:
- A user's first and last name can include special characters such as spaces, hyphens (-), apostrophes ('), underscore (_), plus (+), and parentheses (), allowing for diverse naming choices.
- You can grant a user access to one or more sub accounts by assigning them a custom role defined at the parent account level. A custom role defined at the parent level will be available for use at the sub account level if at least one user has been assigned the custom role within the sub account.
- There is no limit on the number of roles a user can have.
Update a user's permissions
On the Users tab, click the three-dot button next to the user and select View/Edit to update a user's personal information and role permissions.
Reset a user's password
On the Users tab, click the three-dot button next to the user and select Reset Password to reset their password.
Updated about 1 month ago
Did this page help you?