Watchlist Monitoring Setup
Learn how to configure Watchlist Monitoring to receive ongoing, asynchronous alerts when approved users are added to, removed from, or updated on watchlists.
Set up Watchlist Monitoring
There are several ways to set up Watchlist Monitoring.
Note:
Watchlist monitoring alerts are sent asynchronously via webhooks. In all cases, you will need to configure and integrate monitoring webhook events so that you can receive notifications whenever one of your users is added, removed, or has updated data on a watchlist.
Understanding screening vs. monitoring
| Screening | Monitoring | |
|---|---|---|
| When used | At onboarding or during a one-off rescreen | After a customer is accepted, for ongoing risk detection |
| Goal | Catch risk before entry | Catch changes over time |
| Trigger | You or an automated workflow submit an evaluation request | Lists are updated (new matches, changes, removals) and you are notified if a match is found via webhook or email |
| Example | A customer applies today. Screening catches if they are already sanctioned. | A customer was clear at onboarding but was sanctioned two months later |
Enable monitoring in a workflow
You can add a Monitoring enrichment step to your workflow to automatically enable monitoring for an entity that is approved in an evaluation.
- In RiskOS™, create Approve and Decline tags to route approved cases through the Watchlist Monitoring enrichment step before applying a final Approve decision.
- This ensures you only monitor entities that you approve.
Enable monitoring via API
Use the Evaluation Monitoring API to enable or disable monitoring for a user using your own logic (for example, users who deposit in their accounts or users who transact over a certain amount).
To enable monitoring for an entity, you need the referenceId from the original screening evaluation response. This is a system-generated UUID that uniquely identifies the Watchlist enrichment result for a specific entity. You can find it at data_enrichments[].response.referenceId in the Watchlist Screening evaluation response.
Send a POST request to the Evaluation Monitoring API with this value as the reference_id parameter.
Example request:
{
  "reference_id": "ecfe3351-9df6-4e2f-9cd5-73c6e06108b9",
  "list_type": "watchlist",
  "operation": "enable"
}Note:
The
reference_idis different from theeval_id. An evaluation can contain multiple enrichments, and each enrichment receives its ownreferenceId. For watchlist monitoring, you must use thereferenceIdfrom the Watchlist enrichment — not the top-level evaluation ID.
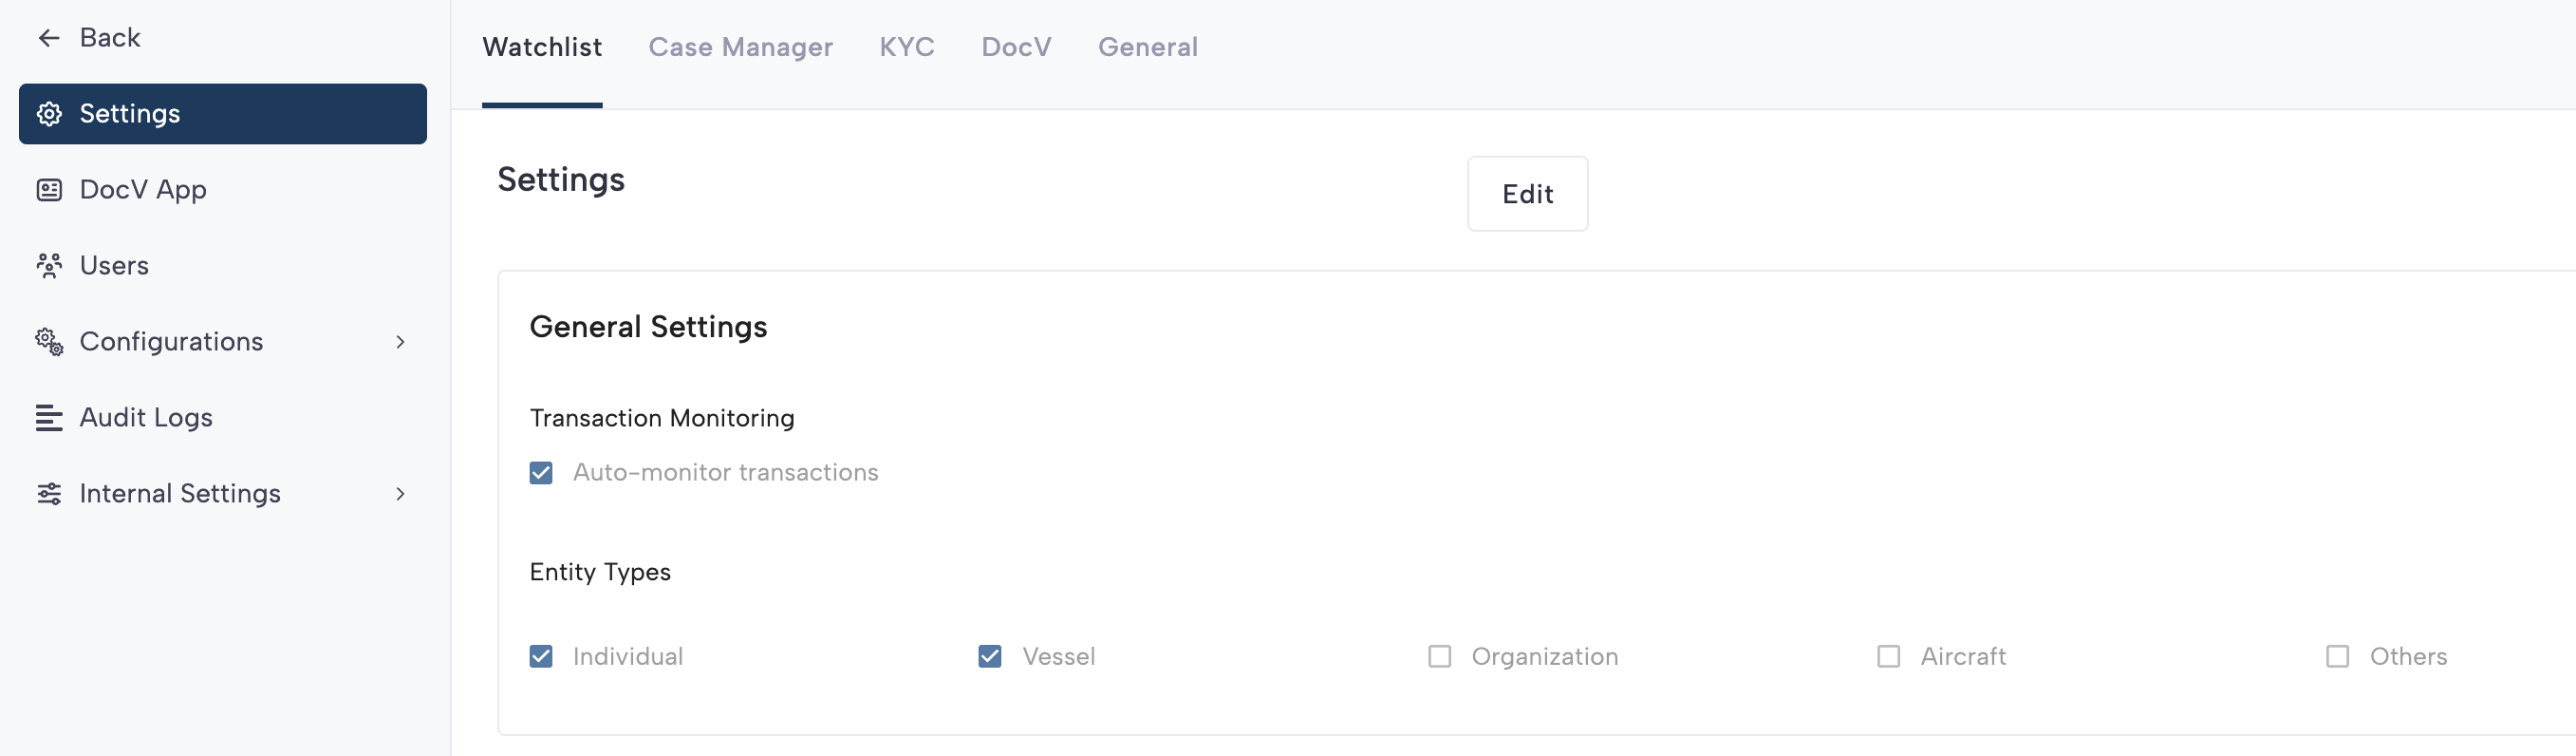
Auto-monitoring
Auto-monitoring automatically enables monitoring for all entities that go through an evaluation flow.
- Typically enabled for a short period while you import existing entities you know are already active into Socure’s platform.
- To enable Auto-monitoring, go to Settings → Watchlist Settings and toggle the Auto-monitoring switch on.
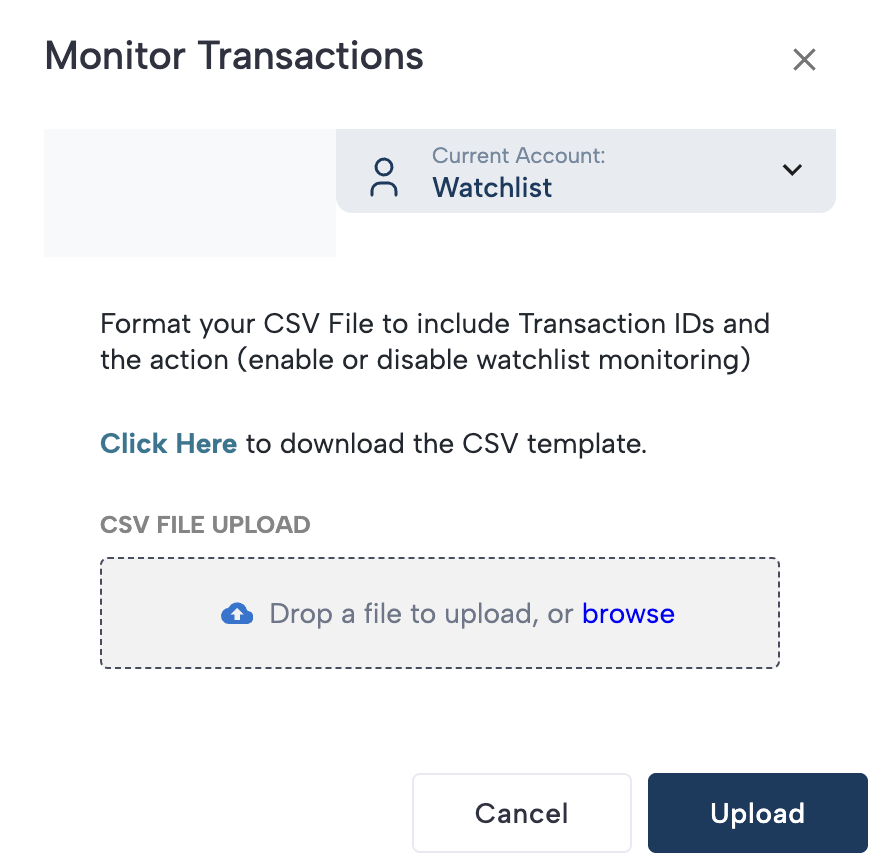
Enable and disable monitoring with a batch file
You can enable or disable monitoring for a list of transactions by uploading a list of transaction IDs in batch.
If you are using Auto-monitoring as the primary method, you may also need to disable monitoring for entities that were not approved. Batch file upload is an easy way to do this.
Steps to use a batch file:
- In the RiskOS™ Dashboard, click Batch Jobs in the side navigation.
- At the top right, select the ‘+’ icon and choose Monitor Transactions.
- A modal will appear with a link to download a template CSV.
- Prepare a CSV file matching the template columns:
- transactionid → enter the
referenceIdfrom the Watchlist Evaluation response. - action → specify either
enableordisable.
- transactionid → enter the
- Upload the completed batch file into the modal.
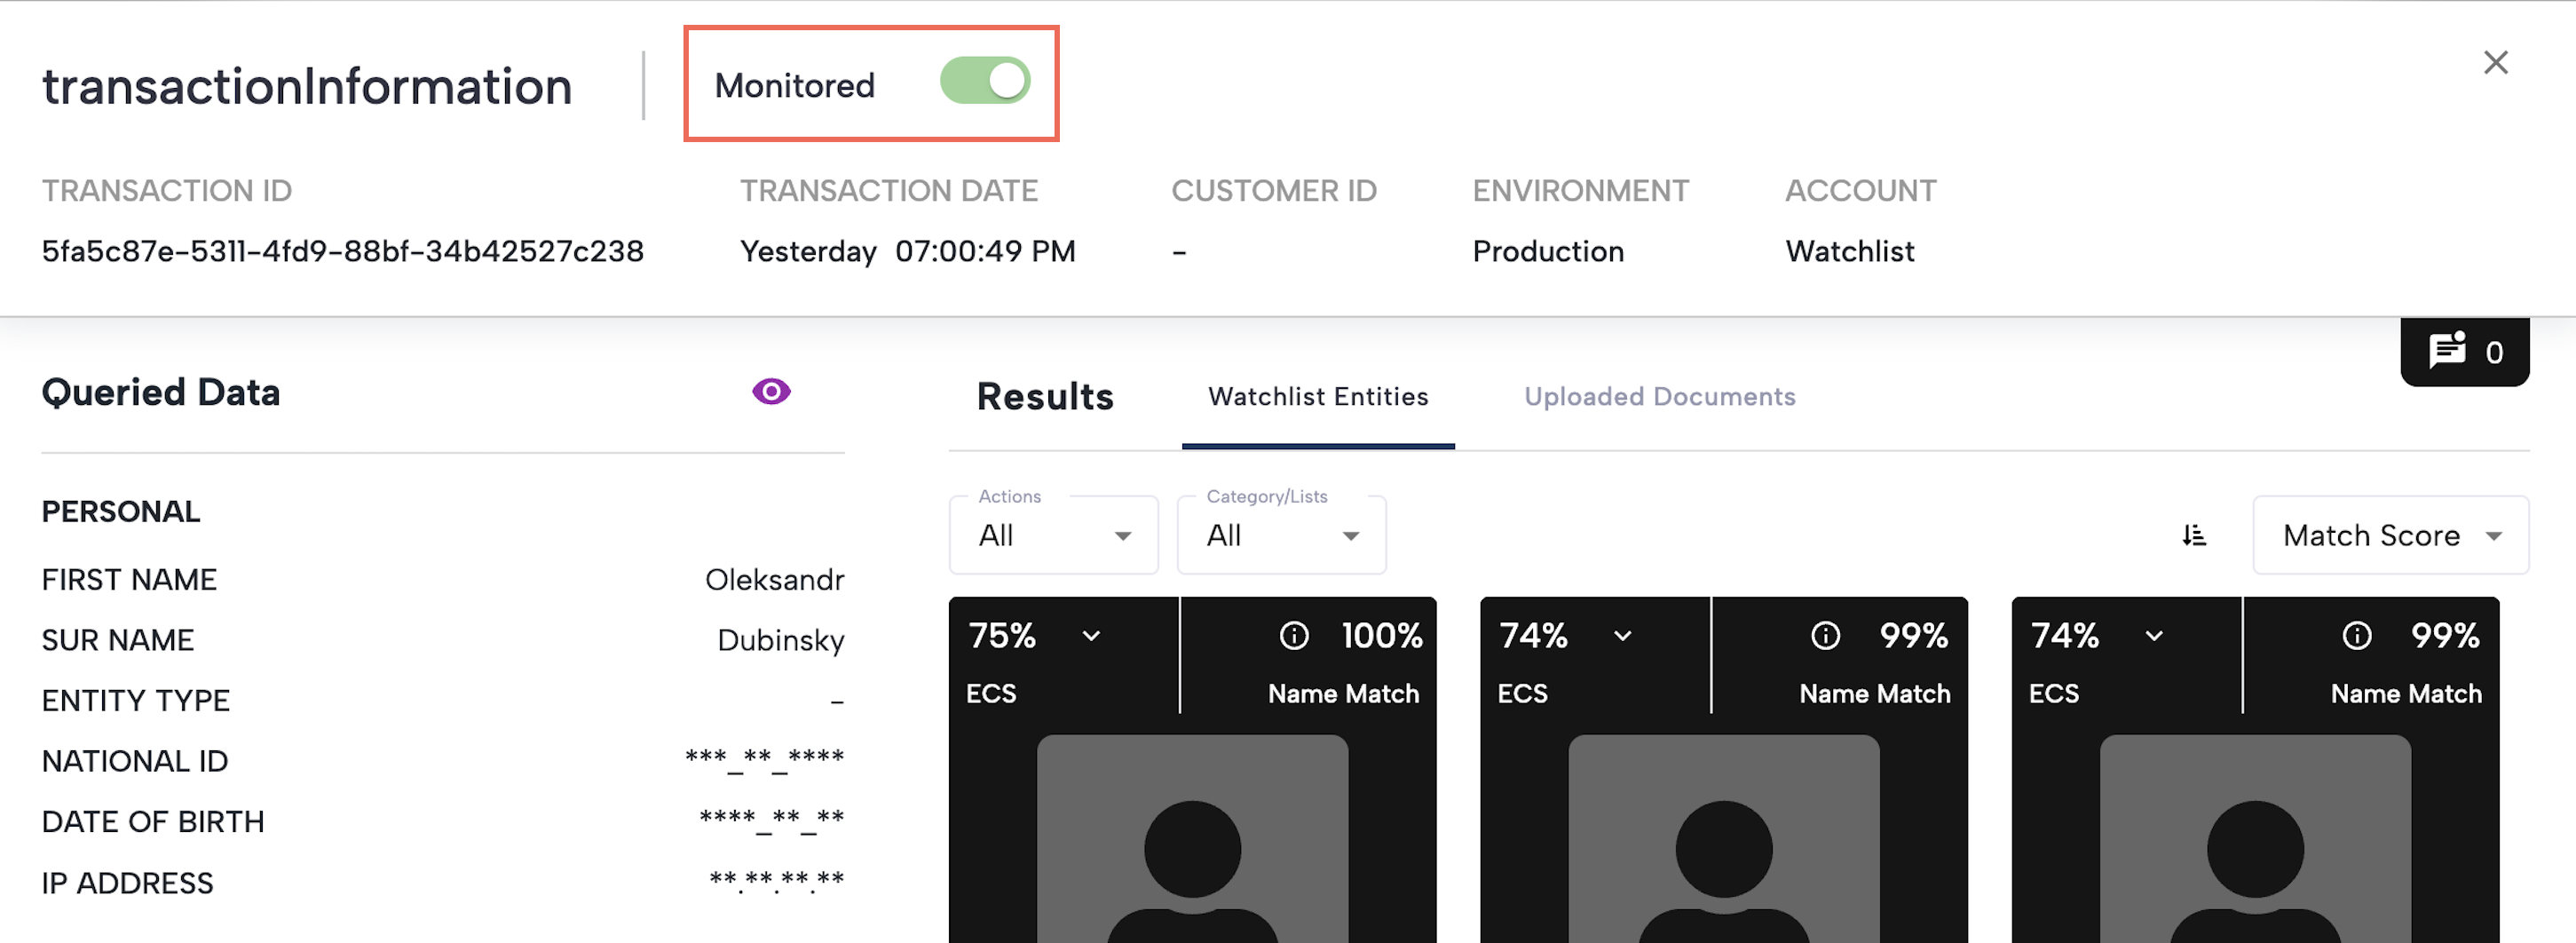
Enable and disable monitoring manually
For cases that go to review before being accepted, enroll them in monitoring as soon as they move to Approve. Follow the steps to disposition and close a case, and in each case click the toggle to enable monitoring.
Updated 2 months ago