
Manage Users
Create, edit, invite, and delete user accounts for Channel Partner client accounts in RiskOS™.
The Users page allows Channel Partner administrators to manage user accounts across client accounts. You can create users, assign them to use cases, and configure environment-specific access for both Sandbox and Production.
Access it from Settings > Users in the Channel Partner sidebar.
Why it matters
Each client account has its own set of users with independent credentials and permissions. Properly managing user lifecycle — from creation through role assignment to eventual deactivation — ensures that the right people have the right access at all times.
Before you begin
| Requirement | Details |
|---|---|
| Permission | You must have the Can Edit permission to Users |
| Account context | If managing users for a client, switch into the client's account first. |
| Environment | Verify you are viewing the correct environment (Sandbox or Production) using the environment selector at the top of the page. |
| Information needed | The user's email address, first and last name, intended use case assignments, and role assignments. |
| Estimated time | 5–10 minutes per user. |
| Production impact | Adding or modifying users in Production takes effect immediately. There is no staging or approval workflow. |
User table
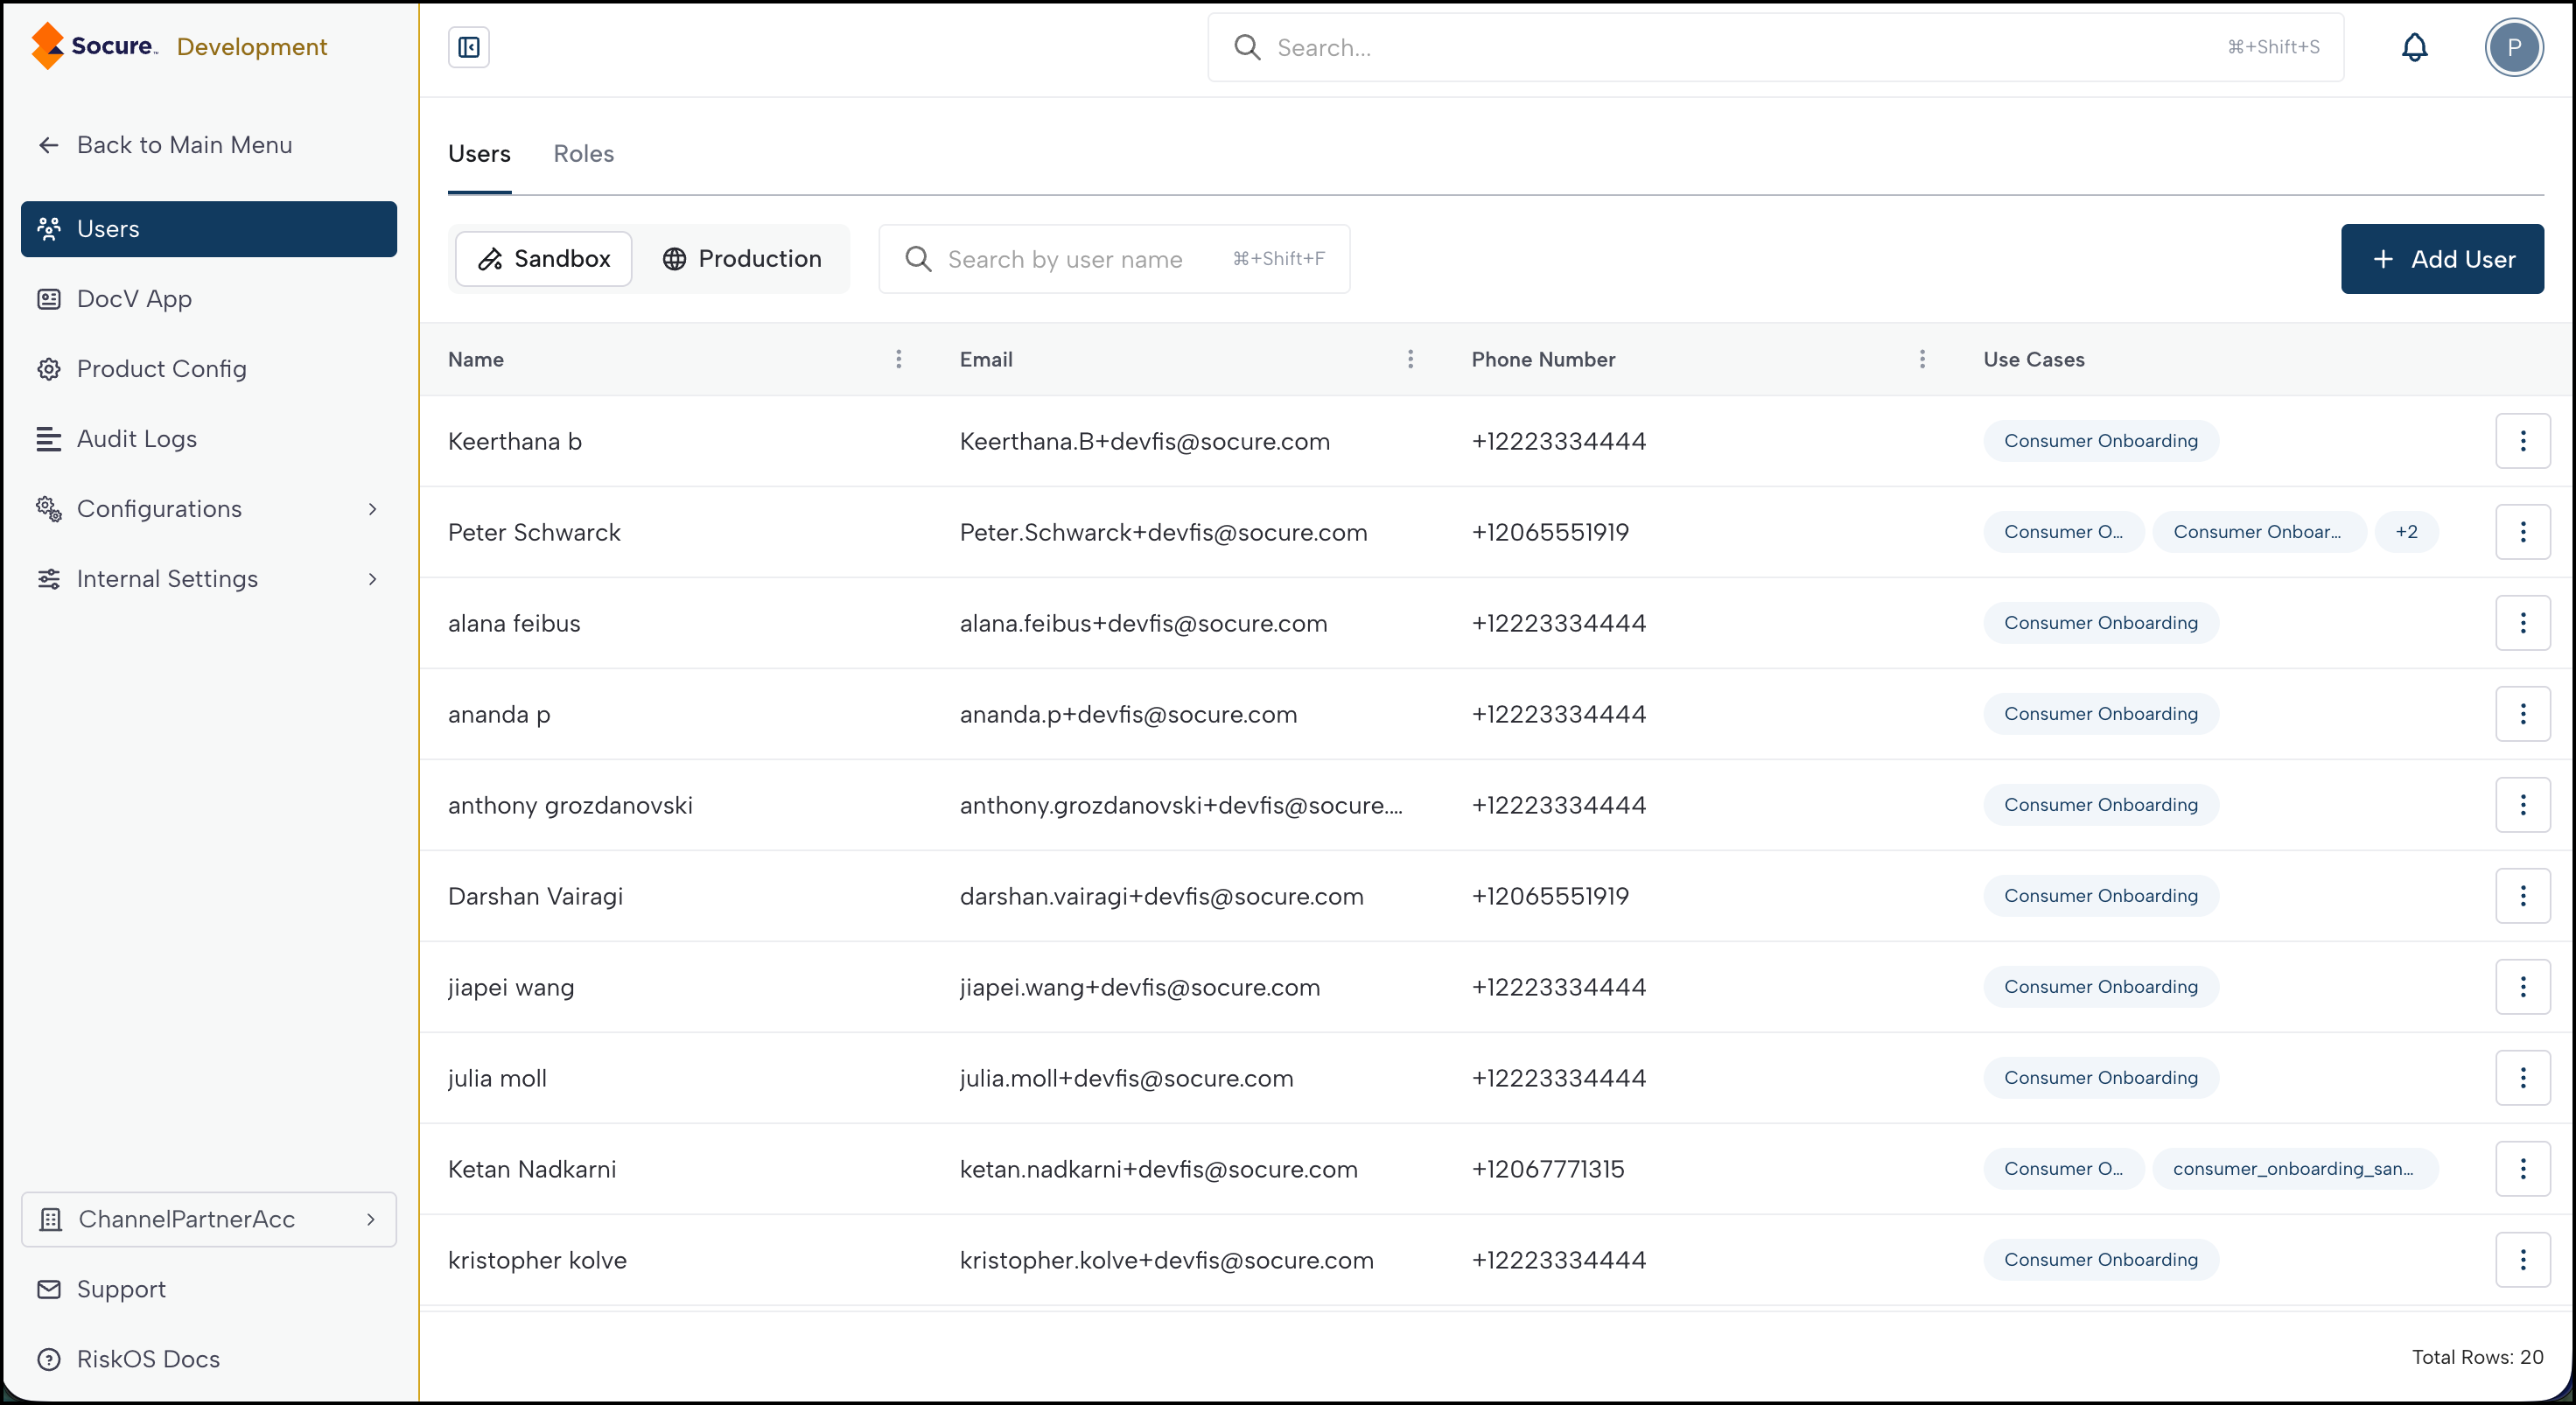
The Users tab displays all users in the current account. An environment selector at the top lets you switch between Sandbox and Production user lists.
| Column | Description |
|---|---|
| Name | The user's first and last name. |
| The user's email address. | |
| Phone Number | The user's contact number (if provided). |
| Use Cases | Tags showing the use cases assigned to this user. Up to two tags are shown inline; click the overflow indicator to see the full list. |
| Actions | An edit button to modify the user's details and permissions. |
Search users
Use the search field above the table to filter users by name or email.
User operations
| Operation | How to access it |
|---|---|
| Add User | Click the Add User button above the table. Opens the add user wizard. |
| Edit User | Click the edit button in the Actions column. Opens the wizard pre-filled with the user's data. |
| Delete User | Available from the user's action menu. Removes the user from the account. |
Note:
All user operations apply one at a time. There is no bulk invite or bulk delete functionality.
Add a user
The add user wizard walks you through four steps to create a new user and assign them roles.
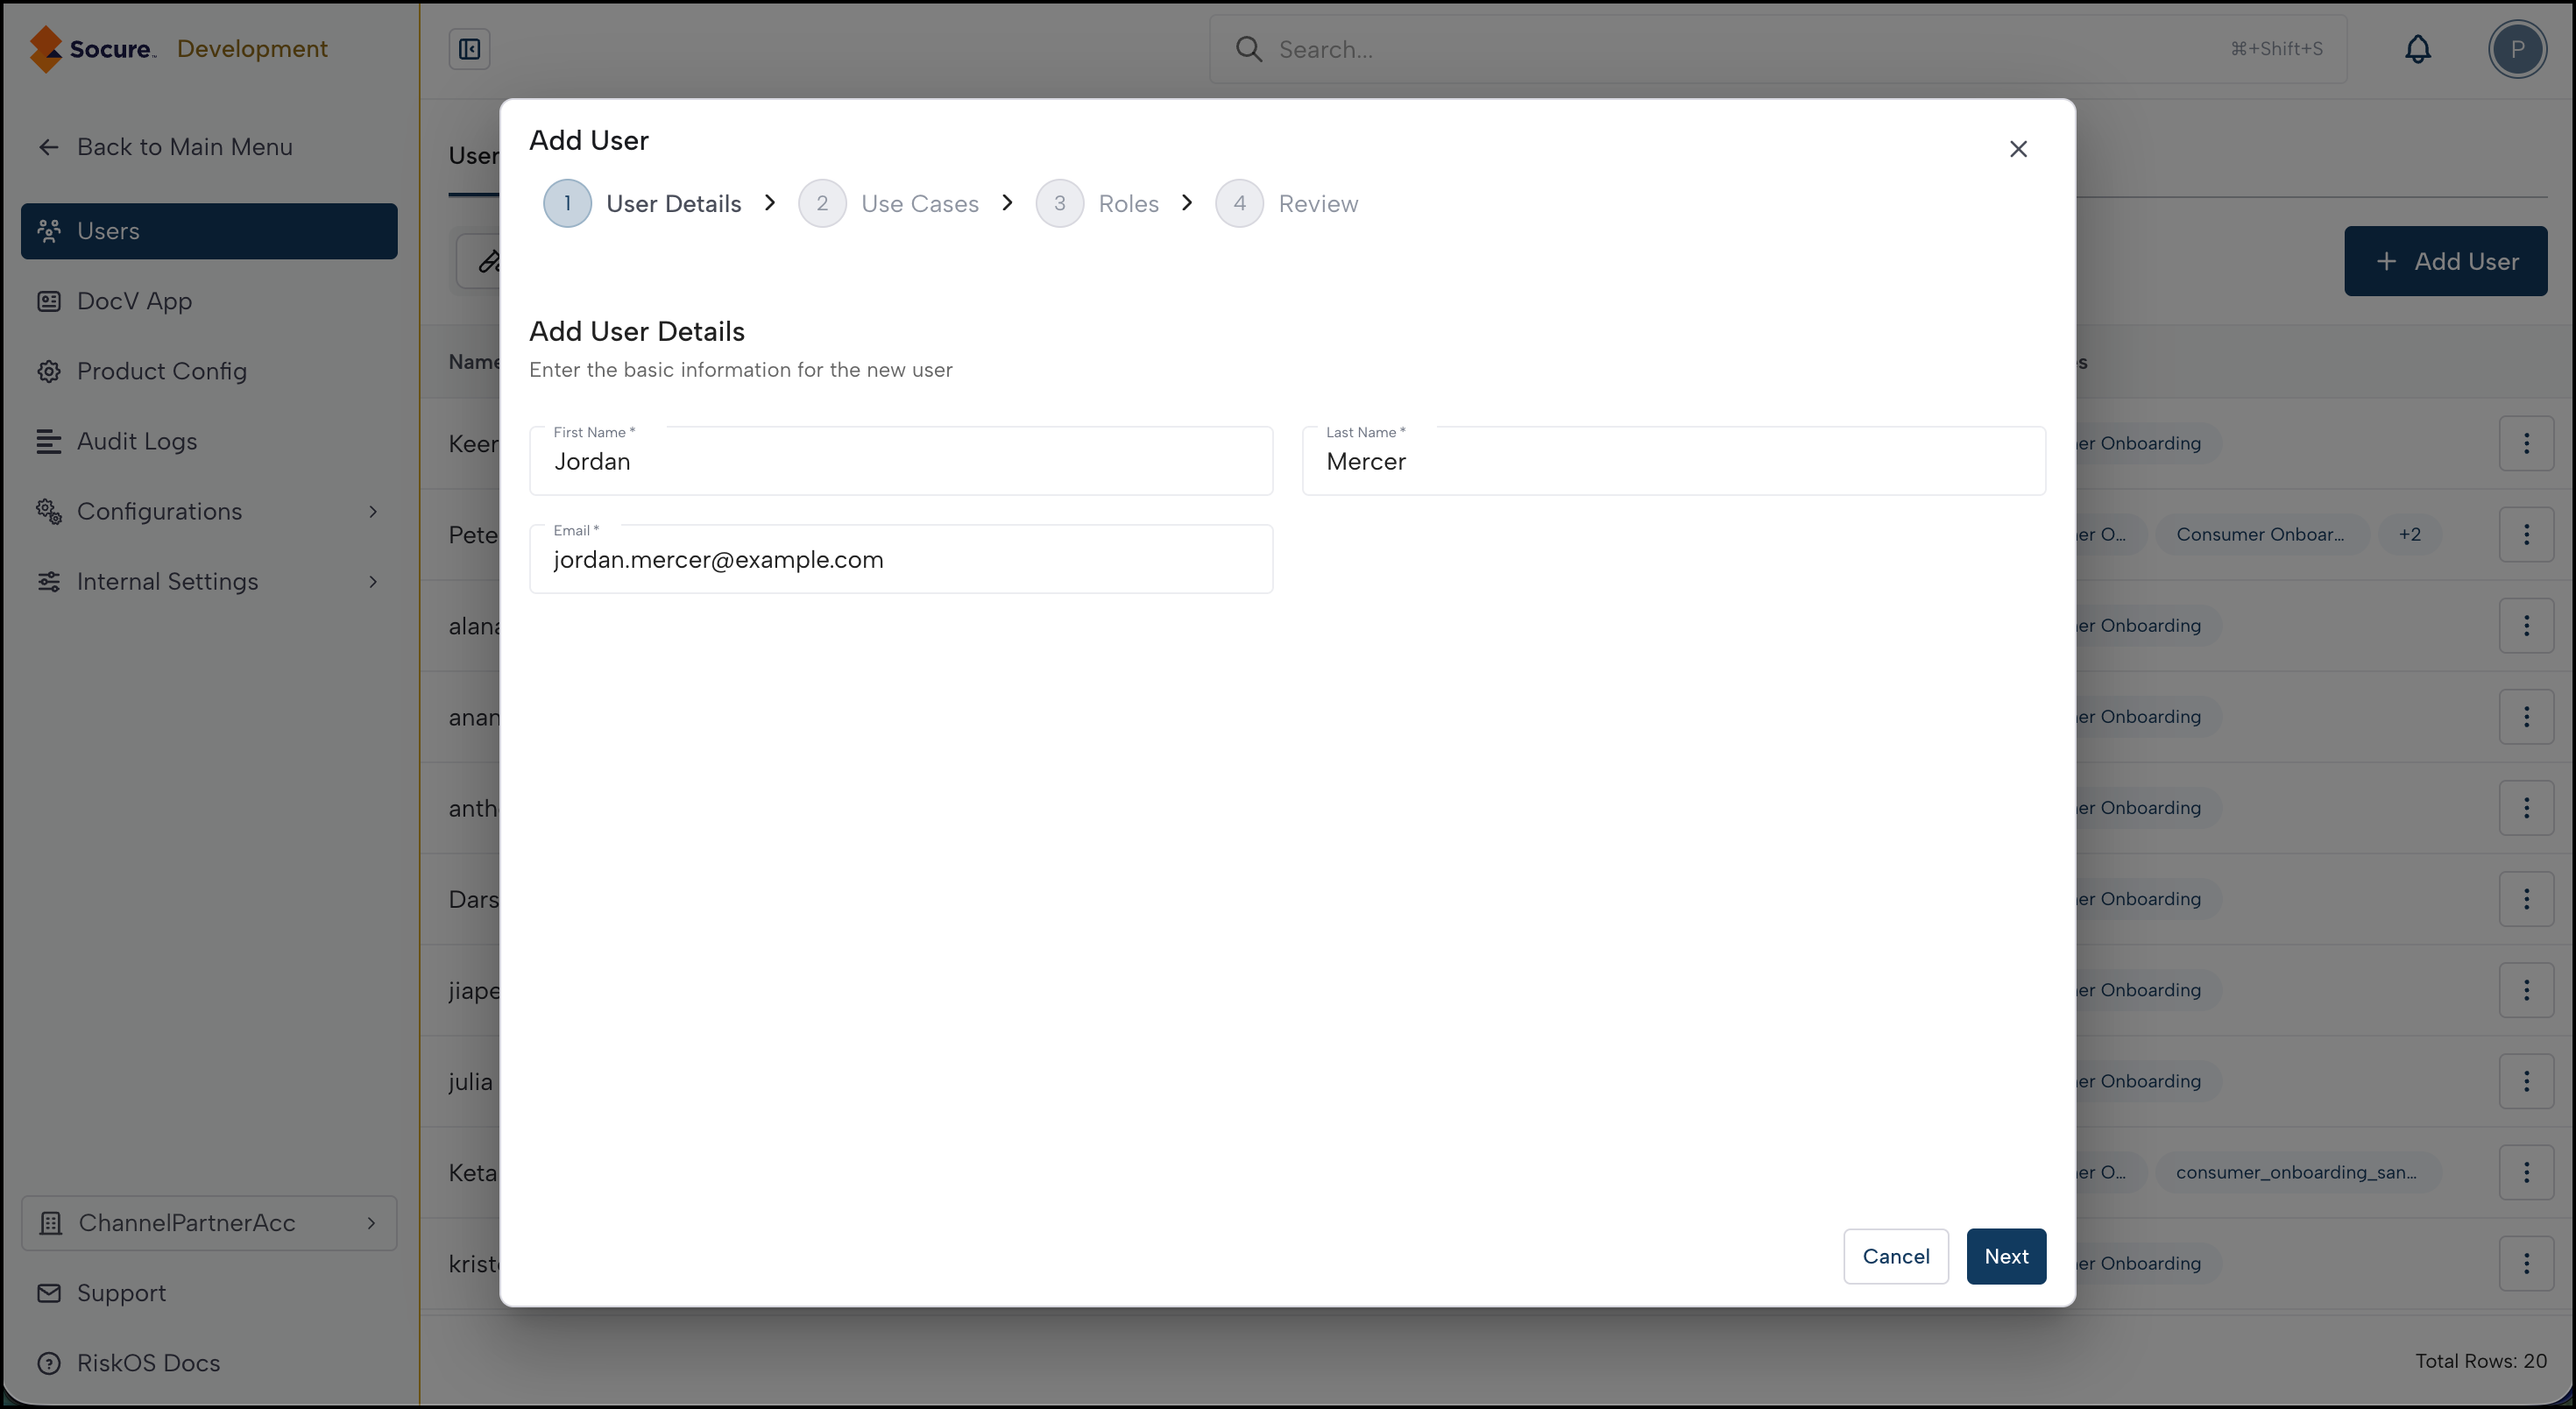
Step 1: User details
Enter the user's personal information:
| Field | Required | Notes |
|---|---|---|
| First Name | Yes | |
| Last Name | Yes | |
| Yes | Must be a valid email address. Cannot be changed after the user is created. |
Click Next to proceed.
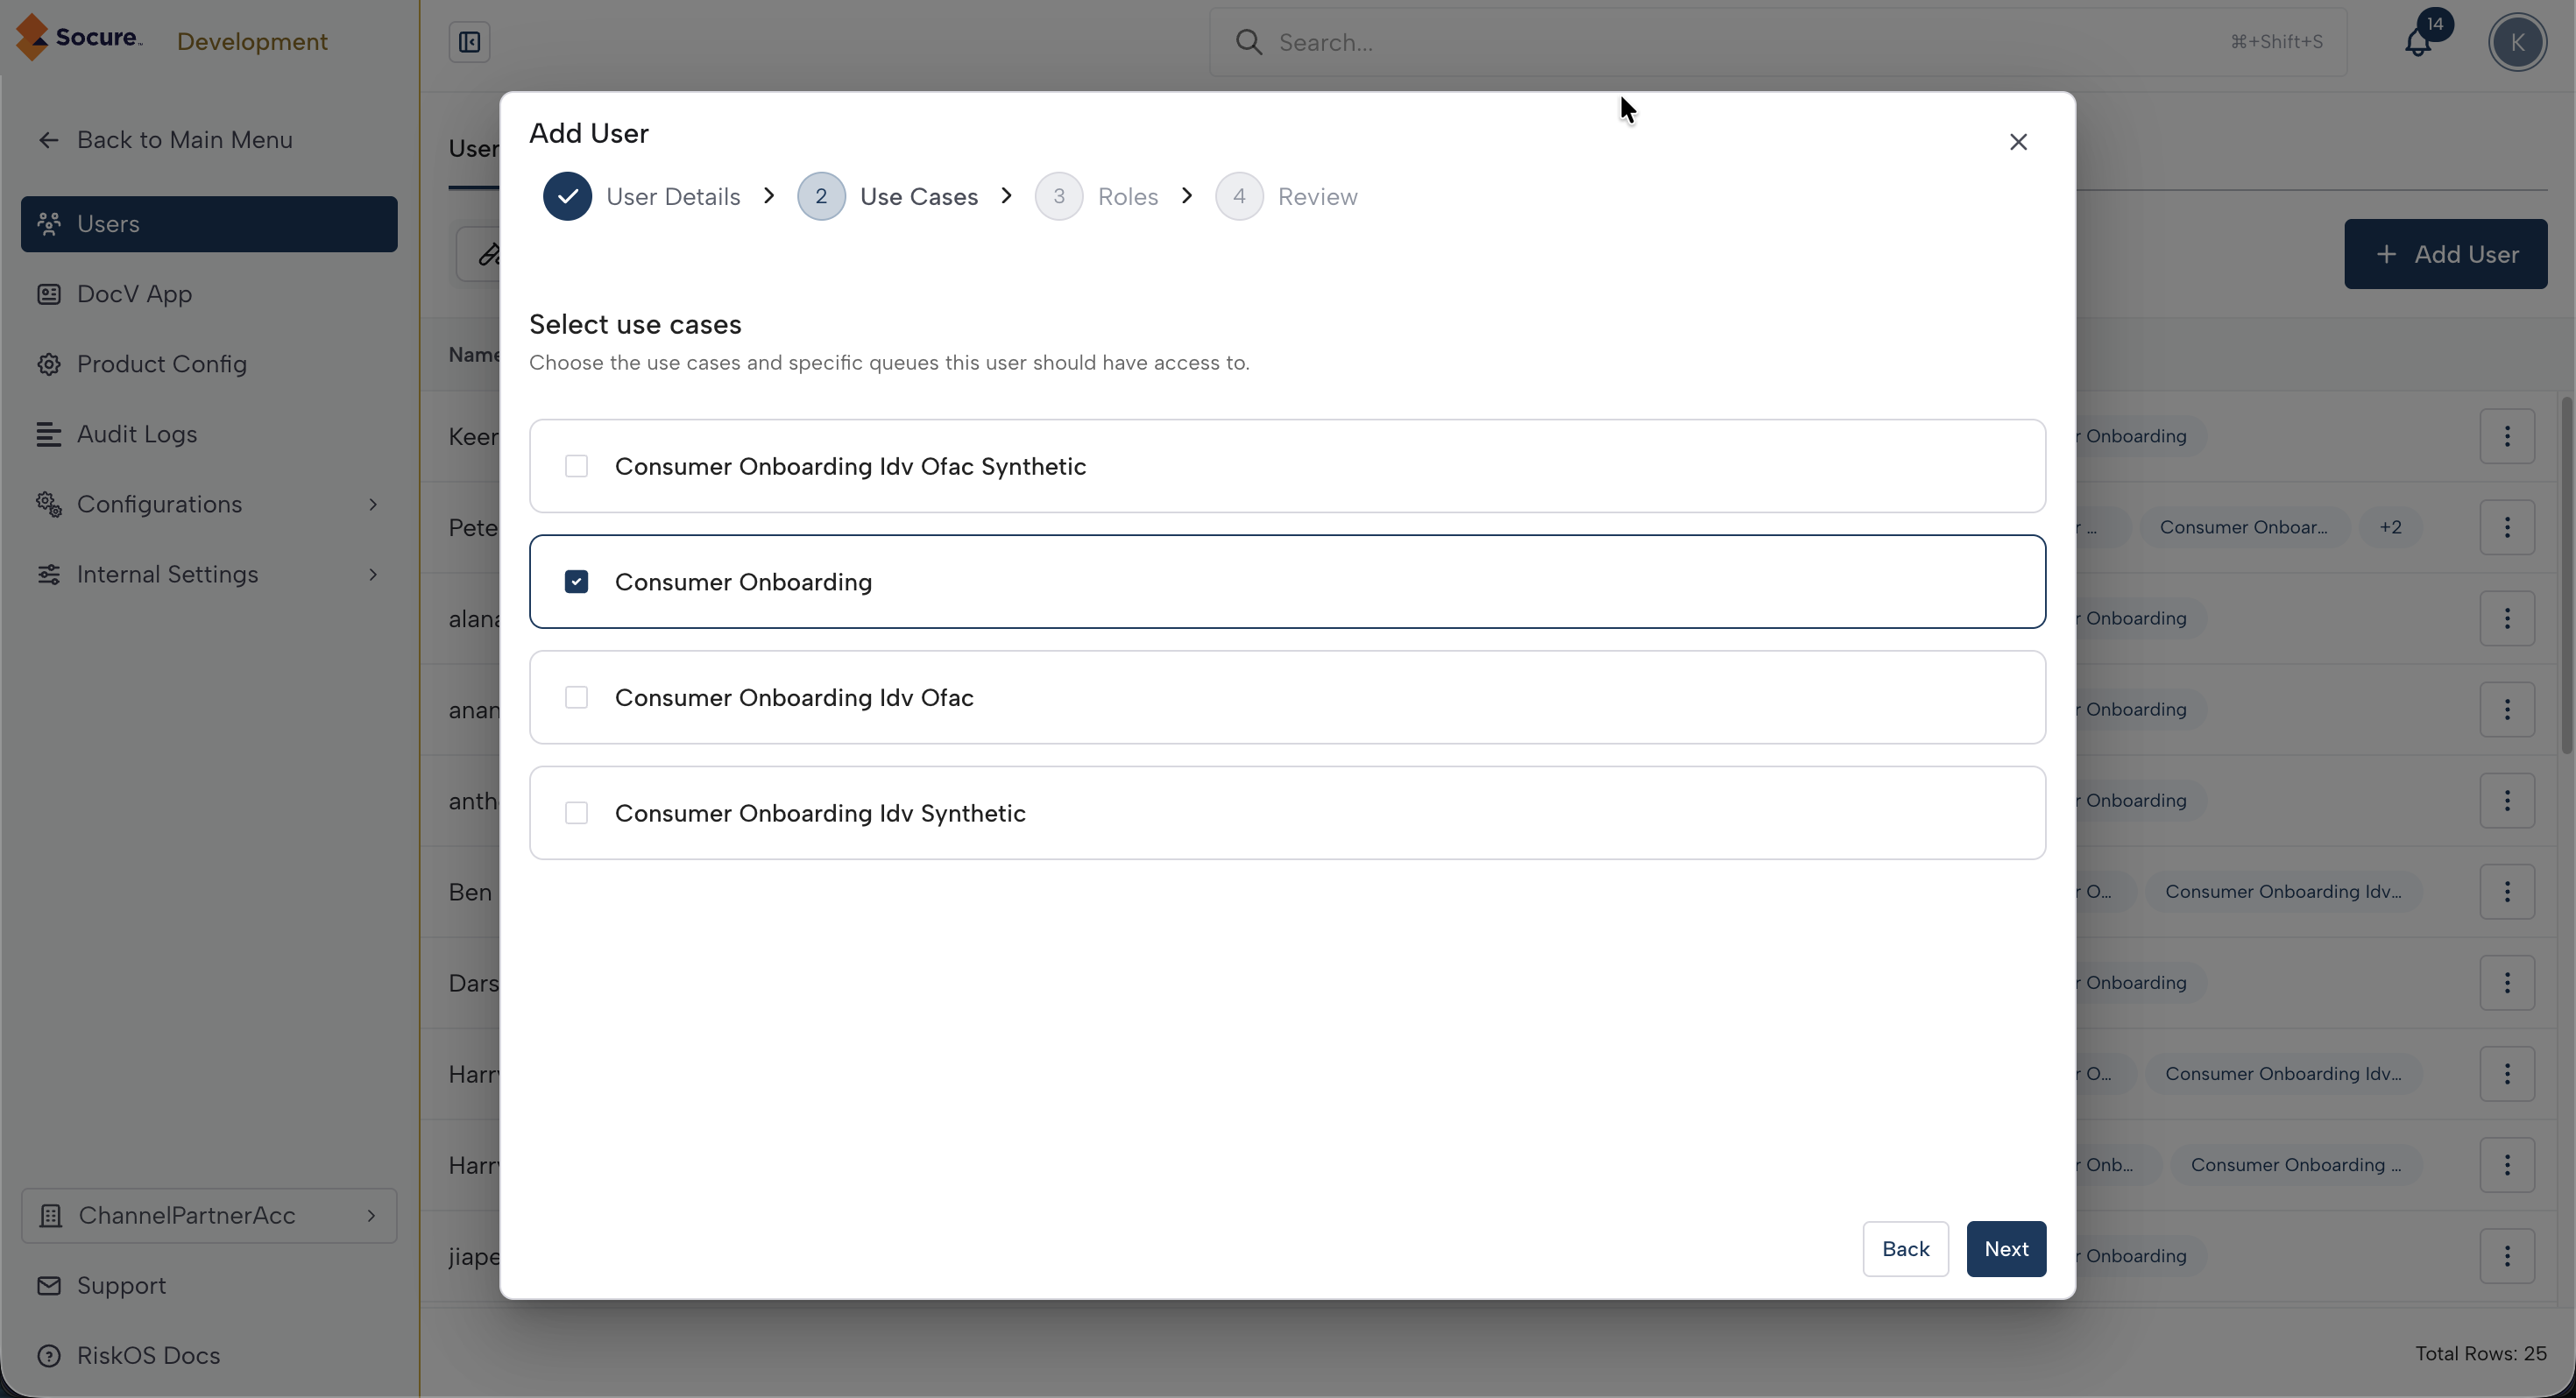
Step 2: Select use cases
Select the use cases the user should have access to. Each use case appears as a checkbox item.
- Select at least one use case.
- Each use case can be independently assigned access to Sandbox or Production queues.
Click Next to proceed.
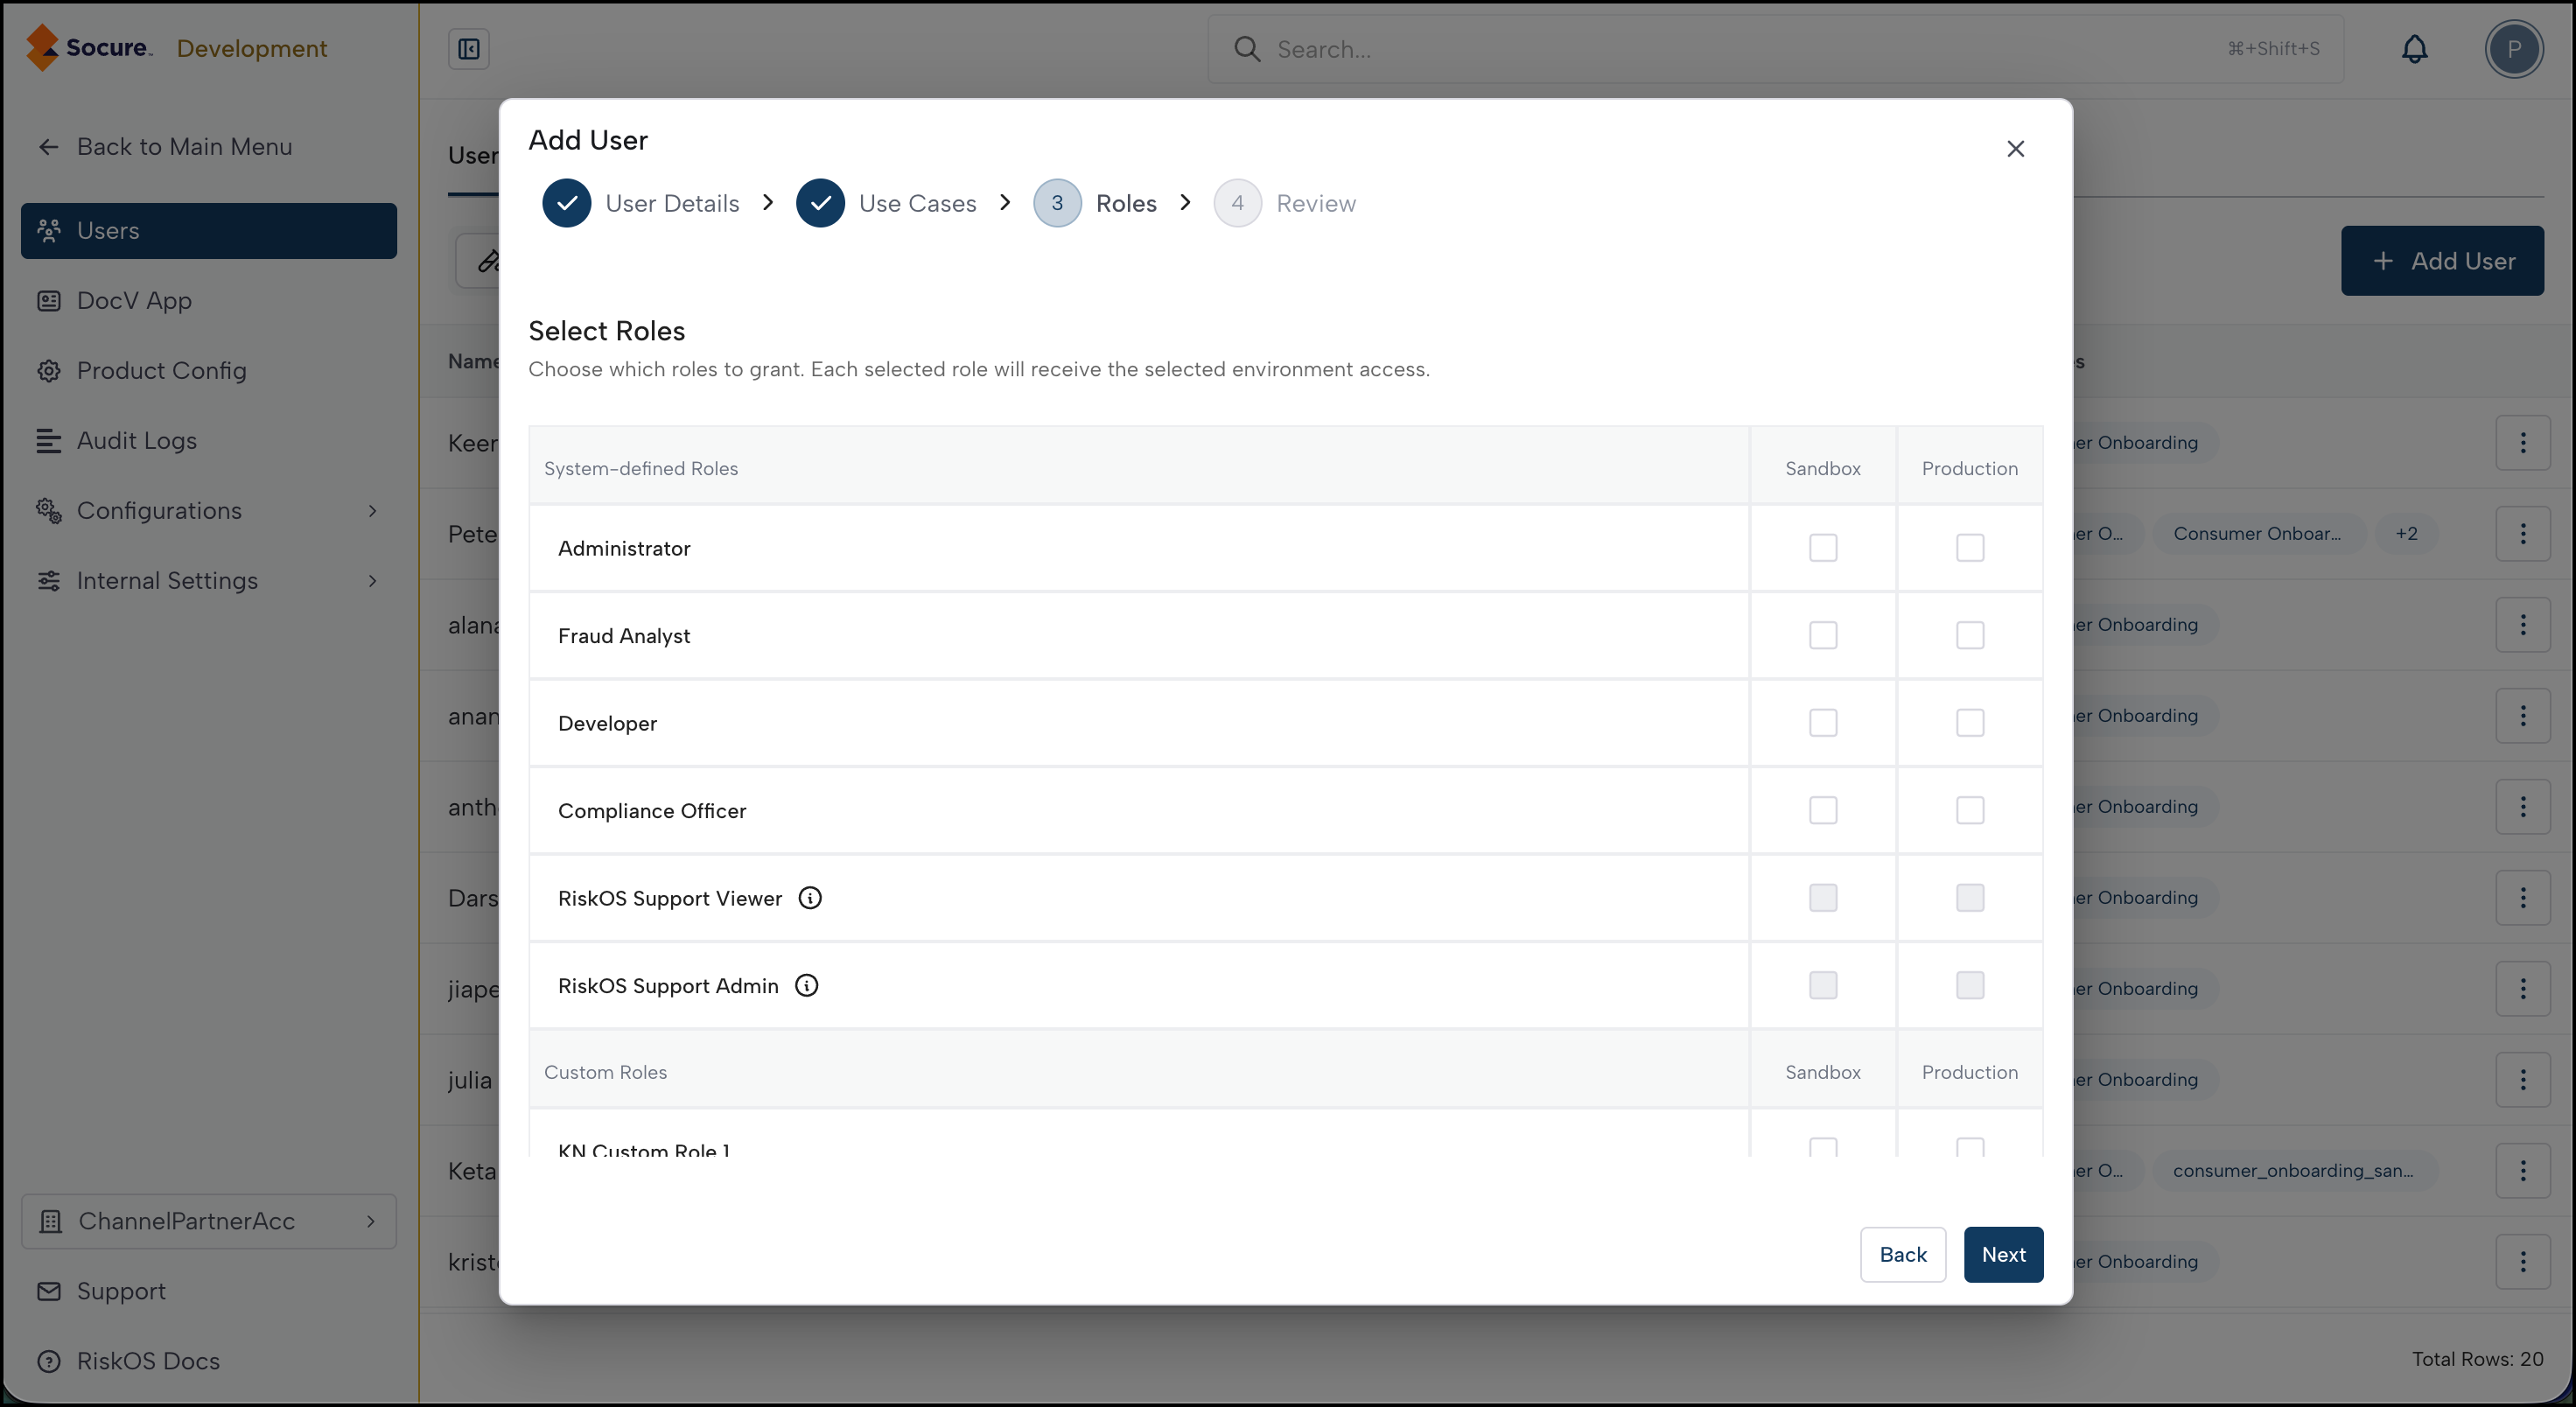
Step 3: Select roles
Assign one or more roles to the user. This step displays a table where:
- Rows list each available role, grouped into System-Defined Roles and Custom Roles sections.
- Columns represent environments (Sandbox and Production).
- Each cell contains a checkbox. Select the checkbox to grant that role in that environment.
At least one role must be enabled in either Sandbox or Production.
For details on what each role grants, see Roles & Permissions. To assign roles to an existing user, see Assign Roles.
Click Next to proceed.
Step 4: Review
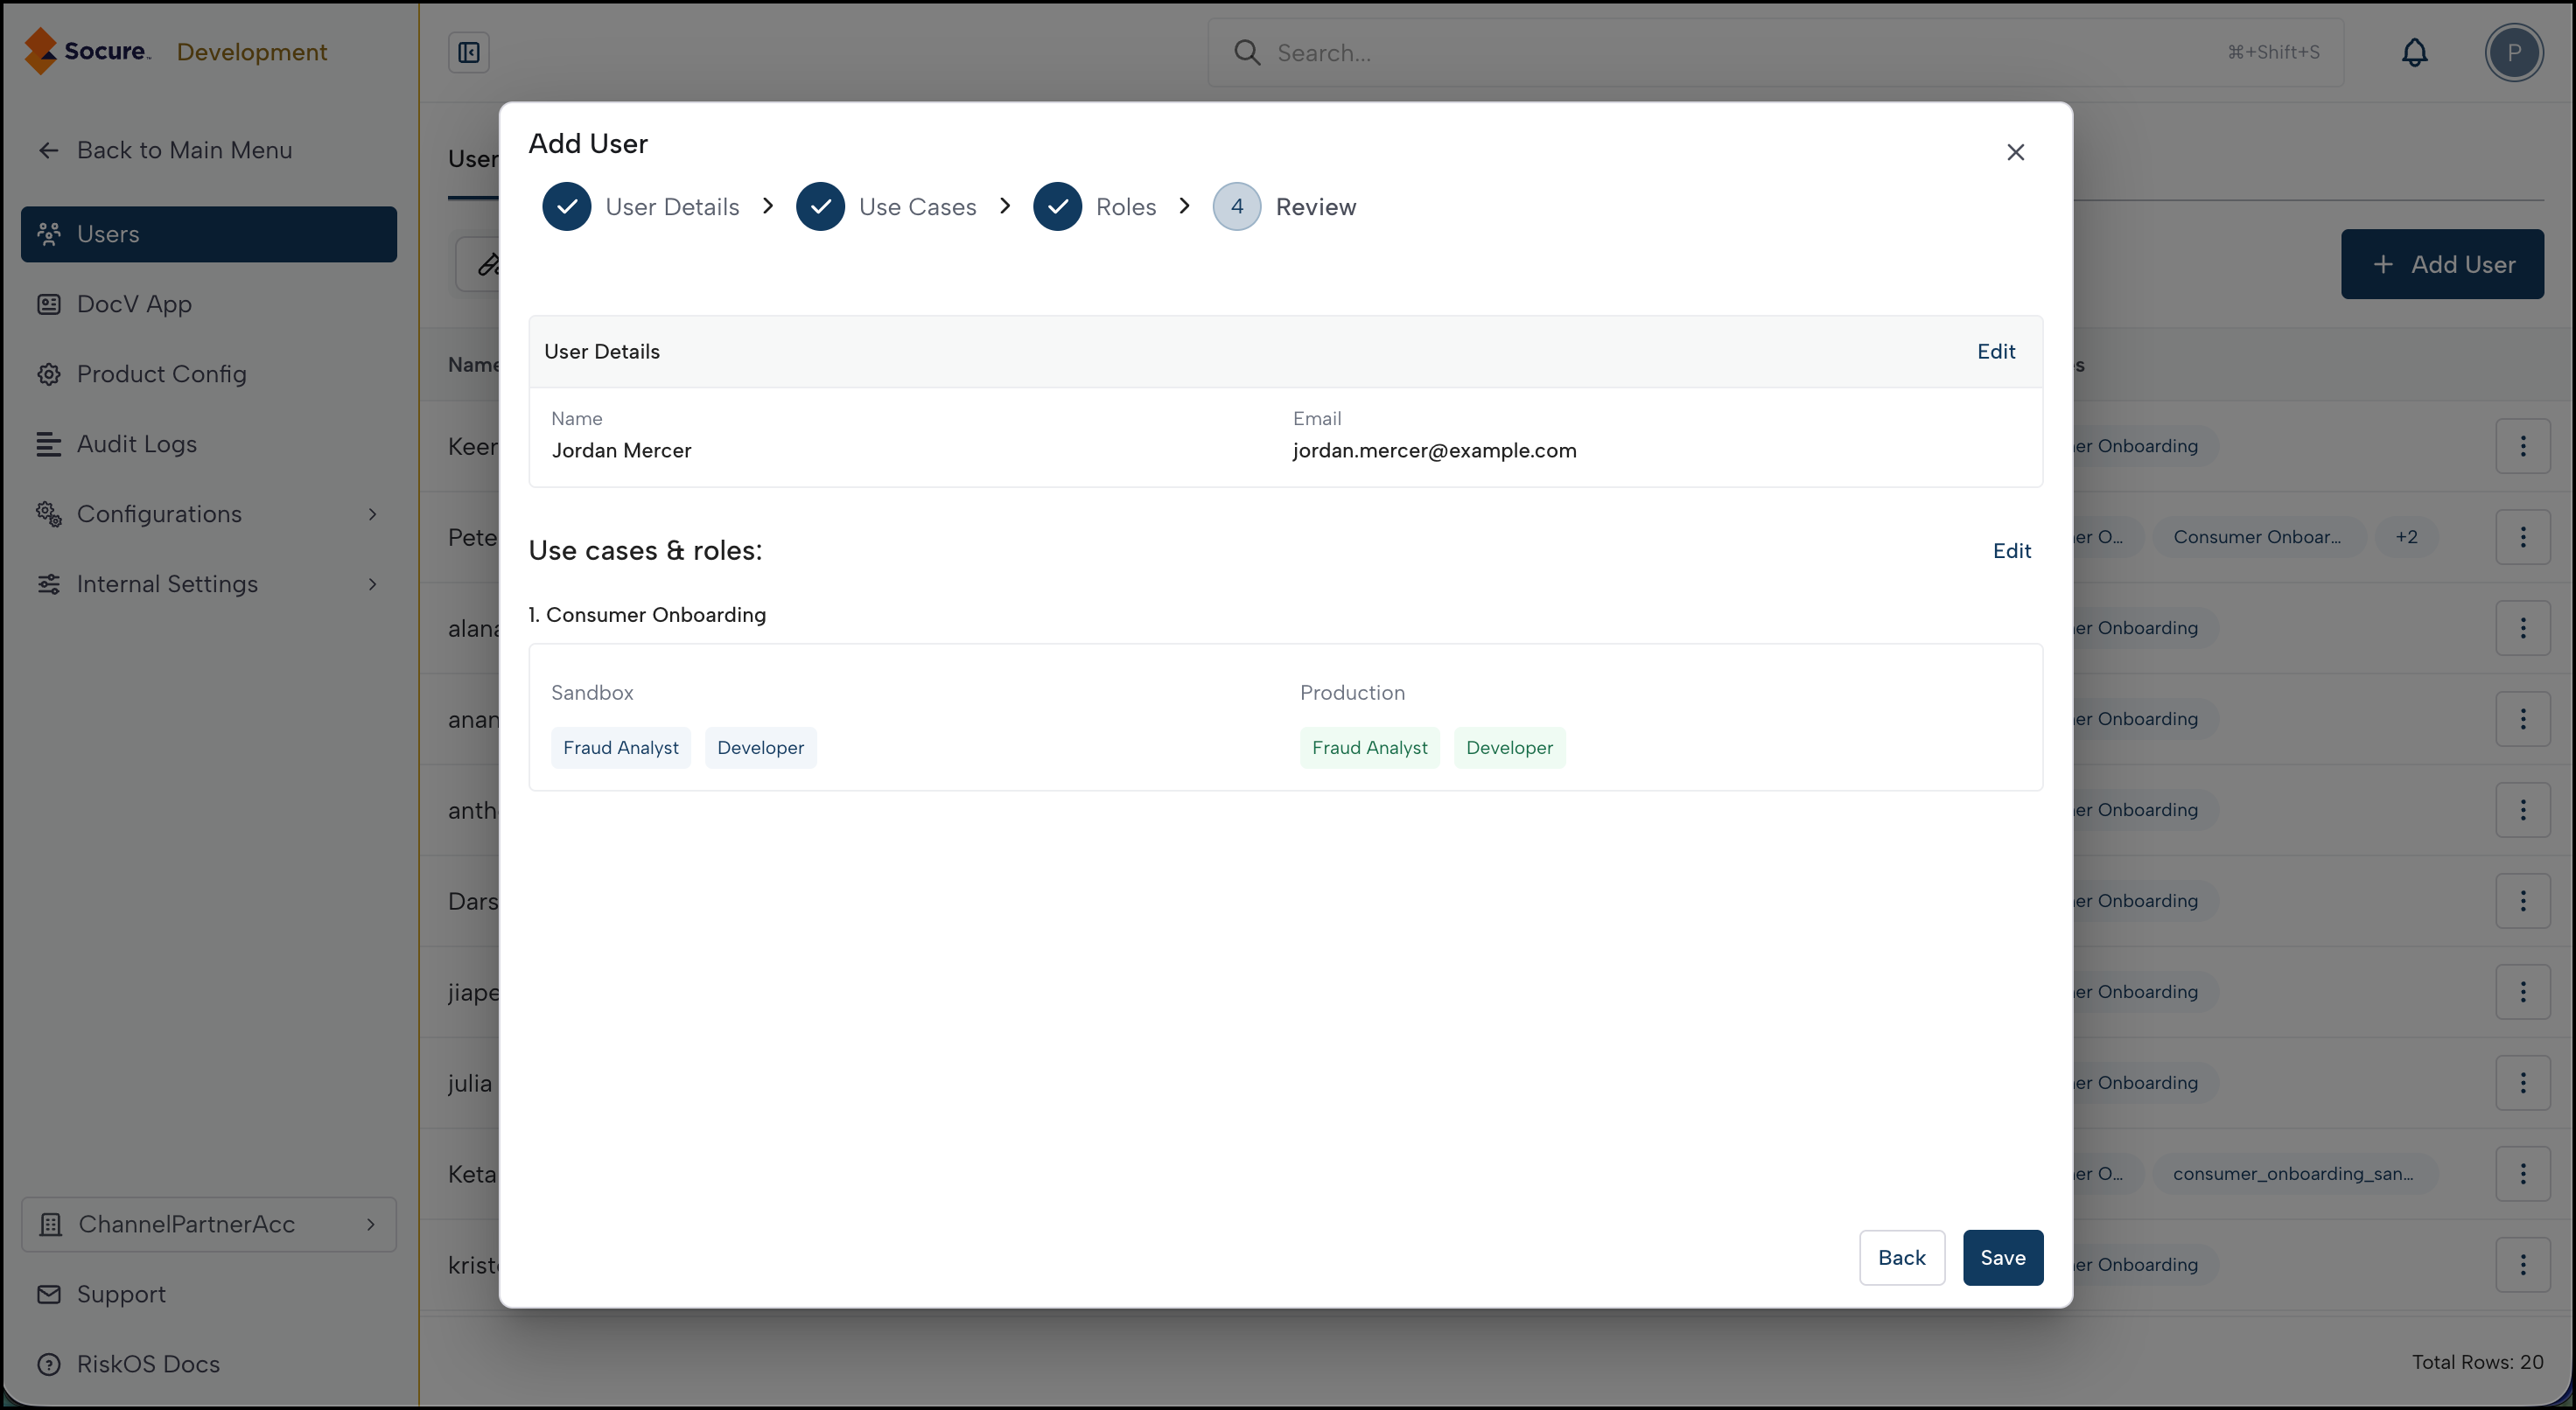
A summary page shows the user's details and their role assignments for each use case and environment:
- User details — Name and email (read-only).
- Use case and role assignments — For each use case, the assigned roles are shown as colored tags:
- Blue tags for Sandbox roles
- Green tags for Production roles
You can click the edit button on any section to jump back to that step and make changes.
Click Save to create the user.
What happens after saving
| Effect | Timing |
|---|---|
| The user is created in the backend. | Immediate |
| The user list refreshes to show the new user. | Immediate (page refresh) |
| The user receives an email invitation (if applicable). | Within minutes, depending on email delivery |
| The user can log in and access features based on their assigned roles. | As soon as they accept the invitation |
Note:
If the save fails, a toast notification appears with the error message. The wizard remains open so you can correct the issue and retry.
Edit a user
- On the Users tab, click the edit button for the user you want to modify.
- The add user wizard opens pre-filled with the user's current details. Since all steps have been previously completed, you can jump directly to any step.
- Make your changes across any of the four steps.
- Click Save to apply the changes.
Important:
The Email field is read-only when editing an existing user. To change a user's email, delete the user and create a new one with the correct email.
What happens after editing
| Effect | Timing |
|---|---|
| Updated roles and use case assignments take effect. | Immediate (on next page load or action) |
| The user list refreshes to reflect changes. | Immediate (page refresh) |
| The user does not receive a notification about role changes. | — |
Delete a user
- Click the action menu for the user you want to remove.
- Select Delete User.
- Confirm the deletion in the dialog.
Important:
Deleting a user is permanent. The user loses access to the account immediately. If you need to restore access, create a new user with the same email.
Troubleshooting
| Issue | Cause | Resolution |
|---|---|---|
| Users page is not accessible | You do not have the Can View or Can Edit permission to Users. | Contact your administrator to grant the permission. |
| User list appears empty | You may be viewing the wrong environment (Sandbox vs. Production). | Check the environment selector at the top of the Users tab and switch if needed. |
| Email validation error when adding a user | The email format is invalid. | Enter a correctly formatted email address (for example, [email protected]). |
| Phone number validation error | The phone number length does not match the selected country code. | Verify the country code is correct and enter the right number of digits for that country. |
| Cannot change a user's email | Email is a read-only field after user creation. | Delete the user and create a new one with the correct email address. |
| Role changes not reflected | You may have edited roles in the wrong environment. | Switch between Sandbox and Production in the environment selector to verify the roles in each. |
| User cannot access expected features | The user's assigned role does not include the required permission. | Edit the user and assign a role with the correct permissions, or create a custom role. |
| Save fails with a backend error | A required field is missing or the backend rejected the input. | Review the error message in the toast notification, correct the issue, and retry. |
Related articles
| Topic | Guide |
|---|---|
| Understand the UAM model | Users & Roles Overview |
| Create and manage roles | Roles & Permissions |
| Assign or change roles for existing users | Assign Roles |
| Review access governance best practices | Access Governance Best Practices |
| Configure product settings | Product Configuration |
Updated 4 months ago