Review Cases
Review cases in RiskOS™ using the Case Preview panel and Single Case View to make informed identity verification decisions.
Case Preview panel
The Case Preview panel provides a condensed summary of a case, allowing you to quickly understand key details.
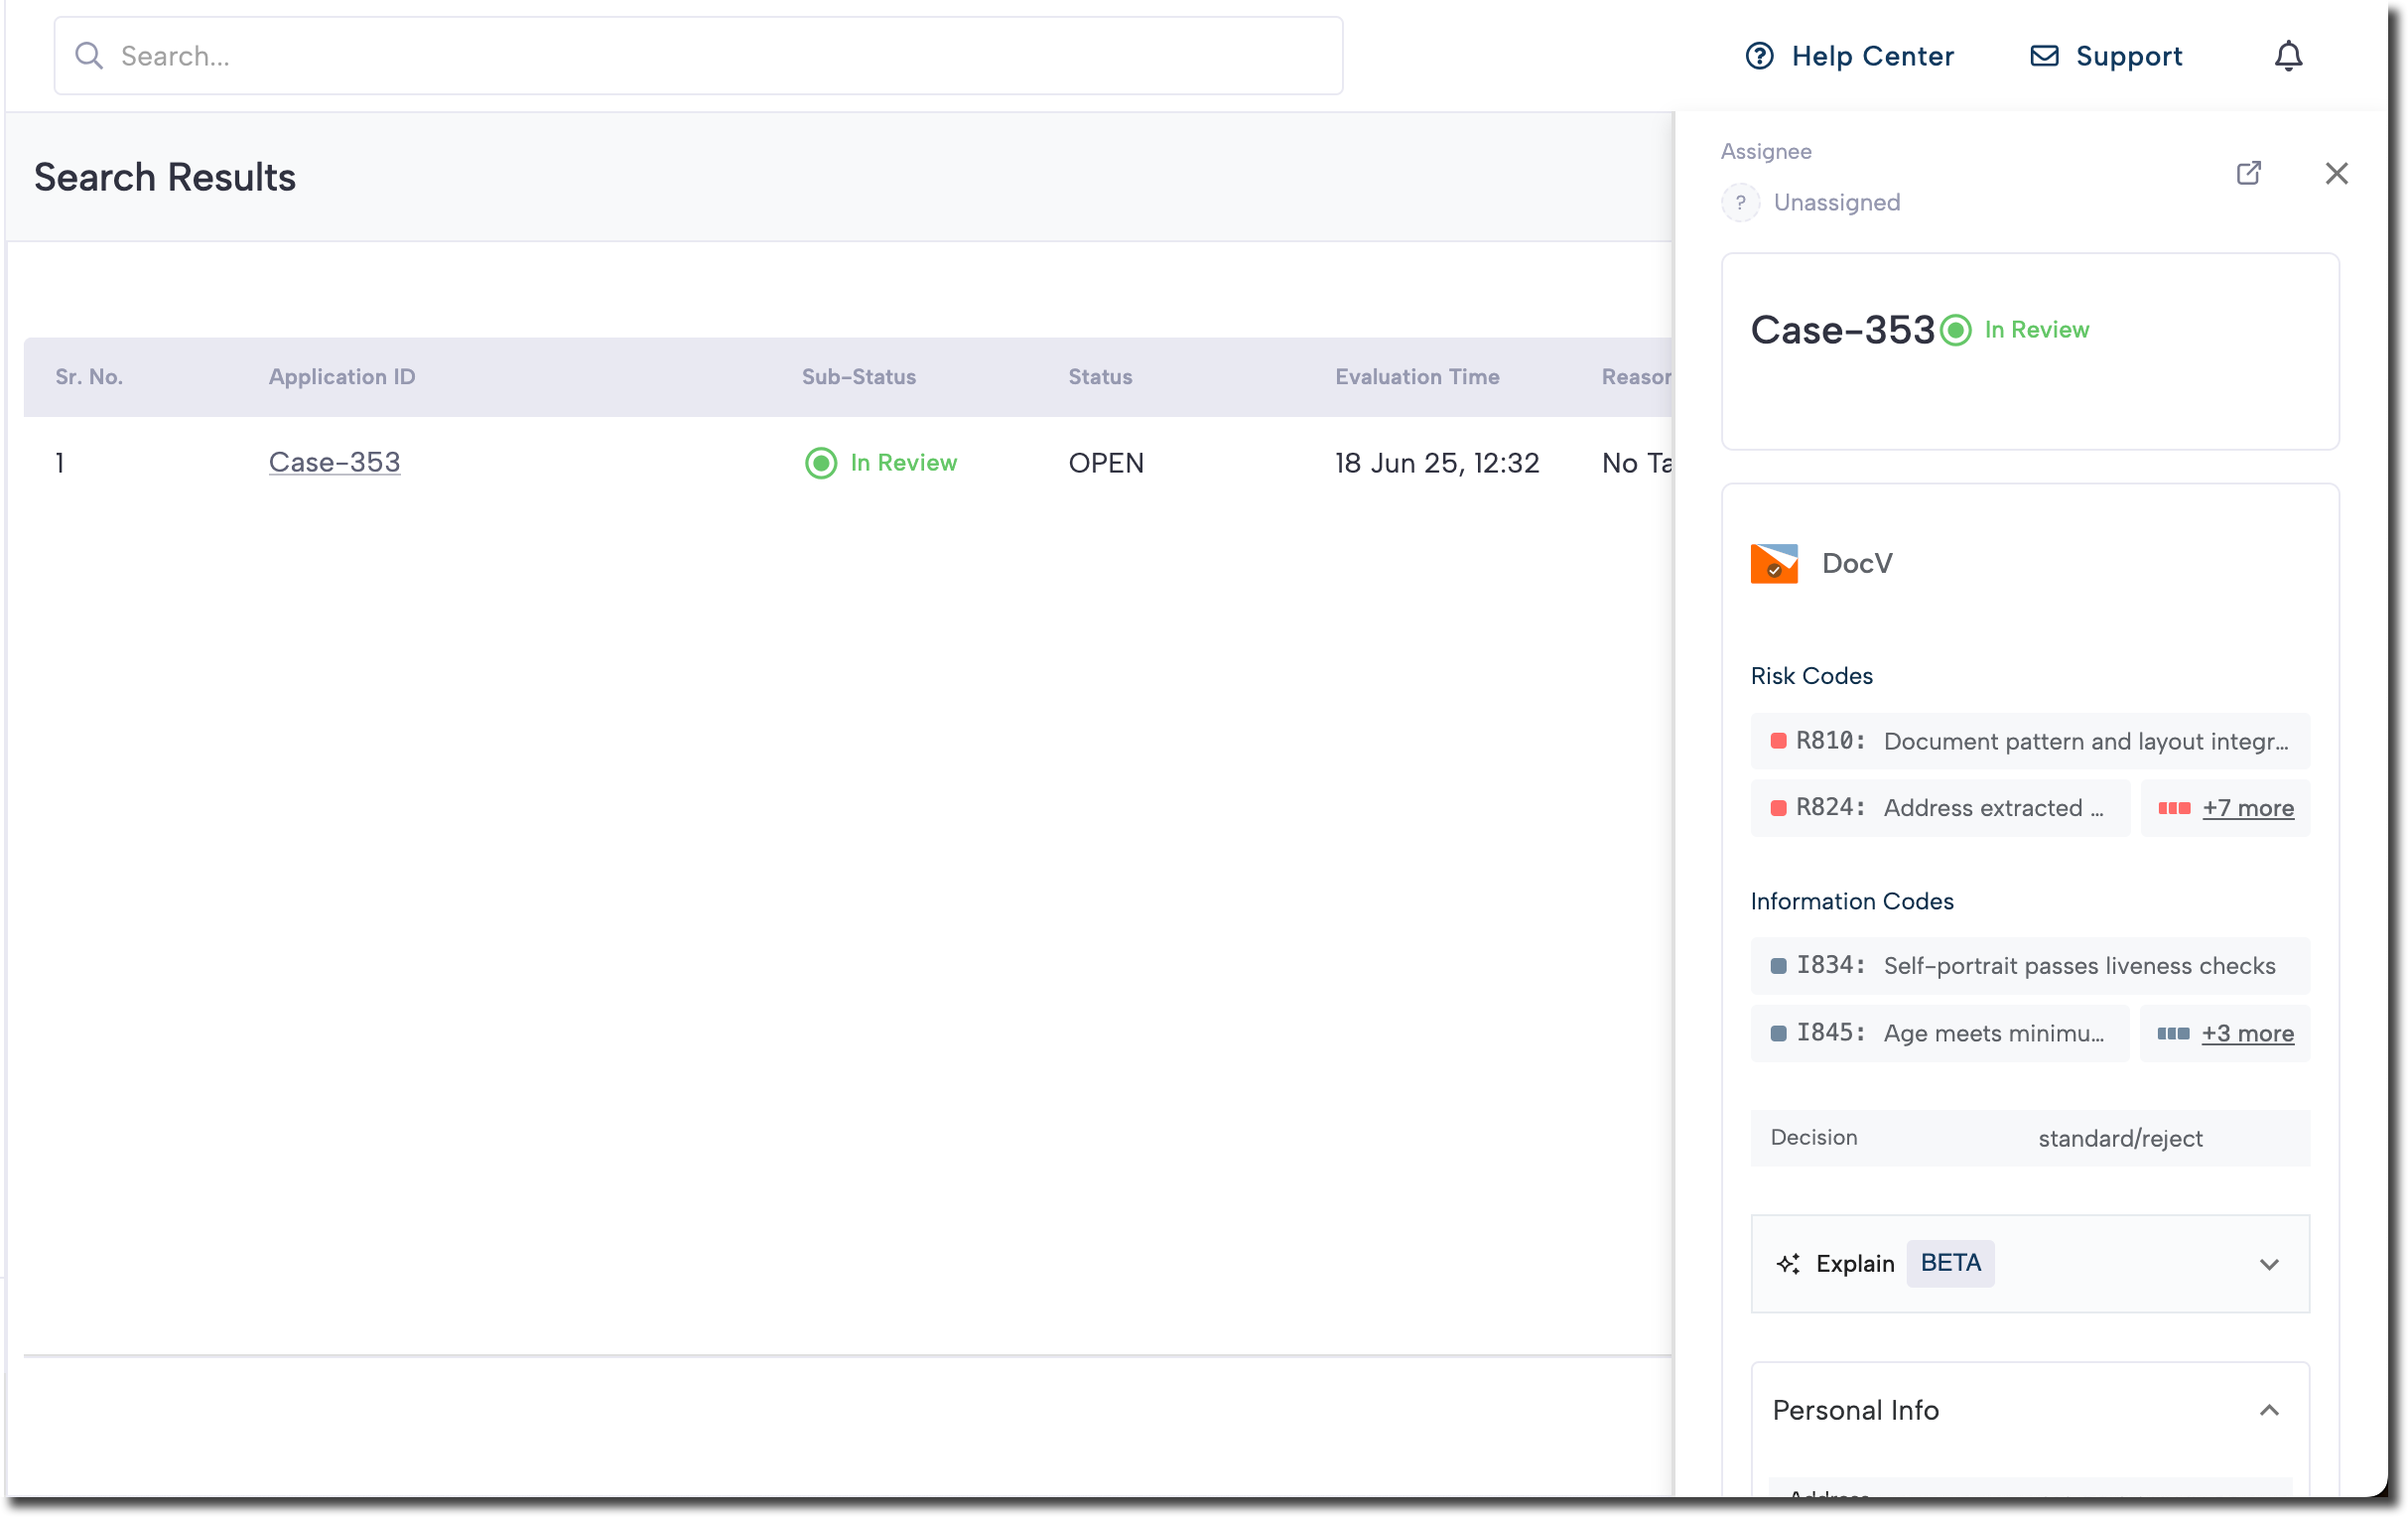
To open the Case Preview panel, select a case from the case list. You can then use the Case Preview panel to perform the following actions:
| Feature | Description |
|---|---|
| Notes | Add notes to document your thoughts and findings while investigating a case. |
| Add attachments | Upload up to 10 files (max 50MB each) per note as supporting evidence. Files can be renamed before finalizing a decision but cannot be edited or deleted afterward. Supported file types include:
|
| Status | Classify cases based on their progress or required actions. |
| Tag | Categorize or highlight key attributes of cases, helping users quickly identify characteristics or risk factors. |
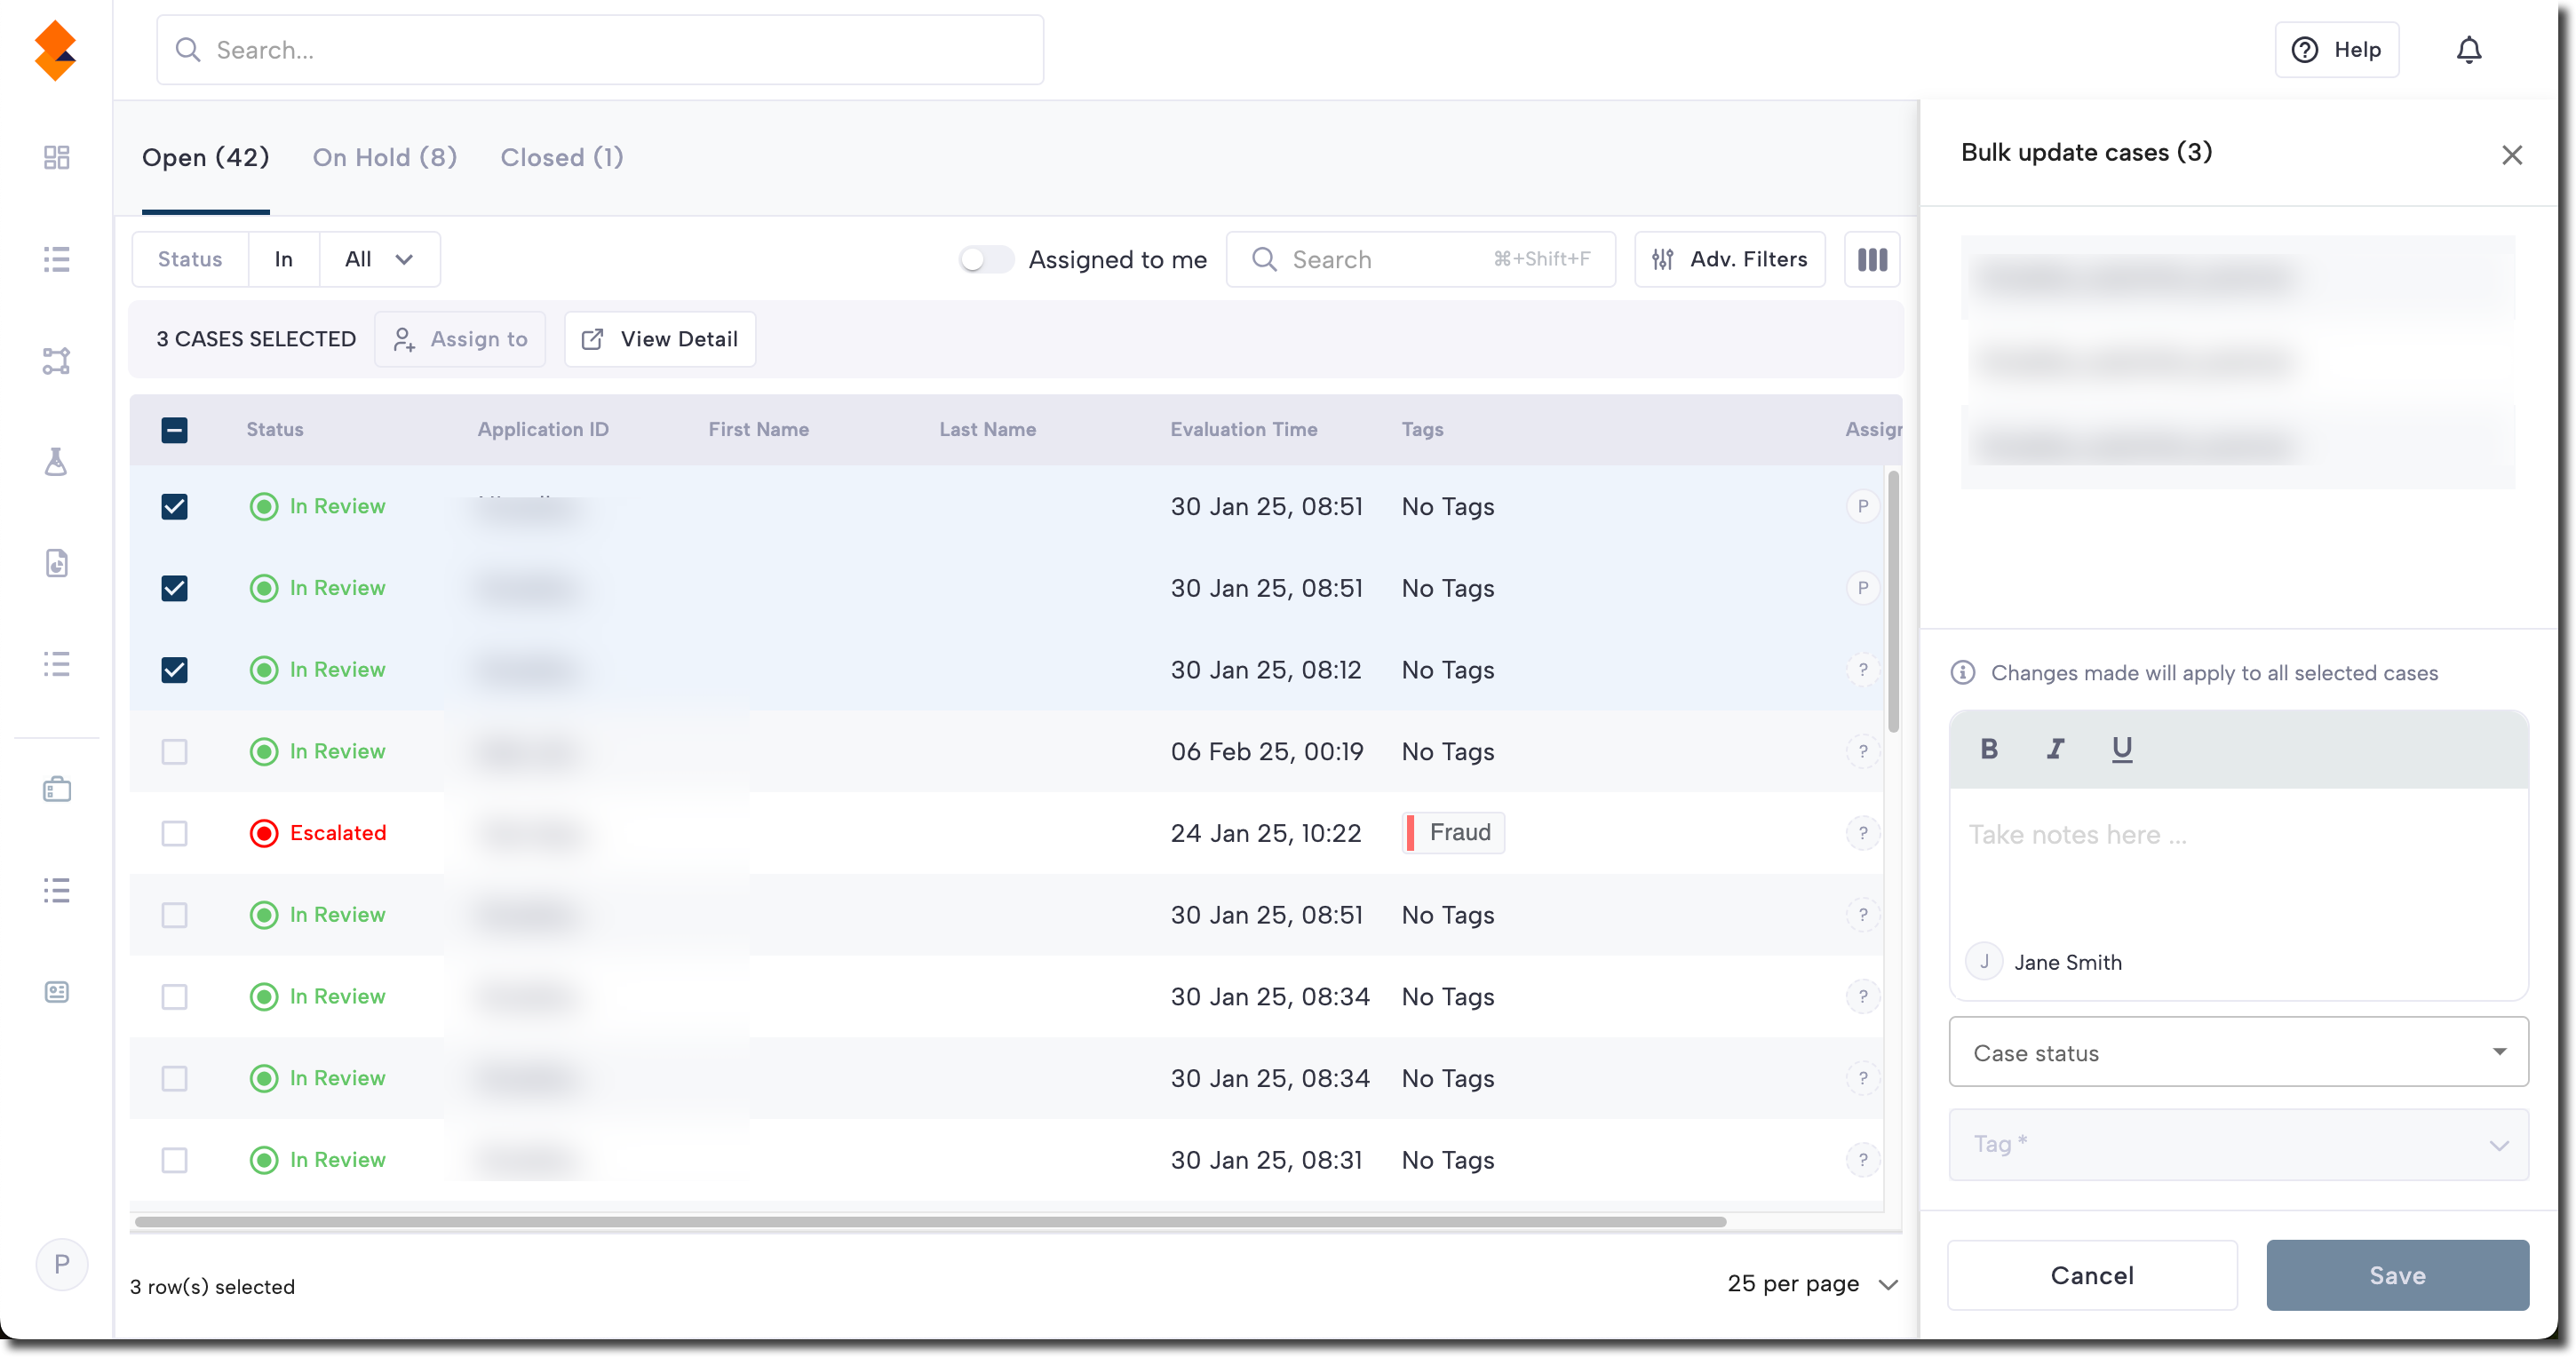
Bulk update cases
To bulk update cases, select multiple cases from a Queue, then use the Case Preview panel to update their notes, statuses, or tags.
Single Case View
The Single Case View provides a detailed summary of a case, including:
To open the Single Case View, click a case’s Application ID in a Queue. You can then use the side panel to take notes, attach files, update the status, or apply tags.
These features, combined with tools for documenting case history and in-depth findings, enable reviewers to reconstruct the full story of each case.
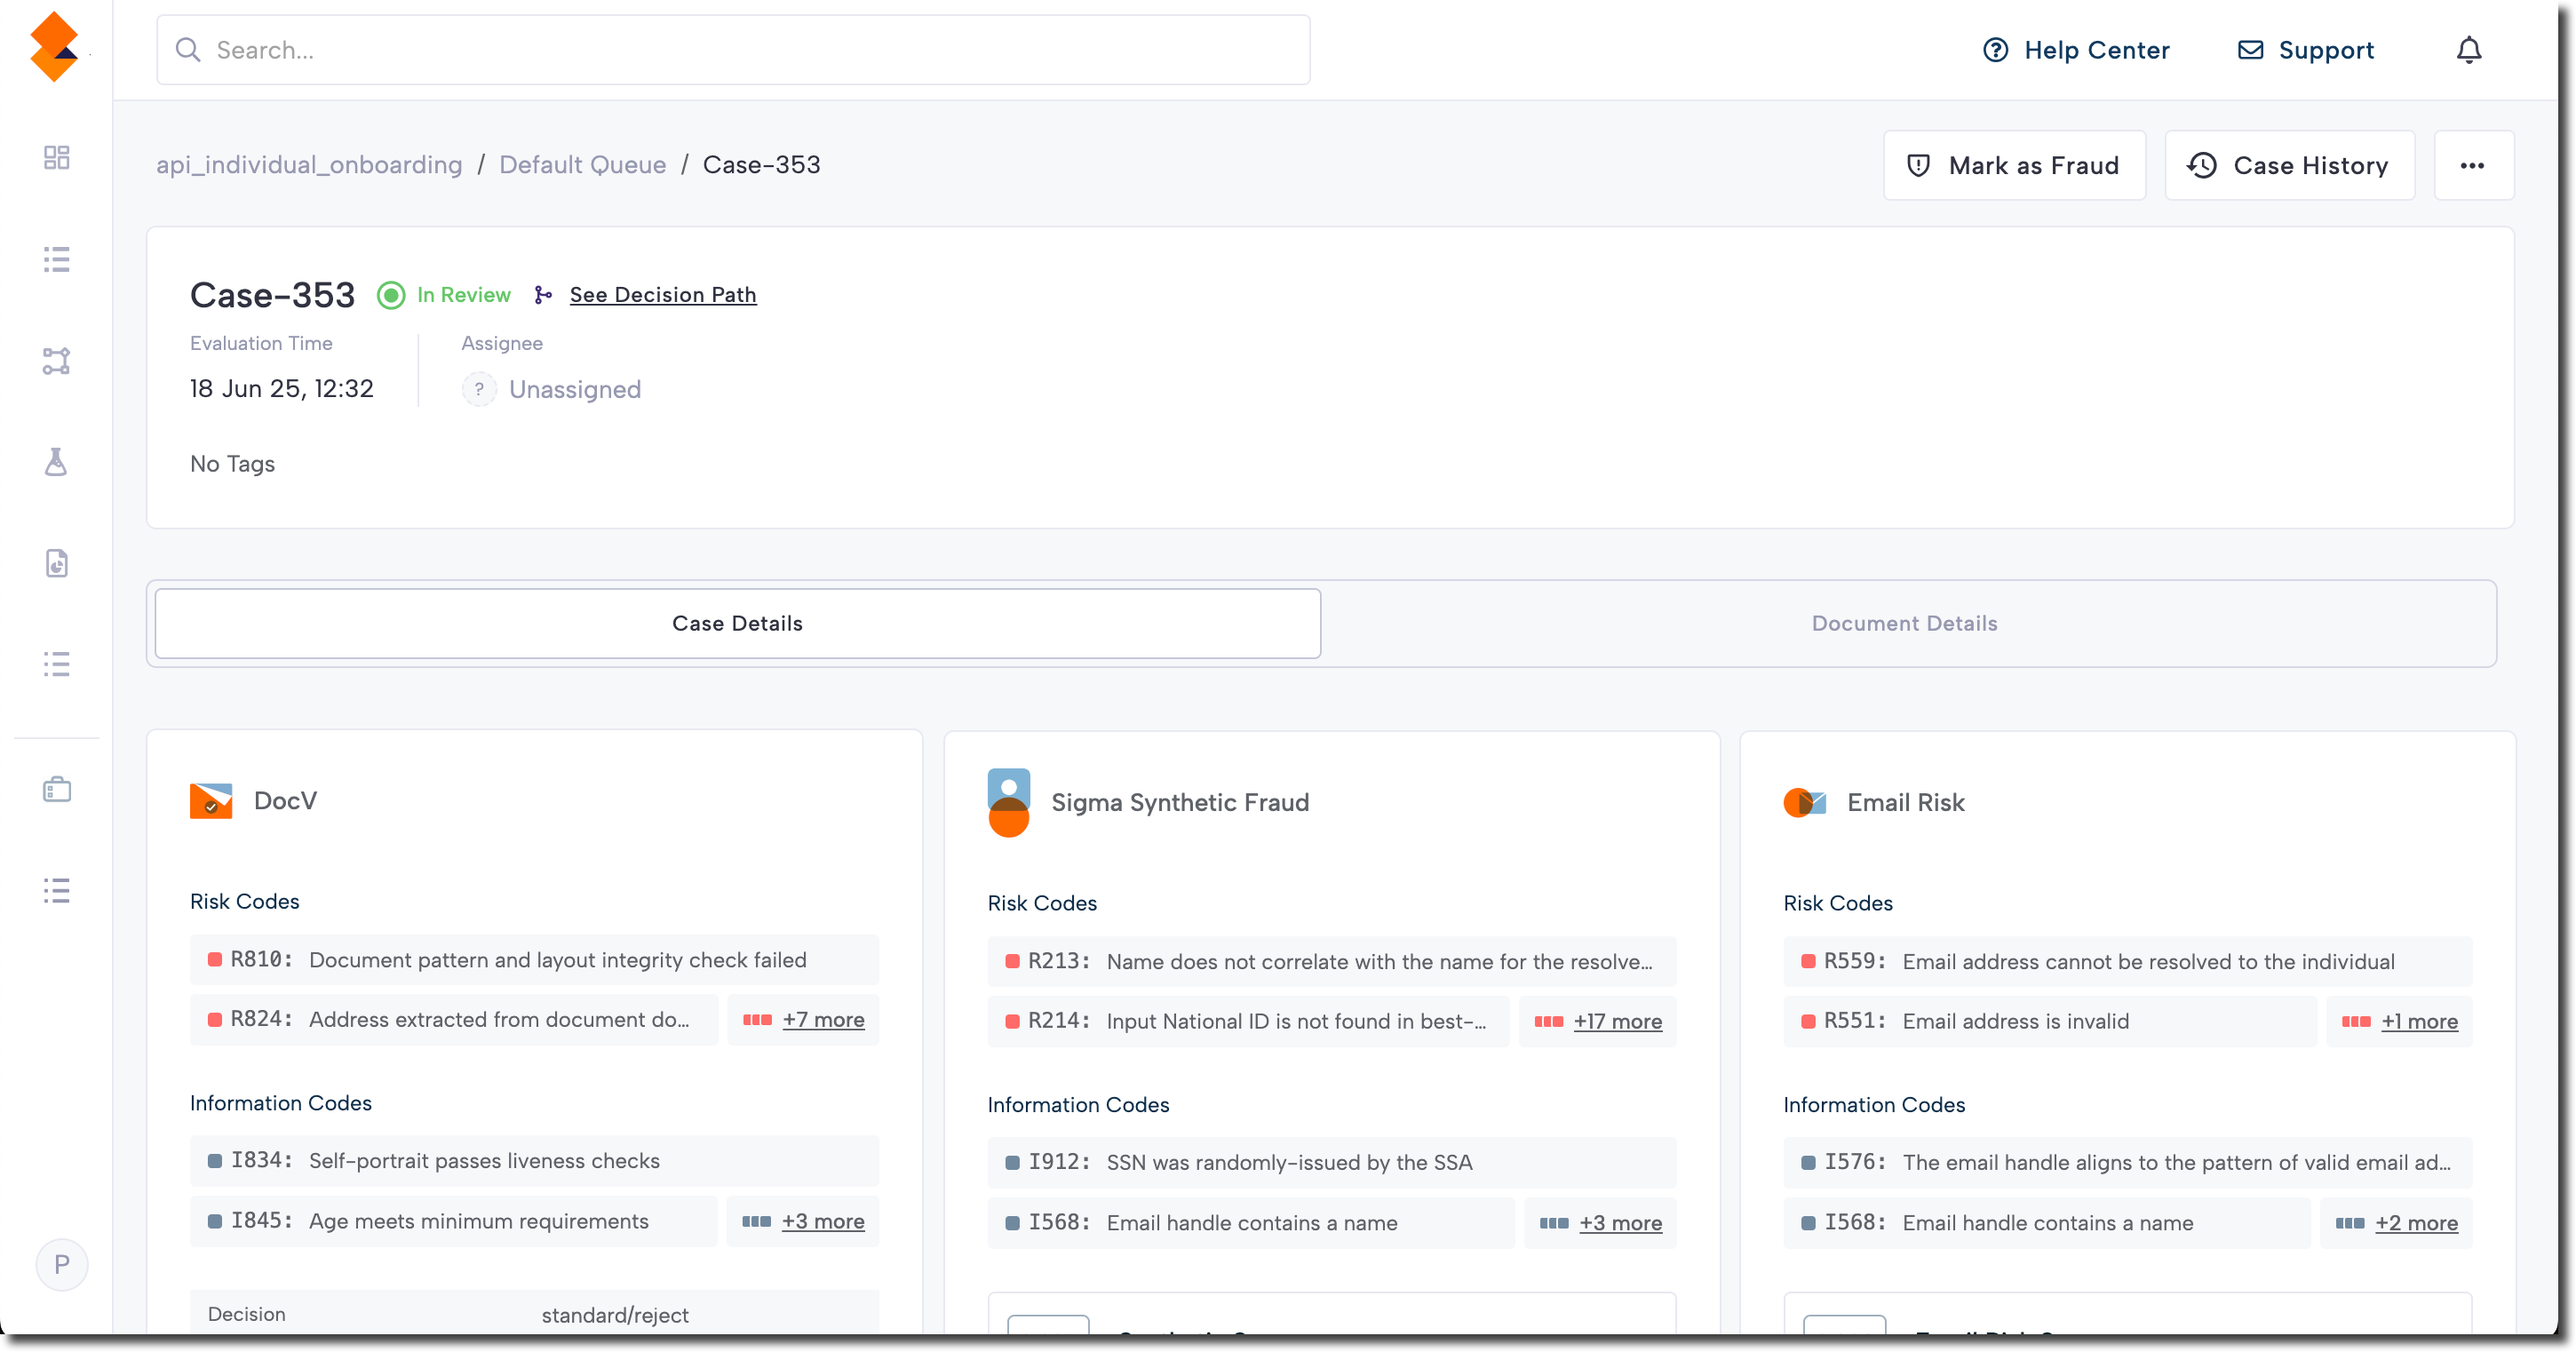
Single Case View top panel
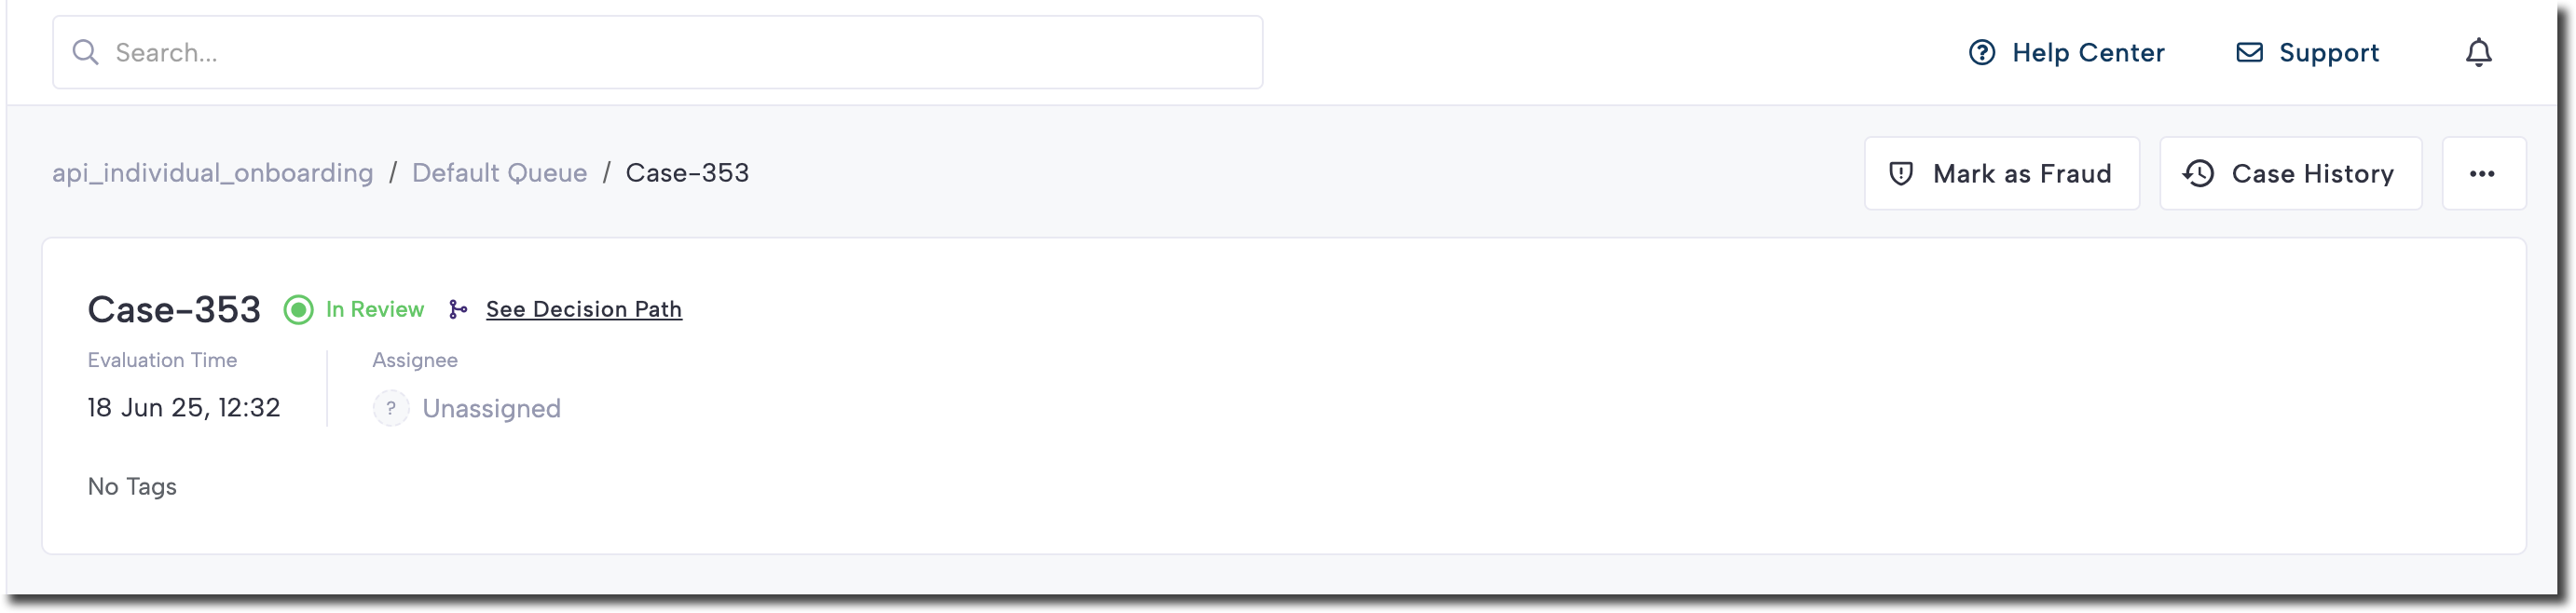
The top panel is fixed across every Case View page and includes:
- The case ID
- The applicant’s name (or card owner / main individual involved)
- The current status of the case
- Links to past case history
- The user assigned to the case
- A link to follow the decision path
Together, these elements give reviewers a quick overview and direct access to commonly used features.
Top panel quick actions
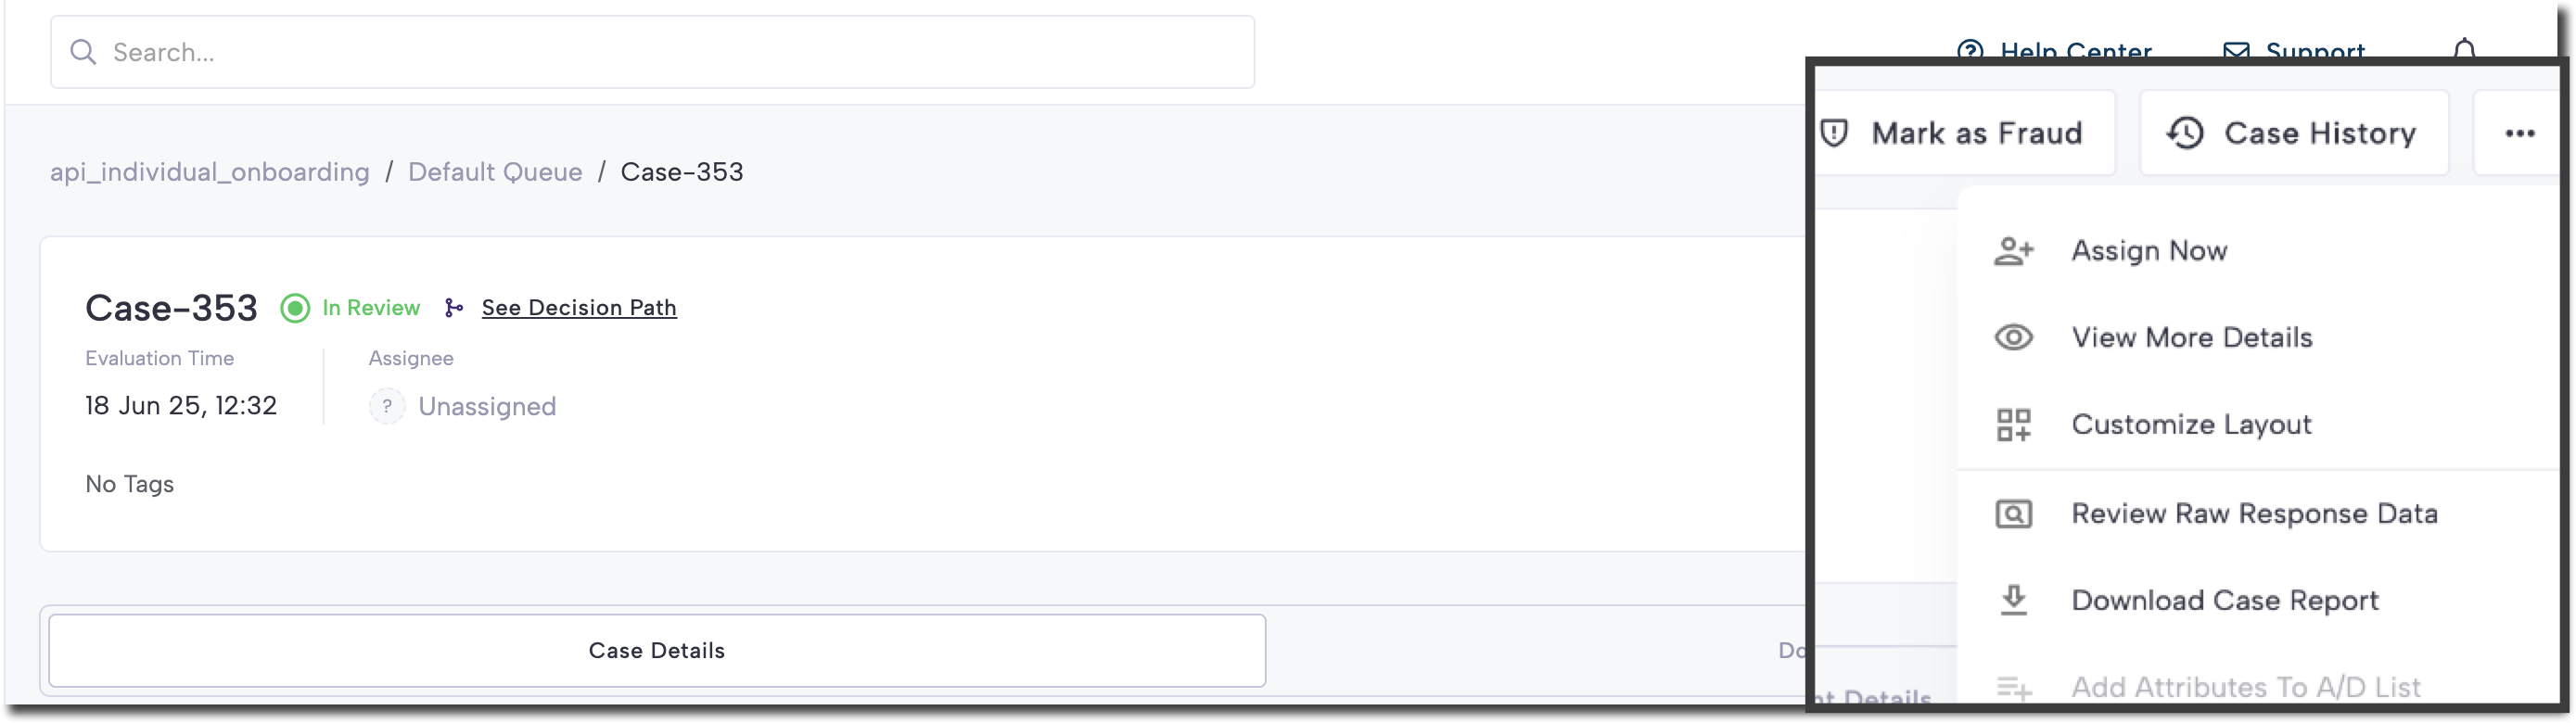
Click the three-dot menu at the top of the Single Case View to access quick actions:
- Assign Now: Assign the case to a specific user.
- Customize Layout: Rearrange the tile view to fit your preferences.
- Review Raw Response Data: View the evaluation record in JSON format.
- Download Case Report: Export key case information as a PDF.
- Add Attributes To A/D List: Add attributes to existing Allow or Deny Lists.
Model scores
The body of the Single Case View organizes each enrichment and fraud module into its own tile — for example, Address Risk, Email Risk, Phone Risk, Sigma Identity Fraud, Sigma Synthetic Fraud, and First Party Fraud. Each tile summarizes the results that module returned for the evaluation.
When a module is backed by a machine learning model, its tile also displays model scores. Expand a score to reveal the model version that produced it, so you always know which model generated a given result.
RiskOS™ groups model scores by type:
| Model type | Description |
|---|---|
| Active | The score from the model version currently live for your account. This is the score that contributes to the case decision. |
| Challenger | The score from a candidate model that runs in shadow mode alongside the active model. Challenger scores let you compare a new model against the active one without affecting live decisions, following the same Champion–Challenger approach used for workflow experiments. |
| Latest | The score from the most recent model version available for the module. |
A module tile shows one or more of these types, depending on the models configured for your account. Each entry lists its model version next to the score.
Tip:
If your account has GenAI Explainability enabled, expand a model score to view a plain-language explanation of the factors behind it. See GenAI Explainability for details.
Case History
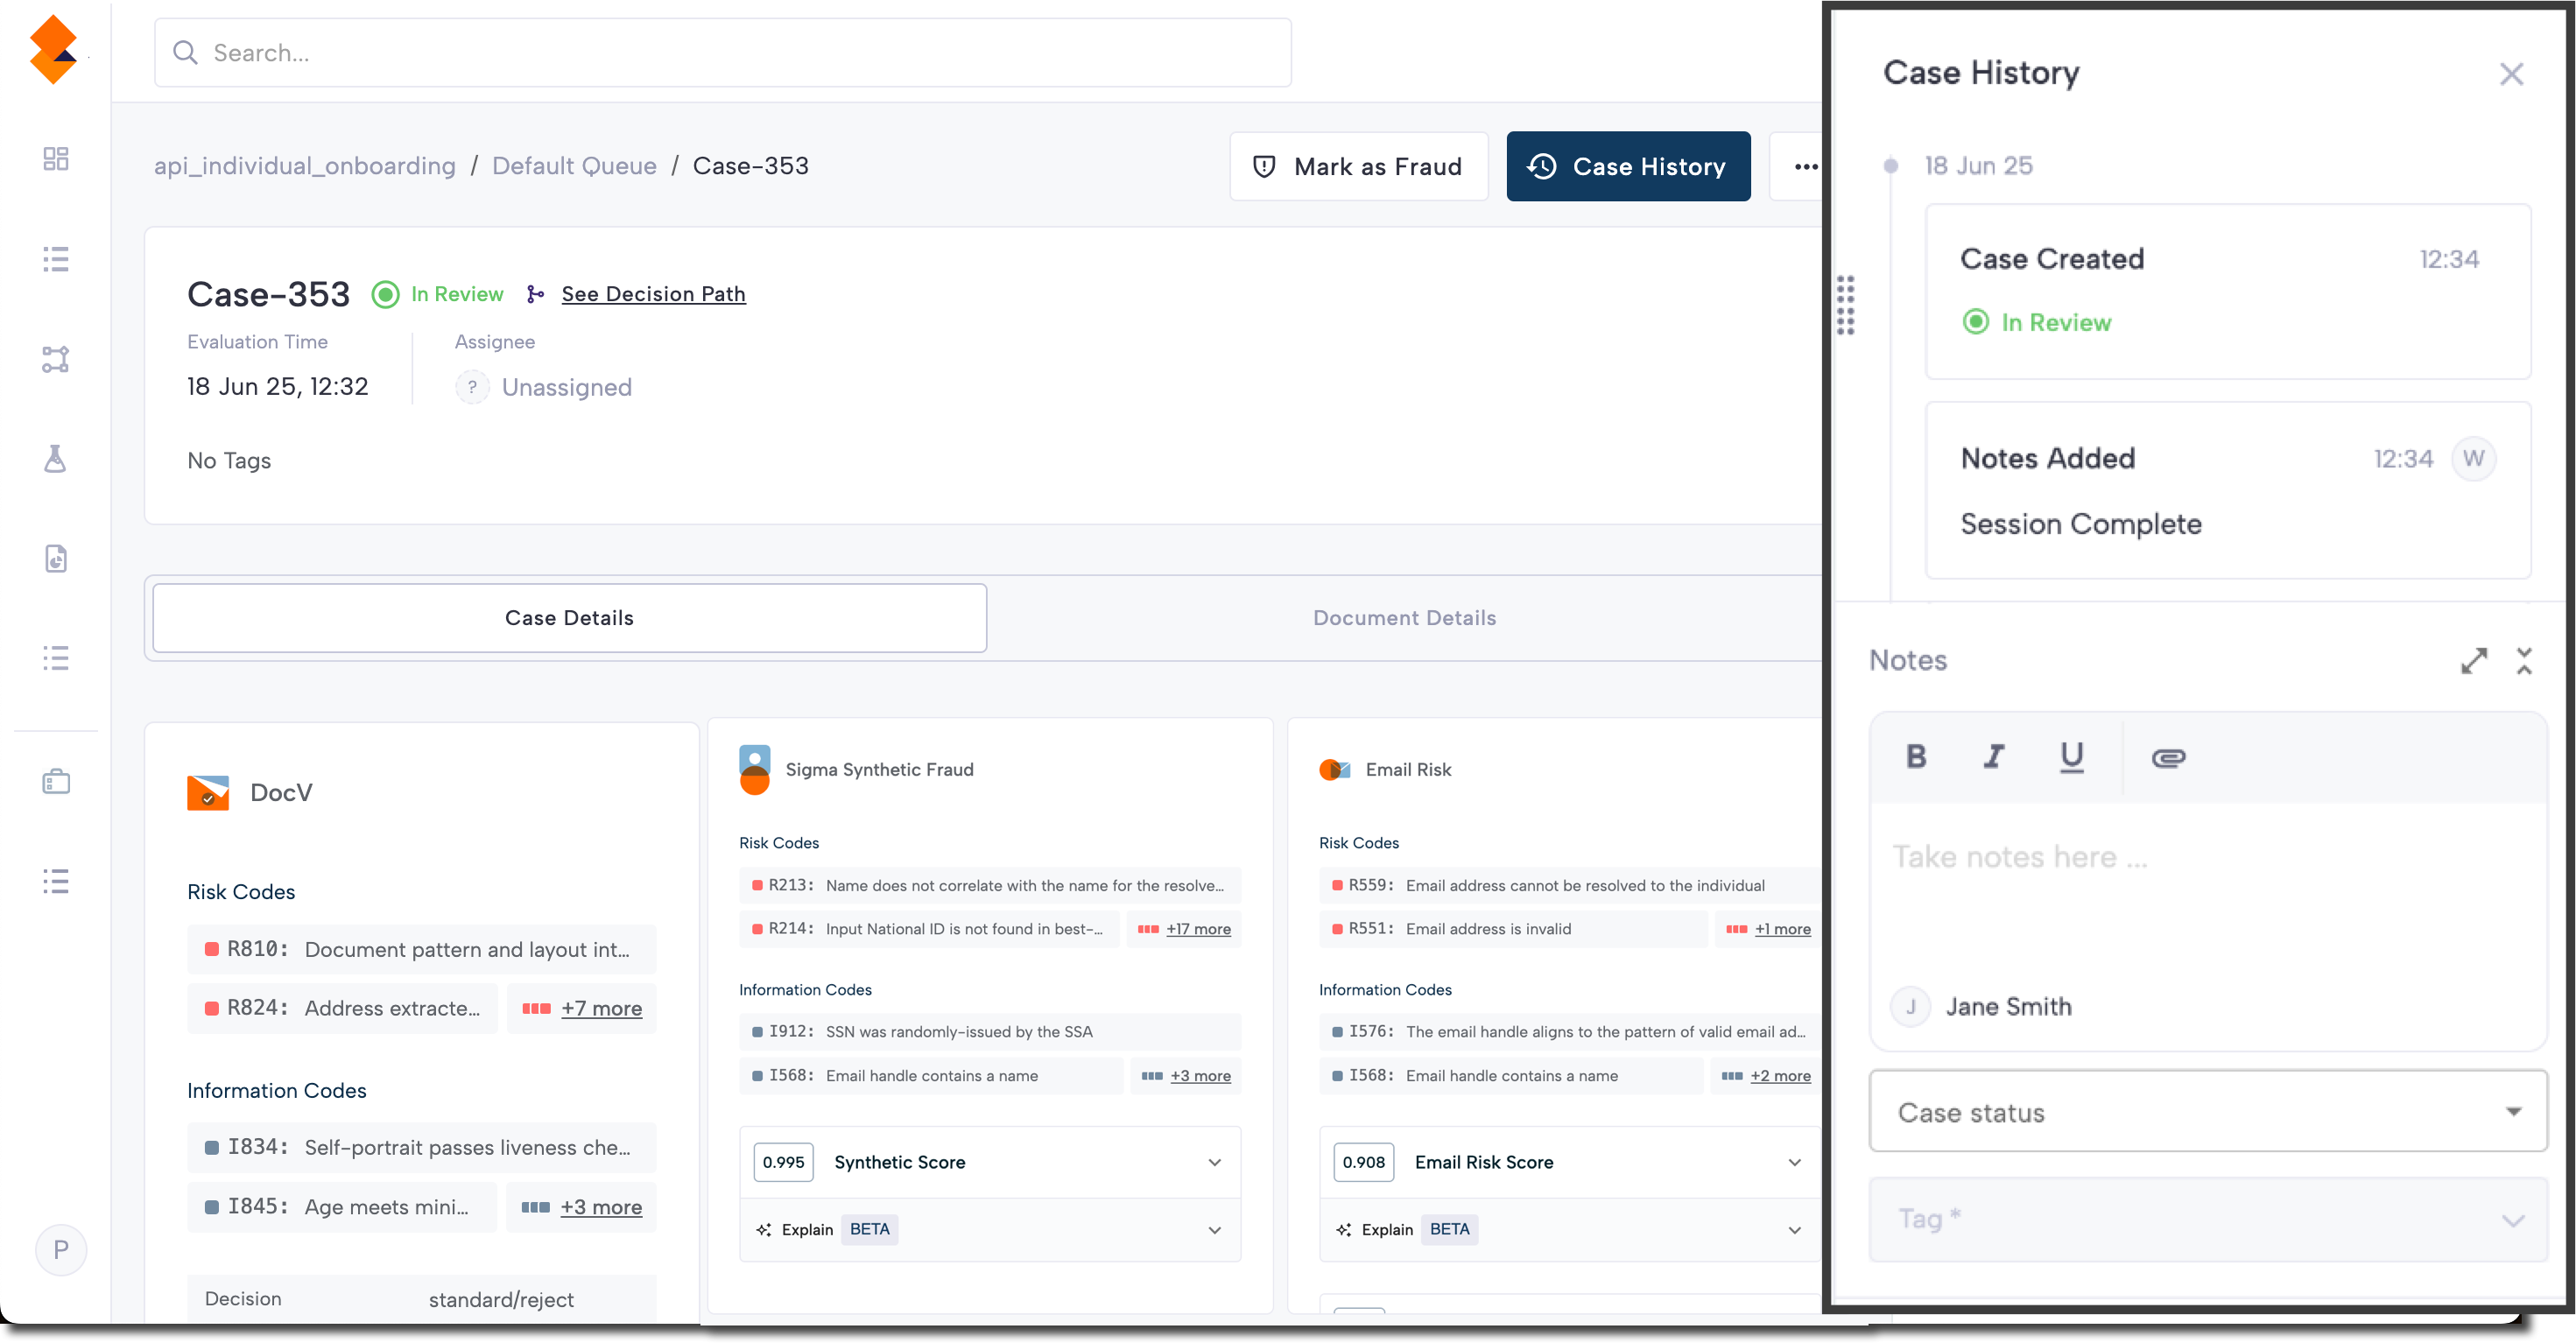
The Case History side panel records all updates to a case, allowing you to quickly understand past activity. Open it by clicking Case History in the top panel.
Each entry in the Case History may include:
- Case notes
- Assignment updates
- Status updates
- Tag updates
The following actions are available in the Case History side panel:
| Feature | Description |
|---|---|
| Notes | Add notes to document your thoughts and findings while investigating a case. |
| Add attachments | Upload up to 10 files (max 50MB each) per note as supporting evidence. Files can be renamed before finalizing a decision but cannot be edited or deleted afterward. Supported file types include:
|
| Status | Classify cases based on their progress or required actions. |
| Tag | Categorize or highlight key attributes of cases, helping users quickly identify characteristics or risk factors. |
Updated 4 days ago