Create a List
Create allow or deny lists in RiskOS™ to automate identity verification decisions with encryption, fuzzy matching, and bulk uploads.
To create a new list, go to Reason Codes & Lists > Allow/Deny Lists in the left menu. The system displays all existing lists in a table showing their name, description, last modified date, creation date, and the user who last modified them.
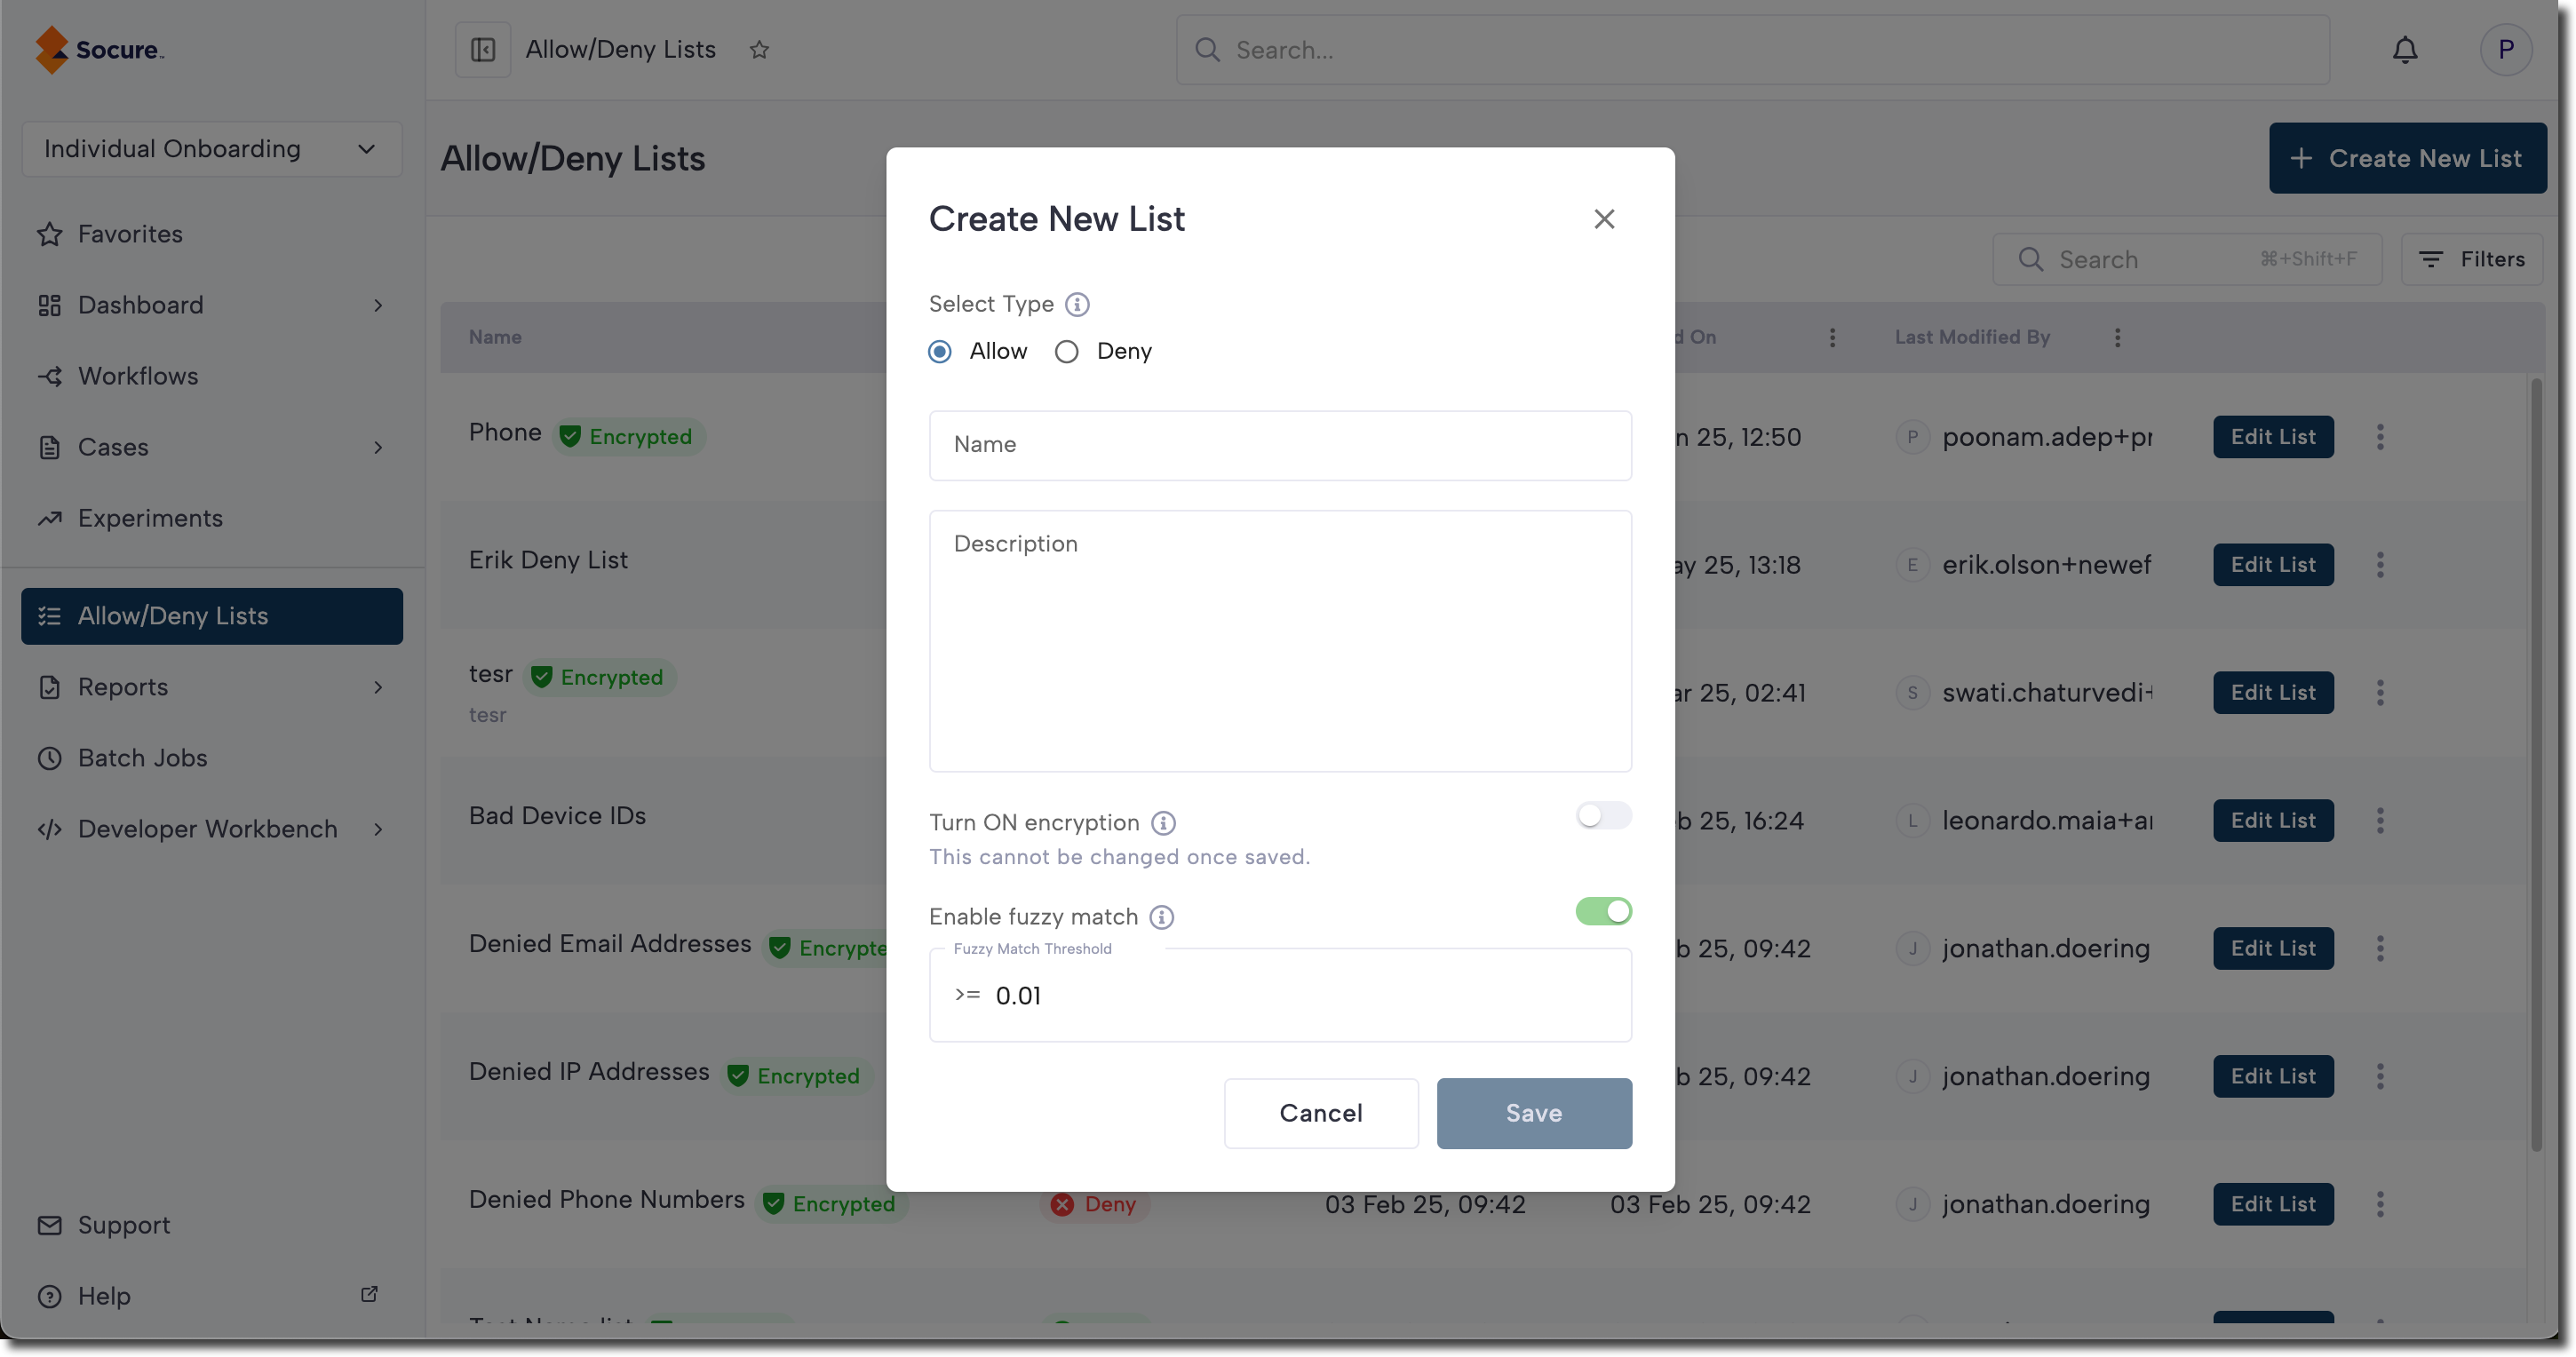
Click the Create New List button in the top-right corner. Each list must have a name. A description is optional and can be used to provide details about the list or its intended use. Select whether the list type is Allow or Deny.
Encryption
When creating a new list, you can choose whether to encrypt the list data. Encryption adds an additional layer of security and privacy for sensitive information. It helps protect data in the event of a breach or unauthorized access.
Note:
Once a list is created, the encryption setting cannot be changed.
Fuzzy matching
Fuzzy matching is configured at the list level. To enable it, turn on the Enable fuzzy match toggle when creating the list.
Note:
The fuzzy matching option is only available if Encryption is turned off.
By default, the fuzzy match threshold is set to ≥0.01, but you can customize the threshold to fit your needs.
After configuring your settings, the new list will be created and added to the top of the listing page.
Edit the list name
To edit a list name:
- Click the three dots menu next to the list.
- Select Edit List Info.
- Update the name and click Save.
The new name will be applied immediately.
Add entries to the list
To add entries to a new or existing list:
- Click Edit List to open the list’s details.
- Click Add Entry in the top-right corner.
- Enter a value, such as an email or phone number.
- Press Enter to add additional rows.
- Click the trash icon to delete a row.
- When finished, click Save Changes.
Note:
- To edit existing entries, click Edit List, then Edit Entries.
- Duplicate values are not allowed.
- For lists with more than 1,000 entries, export to CSV, edit the file, and re-import it to replace all entries.
Bulk import/export list entries
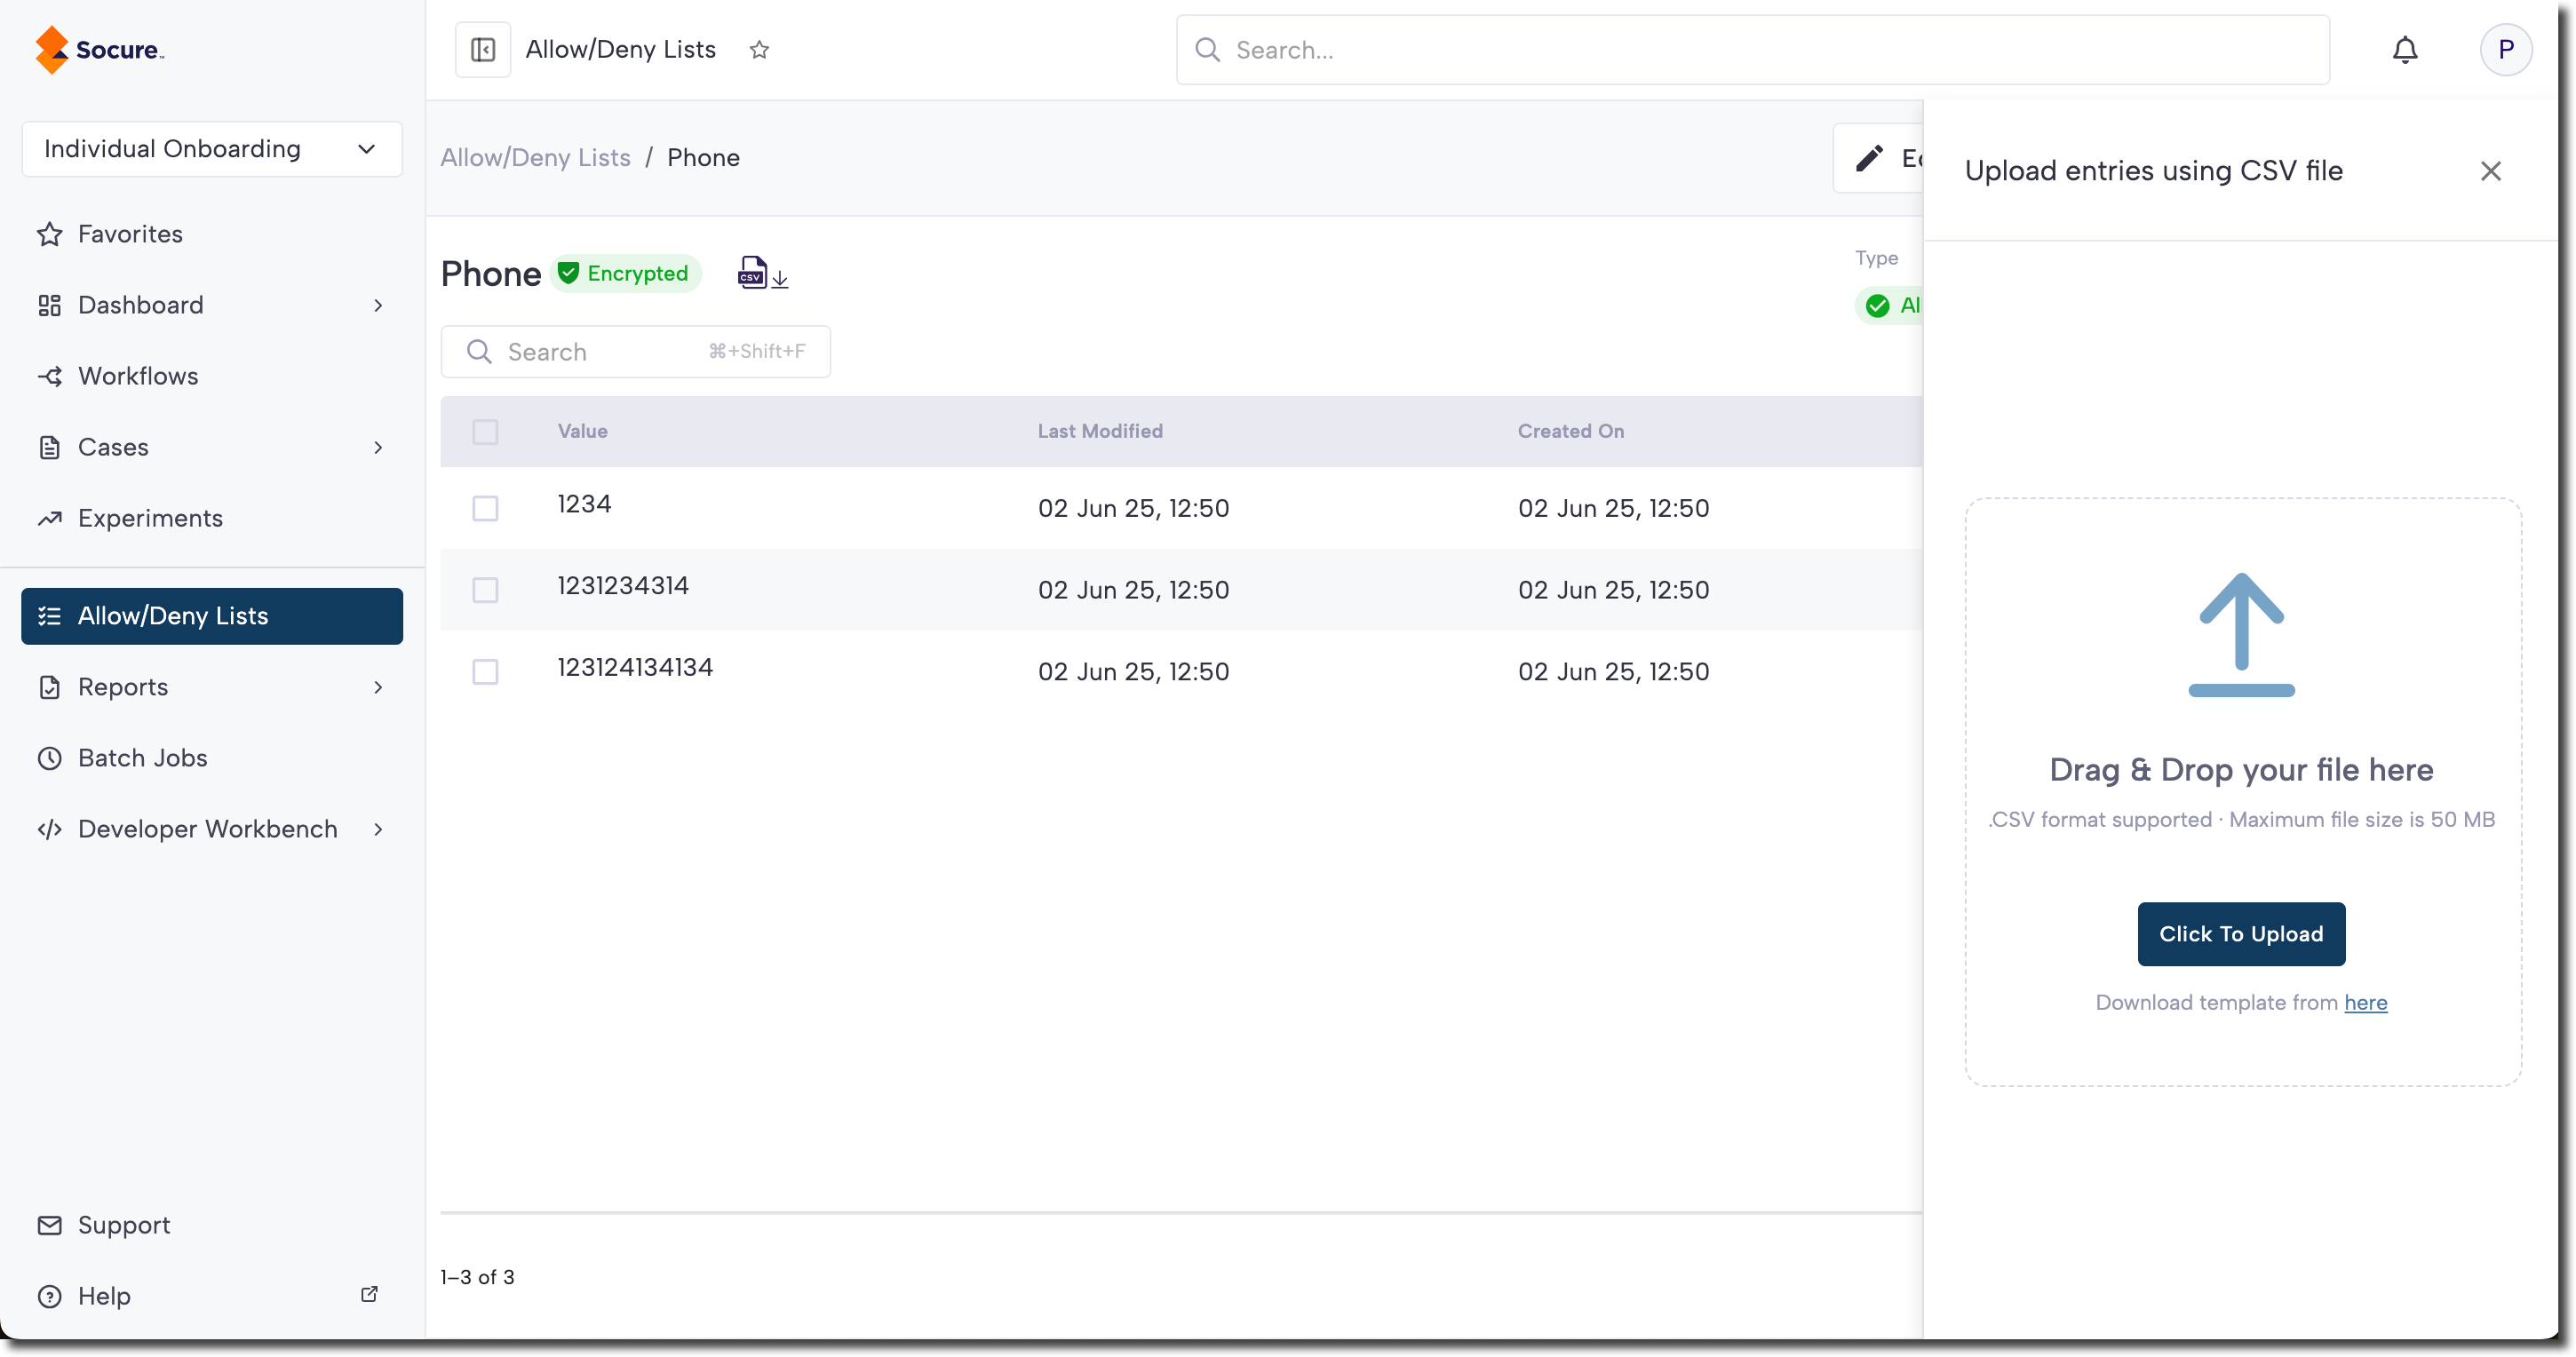
After you create a list, you can bulk upload entries to an Allow/Deny list using a CSV file (up to 20 MB).
- On the Allow/Deny Lists page, click Edit List next to the desired list.
- Click Import CSV.
- Drag and drop the CSV file, or click Click to Upload.
CSV file requirements
Note:
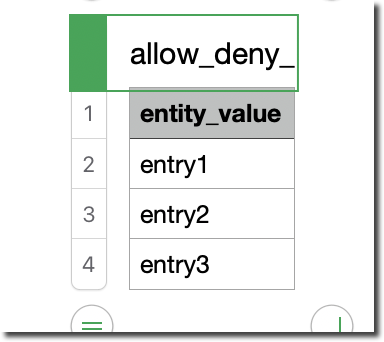
The CSV must contain a single column with the header entity_value. Otherwise, the import will fail.
- Only one column can be imported at a time.
- A sample CSV can be downloaded from the application.
- Each list supports up to 1M entries.
During upload, the system validates the file:
- Duplicate entries within the CSV are flagged.
- Entries that already exist in the list are ignored.
Once confirmed, the new entries are added to the list. Refresh the page to view them.
Upload notifications
For large files, the system will notify you once the upload is complete.
Error handling
Errors (e.g., file too large) are displayed to the user.
Exporting a list
Lists can be exported to CSV. Exported files include system-generated columns such as id, entity_value, entity_nor_value, and list_id, which can be ignored. The entity_nor_value column contains the normalized version of the entry (lowercase, whitespace removed) that the system uses for matching.
Delete entries from a list
To delete all entries in a list:
- Click the checkbox at the top-left of the row headers to select all.
- Click the Delete button that appears.
Updated 1 day ago