

Setup Case Queues and Sub-Statuses
Configure case queues and custom sub-statuses in RiskOS™ to organize case review workflows by use case and status.
Case Queues and Sub-Statuses are specific to each use case. For example, you can create dedicated Queues and Sub-Statuses for a Consumer Onboarding use case, while a Business Onboarding use case has a different set.
Every use case has an All Cases queue by default, where all cases—regardless of status or decision—can be viewed.
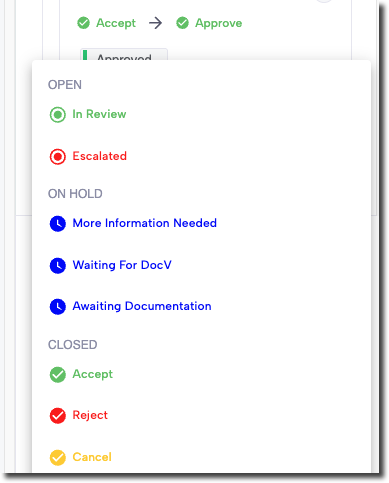
RiskOS™ Case Management provides three main Statuses for a case: Open, On Hold, and Closed. Within these Statuses, teams can define Sub-Statuses to further refine the state of a case. For example, some teams might create an Escalated Sub-Status if a case needs review by a manager, or a Waiting on Documentation Sub-Status if more information is required from the end user.
Set up Case Queues
Step 1 — Navigate to Settings
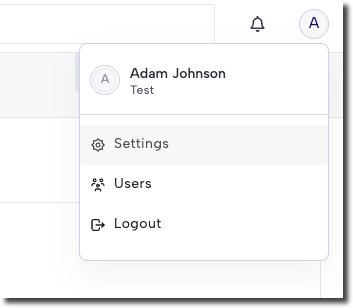
To modify a Queue in RiskOS™, click your profile menu (top right), then click Settings.
Step 2 — Add a new Queue
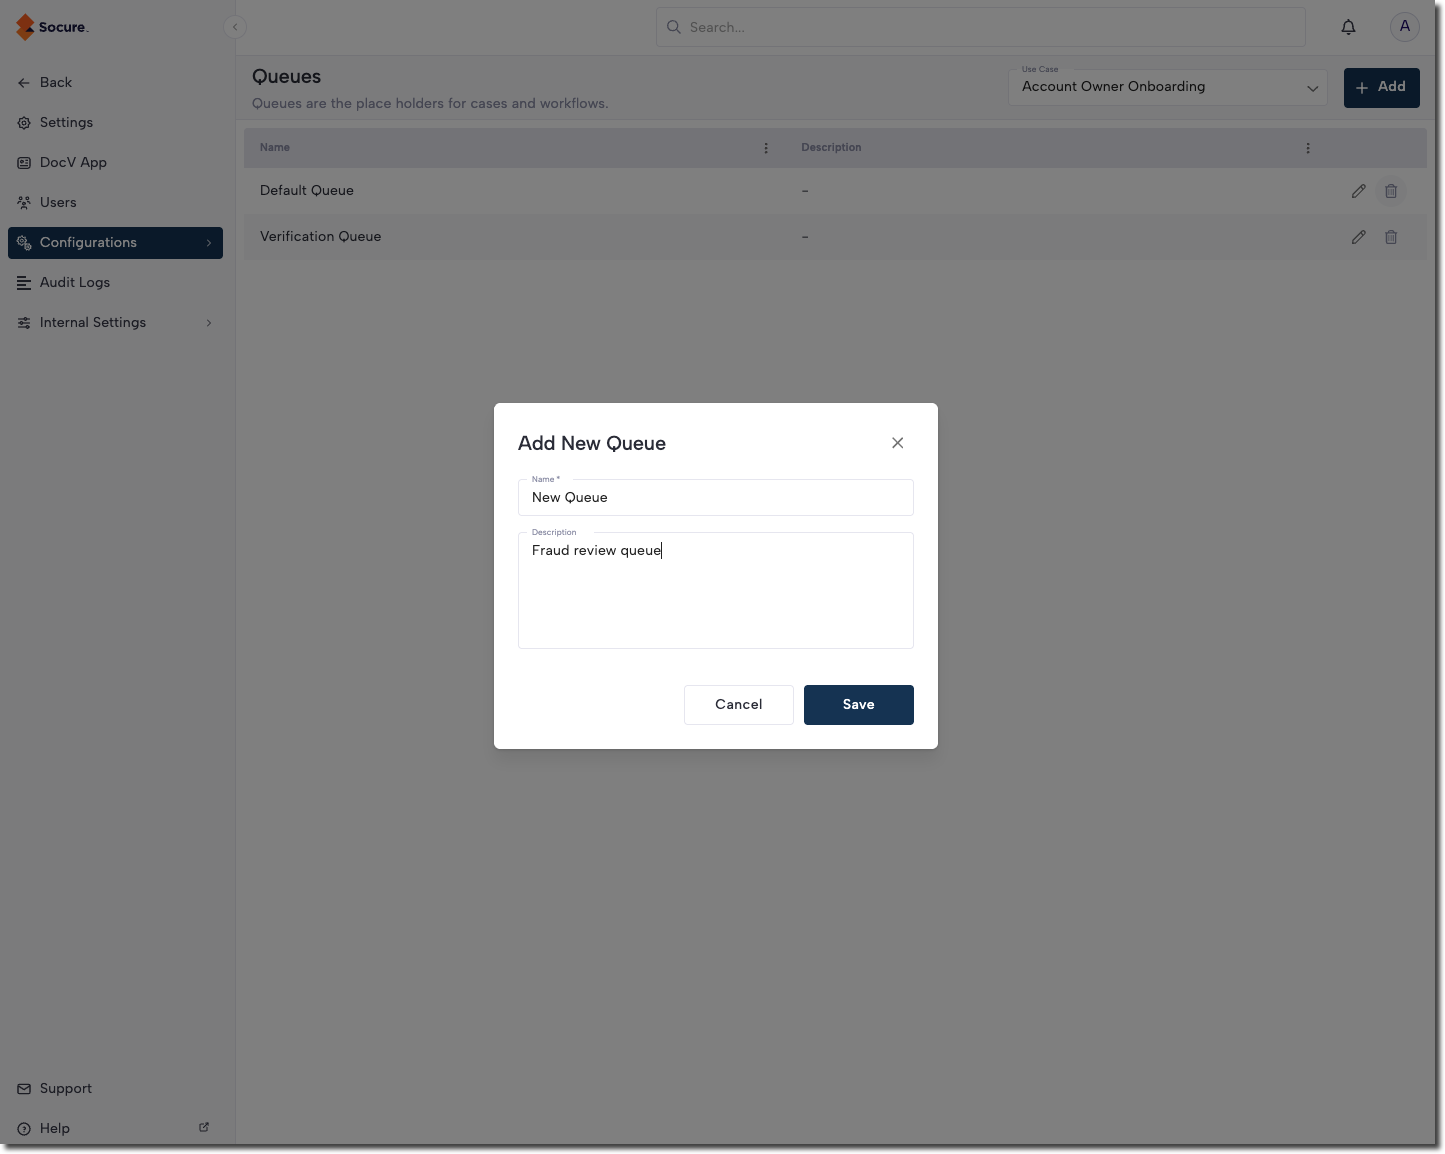
On the Configurations > Queues page, click + Add. In the Add New Queue pop-up, enter a name and description for the Queue. Be sure you’re working within the correct use case. You can see and change the active use case using the Use Case dropdown near the + Add button.
Step 3 — Save and access your new Queue
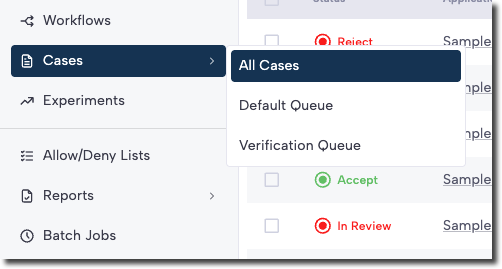
Once you’ve entered the Queue name and description, click Save. The Queue is then available from Cases in the main navigation menu.
Configure display columns
Each queue has configurable display columns that control which fields appear in the case listing table. Display columns determine the information reviewers see at a glance when browsing cases in a queue.
To configure display columns for a queue:
- Navigate to Settings > Configurations > Queues.
- Select the queue you want to configure.
- Add, remove, or reorder the columns displayed in the case listing for that queue.
Each column has the following properties:
| Property | Description |
|---|---|
| Name | The display label shown in the column header. |
| Alias | The internal field identifier mapped to evaluation data. |
| Data type | The data format (for example, string, datetime, array). |
Different queues can display different columns, allowing you to tailor the case listing to each review workflow. For example, a fraud review queue might display risk scores and enrichment flags, while an onboarding queue might display applicant name and submission date.
Configure case retention
Each queue has a closed cases retention period that controls how long closed cases remain visible in the queue. After this period, closed cases are removed from the queue view.
| Setting | Default | Description |
|---|---|---|
| Closed cases TTL | 72 hours | Duration (in hours) that closed cases remain visible in the queue after closure. |
| Maximum allowed cases | 10,000 | Maximum number of cases a queue can hold at one time. |
Contact your Account Manager to adjust these values for your queues.
Set up Statuses
Step 1 — Navigate to Settings
To modify a Queue in RiskOS™, click your profile menu (top right), then click Settings.
Step 2 — Add new Sub-Statuses
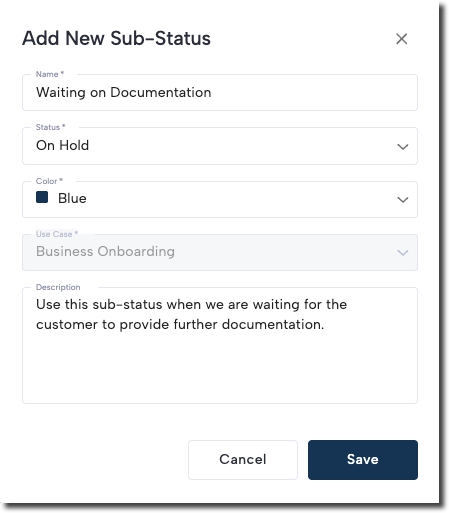
On the Configurations > Statuses page, click + Add. In the Add New Sub-Status pop-up, enter the Sub-Status name, select the parent Status, choose a color to represent it, and add a description.
Be sure you’re working within the correct use case. You can see and change the active use case using the Use Case dropdown near the + Add button.
Step 3 — Save your new Sub-Status and use it in workflows or Case Management
Once you’ve entered the required information, click Save. The Sub-Status is then available for use in workflows and Case Management pages.
Updated 5 months ago