Run Batch Evaluations via CSV Upload
Upload a CSV file to RiskOS™ to run batch evaluations for bulk testing, data migration, or processing offline applications.
RiskOS™ supports uploading and evaluating multiple cases at once using a CSV file.
This is especially useful when you want to:
- Run evaluations in bulk for testing or QA
- Migrate data into RiskOS™ from another system
- Process offline applications or events in a single upload
This guide outlines how to properly format and upload a CSV to trigger batch evaluations via the Case Queue.
Prepare your CSV file for upload
Before uploading your CSV file to RiskOS™, make sure it’s formatted correctly and includes the right fields. This ensures your batch upload runs smoothly and any dependent modules process as expected.
Basic requirements
Your CSV file must meet the following requirements:
- Type:
.CSV - Size: Maximum file size 5 MB
Column formatting
RiskOS™ expects column headers to match our API field structure, which uses JSON-path notation. For example:
- To include a user’s given name, use:
data.individual.given_name - To include an email:
data.contact.email
Required Fields:
id– Unique identifier for each eventtimestamp– When the event occurred (must follow this format: YYYY-MM-DDTHH:MM:SS.SSSZ)Additional fields may also be required depending on your use case. For example:
event_typeandevent_categoryare needed foraccount_takeoverandtrust_and_safetyworkflows- Third-party modules (e.g., Socure enrichment) may have their own required fields
If you’re unsure which fields are mandatory, check the RiskOS™ API Reference or contact [email protected]. Any field required in the API is also required in the CSV.
Downloadable CSV templates
To help you get started, RiskOS™ provides downloadable CSV templates with the correct formatting:
- Events Template (e.g.,
trust_and_safety,login_authentication) - Business Onboarding Template (e.g.,
business_onboarding)
Adding custom fields
RiskOS™ supports custom fields in CSV uploads, with a few limitations:
- Use flat key-value format: e.g.,
data.custom.foo,data.custom.bar - No nested objects — nested structures are only supported via API
- All custom fields are treated as strings by default. If you need specific data types, please reach out to the RiskOS™ team.
Upload a CSV file
- Navigate to All Cases.
- Click on CSV Import in the upper right corner.
- On the CSV Data Import screen, drag and drop your prepared file or click to browse from your file system.
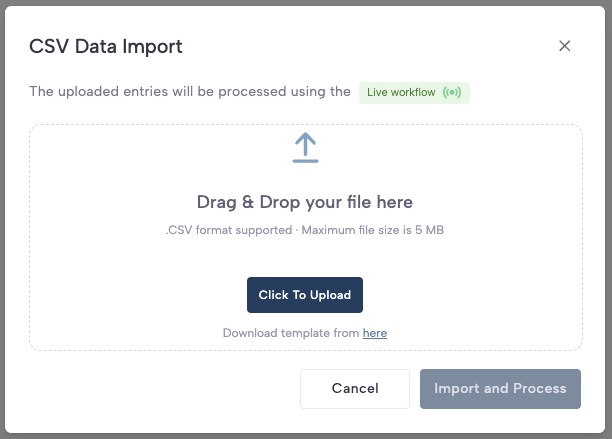
- Click Start Import. A notification will confirm that the batch is running in the background. You’ll be notified once it’s complete.
Review the batch upload
Once processing is finished, you’ll receive a notification in the Notifications sidebar (click the 🔔 icon in the upper right corner).
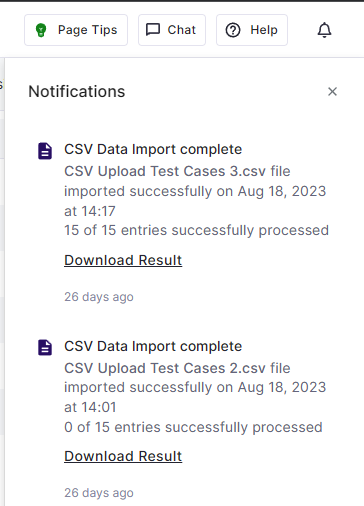
The notification will indicate how many rows were processed successfully. You’ll see an option to Download Result, which includes error details in case specific rows failed.
Viewing uploaded cases in Case Management
After the import and processing are completed successfully, the uploaded evaluations will appear based on the workflow outcome in either All Cases or a specific queue.
Updated 9 days ago